Programming
Utilizing the brand touchpoints, regionalism, and local materials, I would create a unique experience for Mama Shelter Rio de Janeiro. My "Uber-Trendy" city was none other than Copacabana and the building I would position is Windsor California Copacabana Hotel in front of the coastline. Based on the study of my brand, I selected 5 properties that would compete with Mama Shelter. The amenities my competitors had that would be essential for my guests to win business would be free breakfast, laundry service, restaurants, fitness center, bar, concierge, banquet room, and spa.
24"x36" InDesign Board 1: The Site
24"x36" InDesign Board 2: Competitive Set
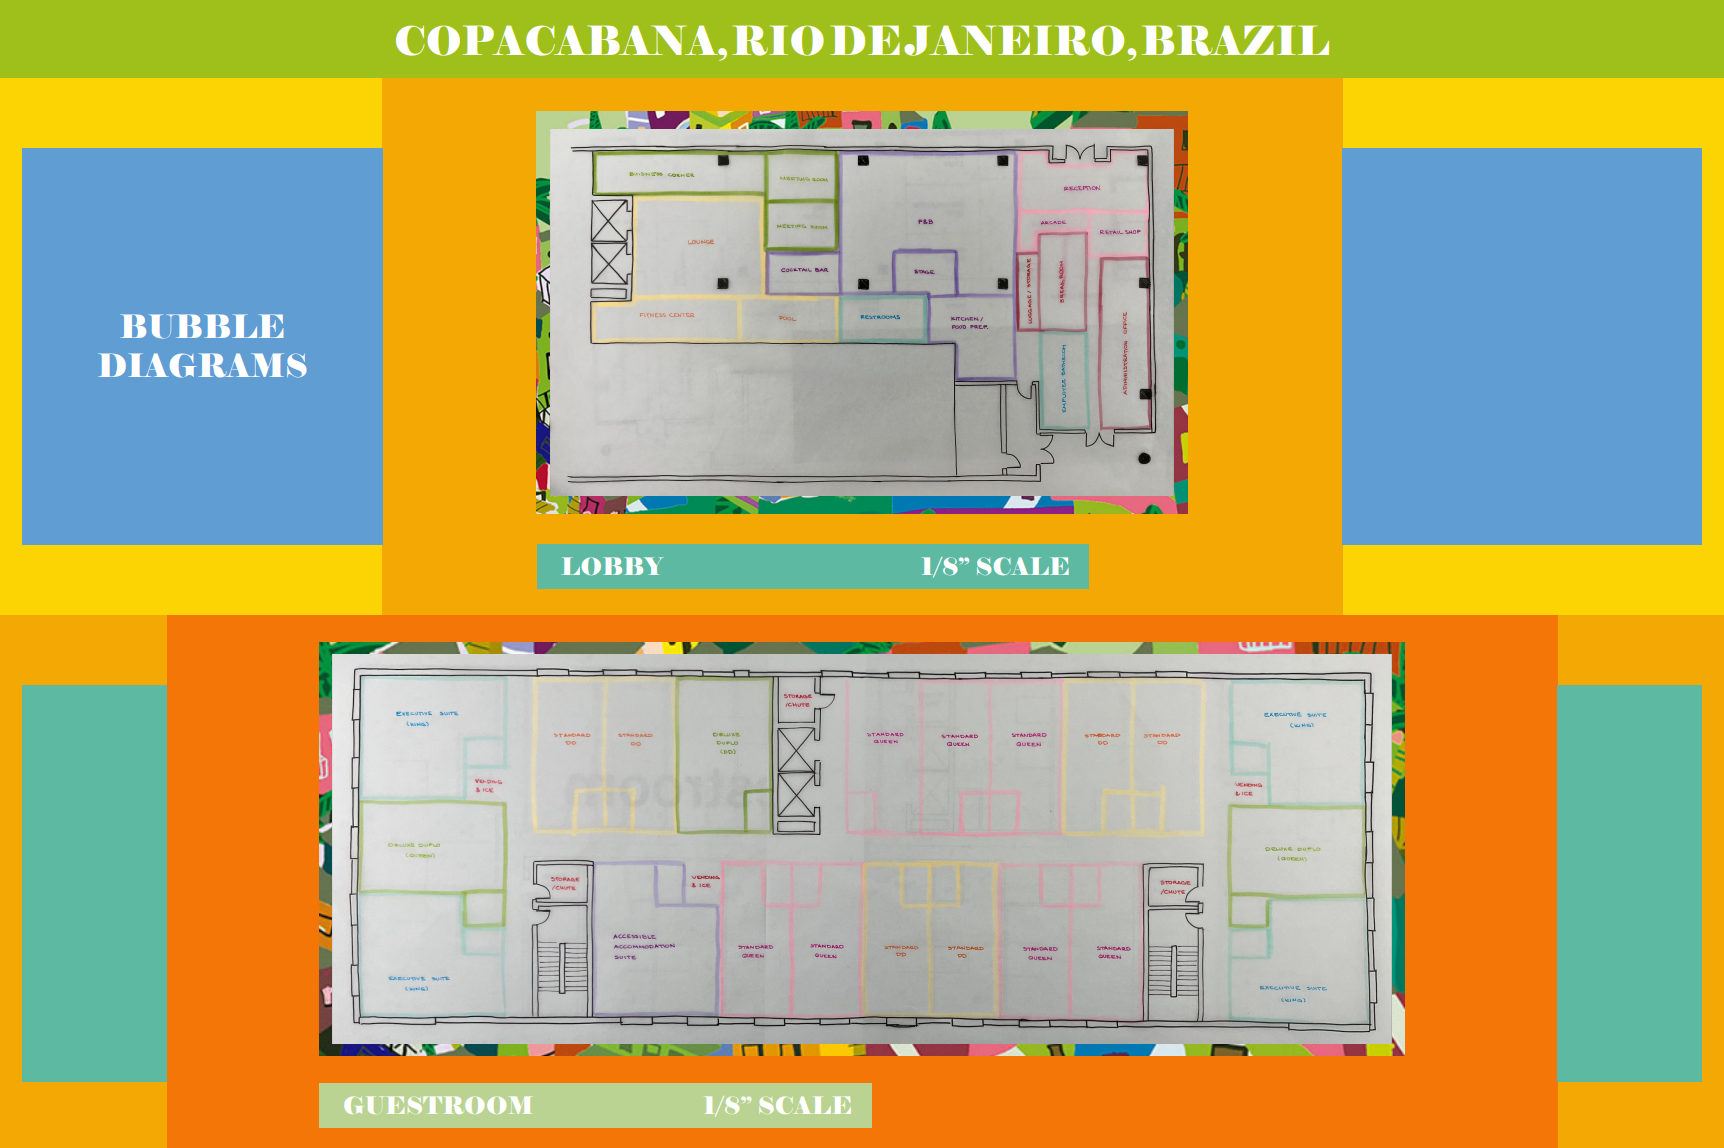
24"x36" InDesign Board 3: The Programing

Lobby Bubble Diagram: 1/8" = 1'-0"
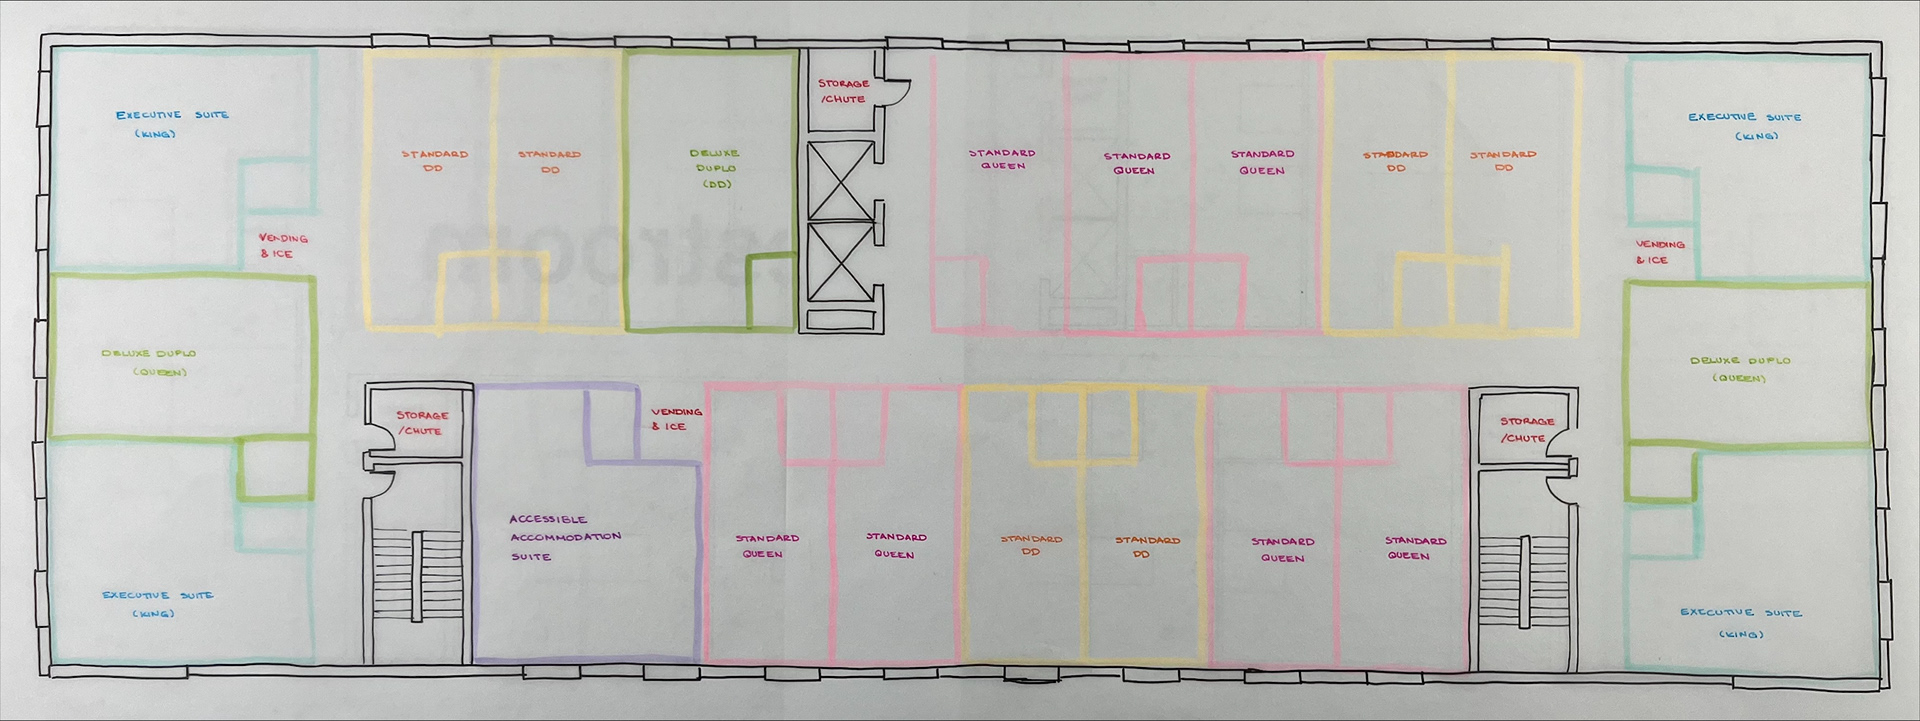
Guestroom Floor Bubble Diagram: 1/8" = 1'-0"
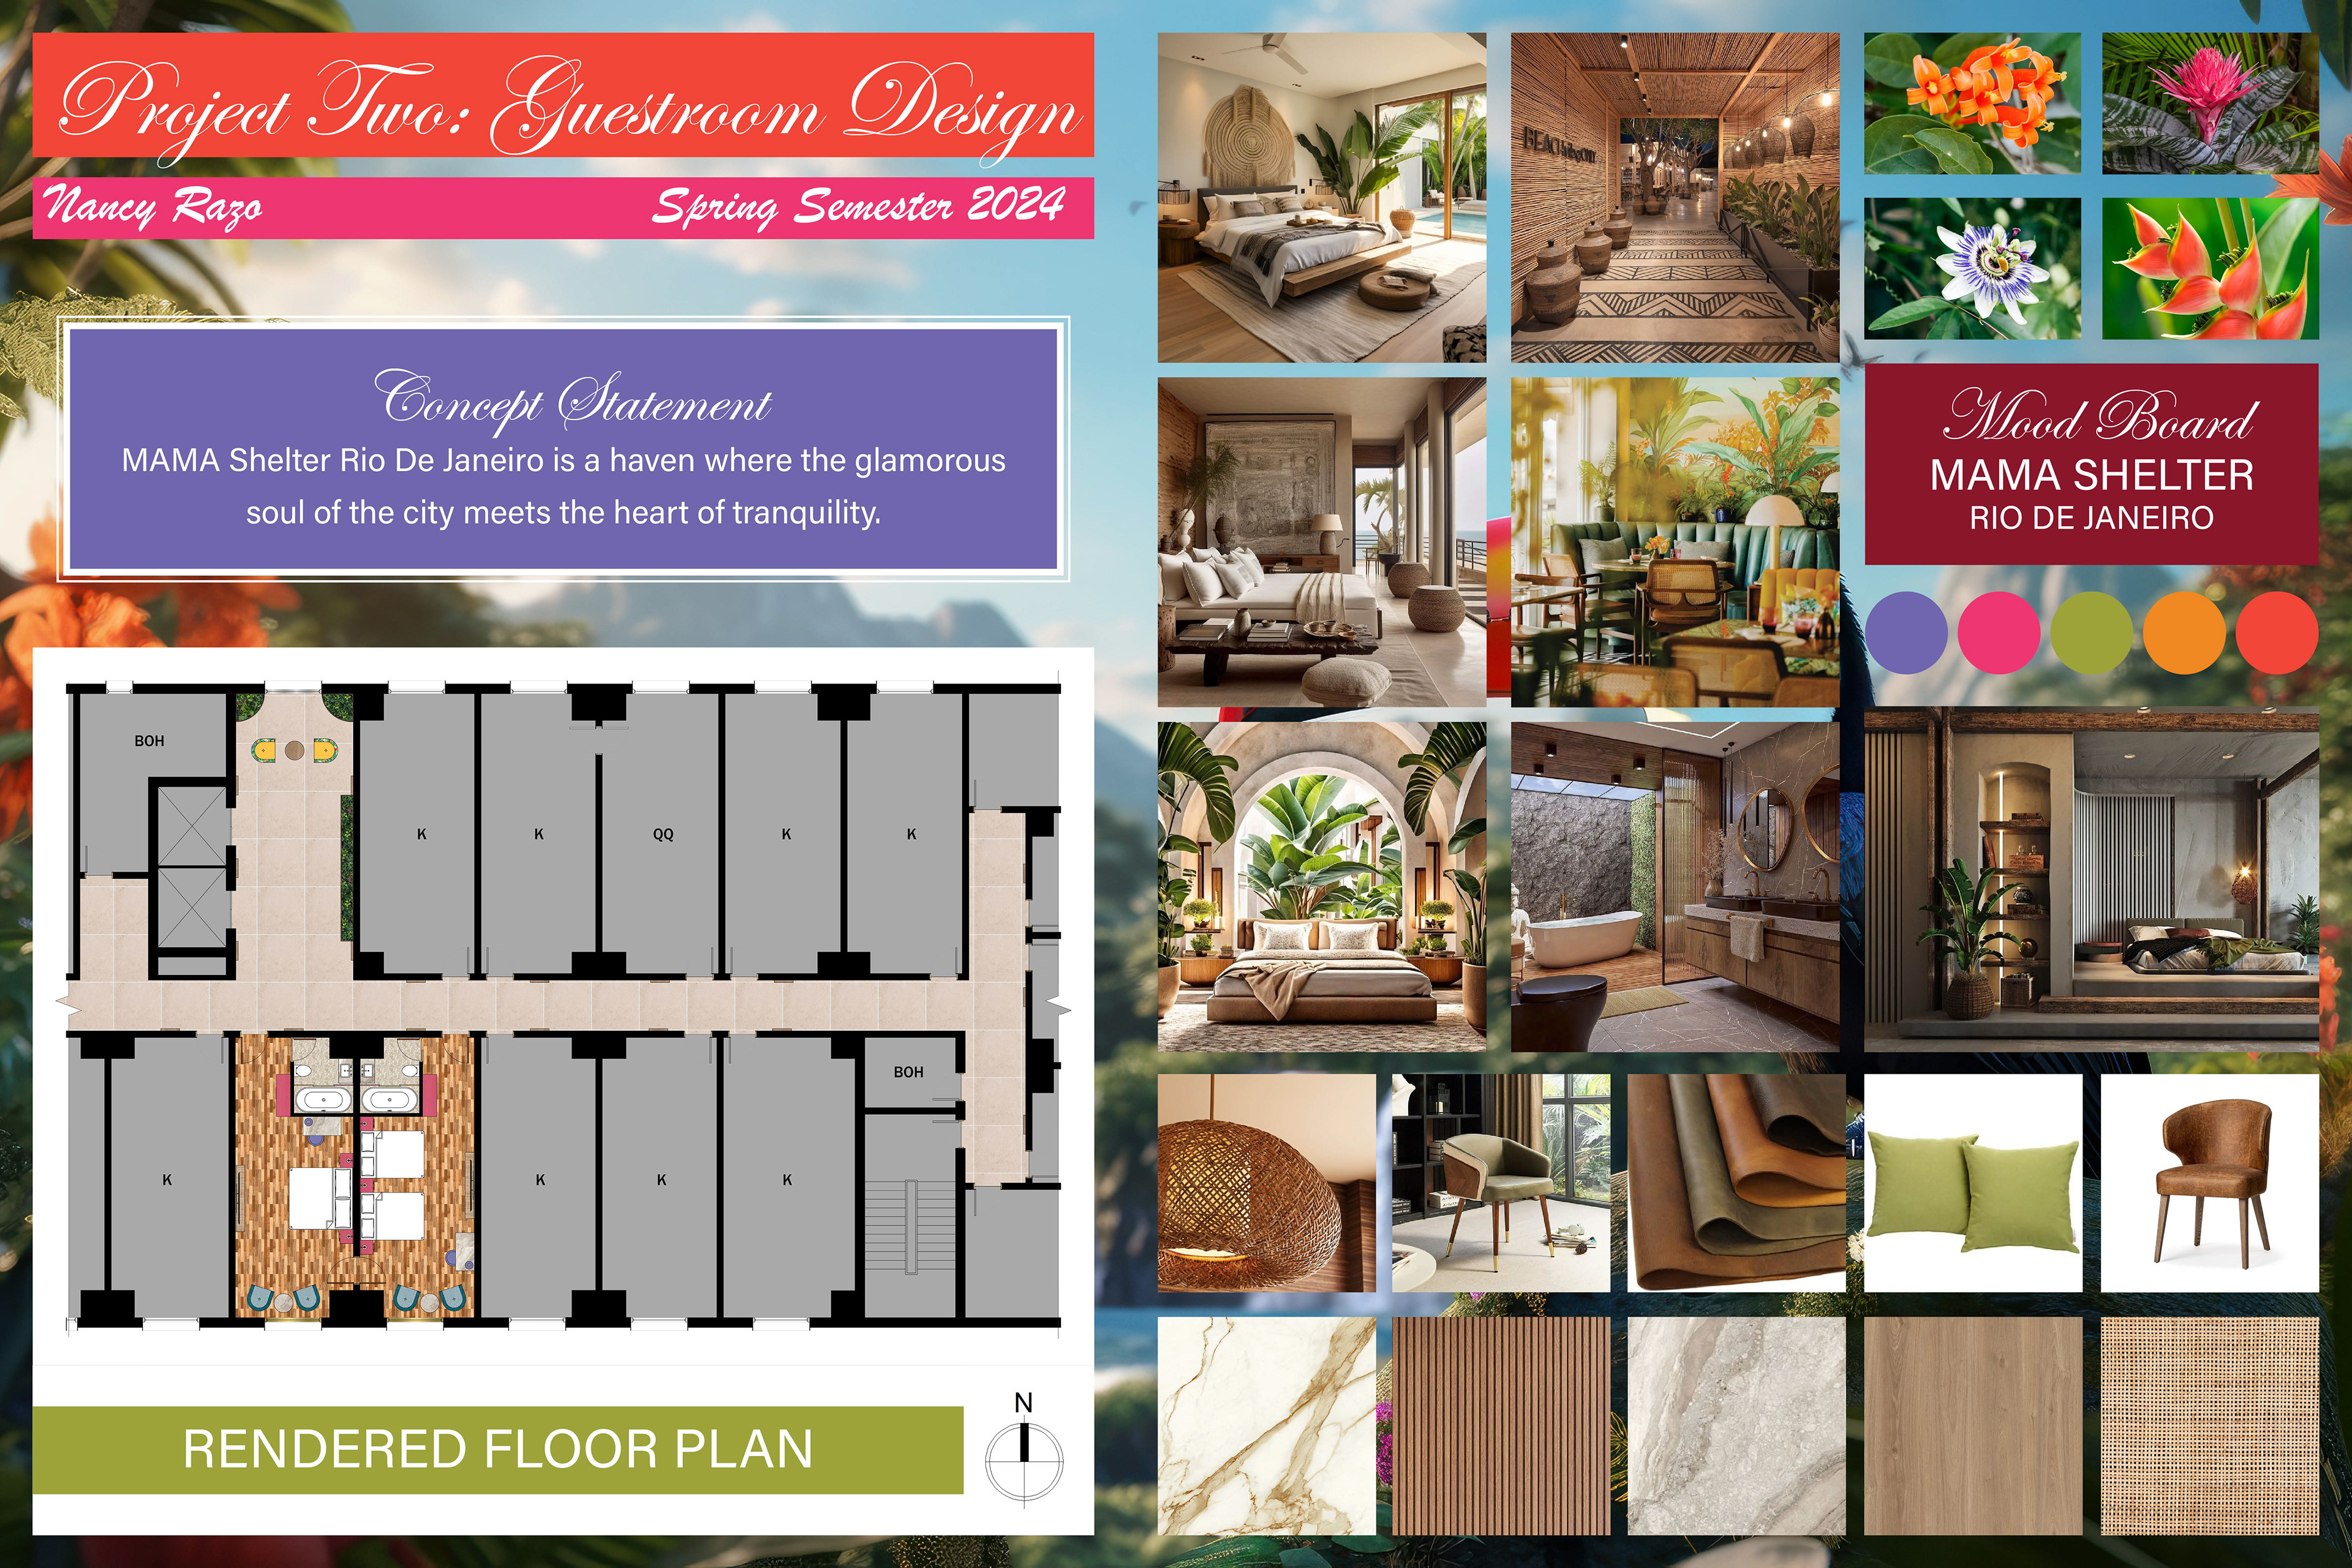
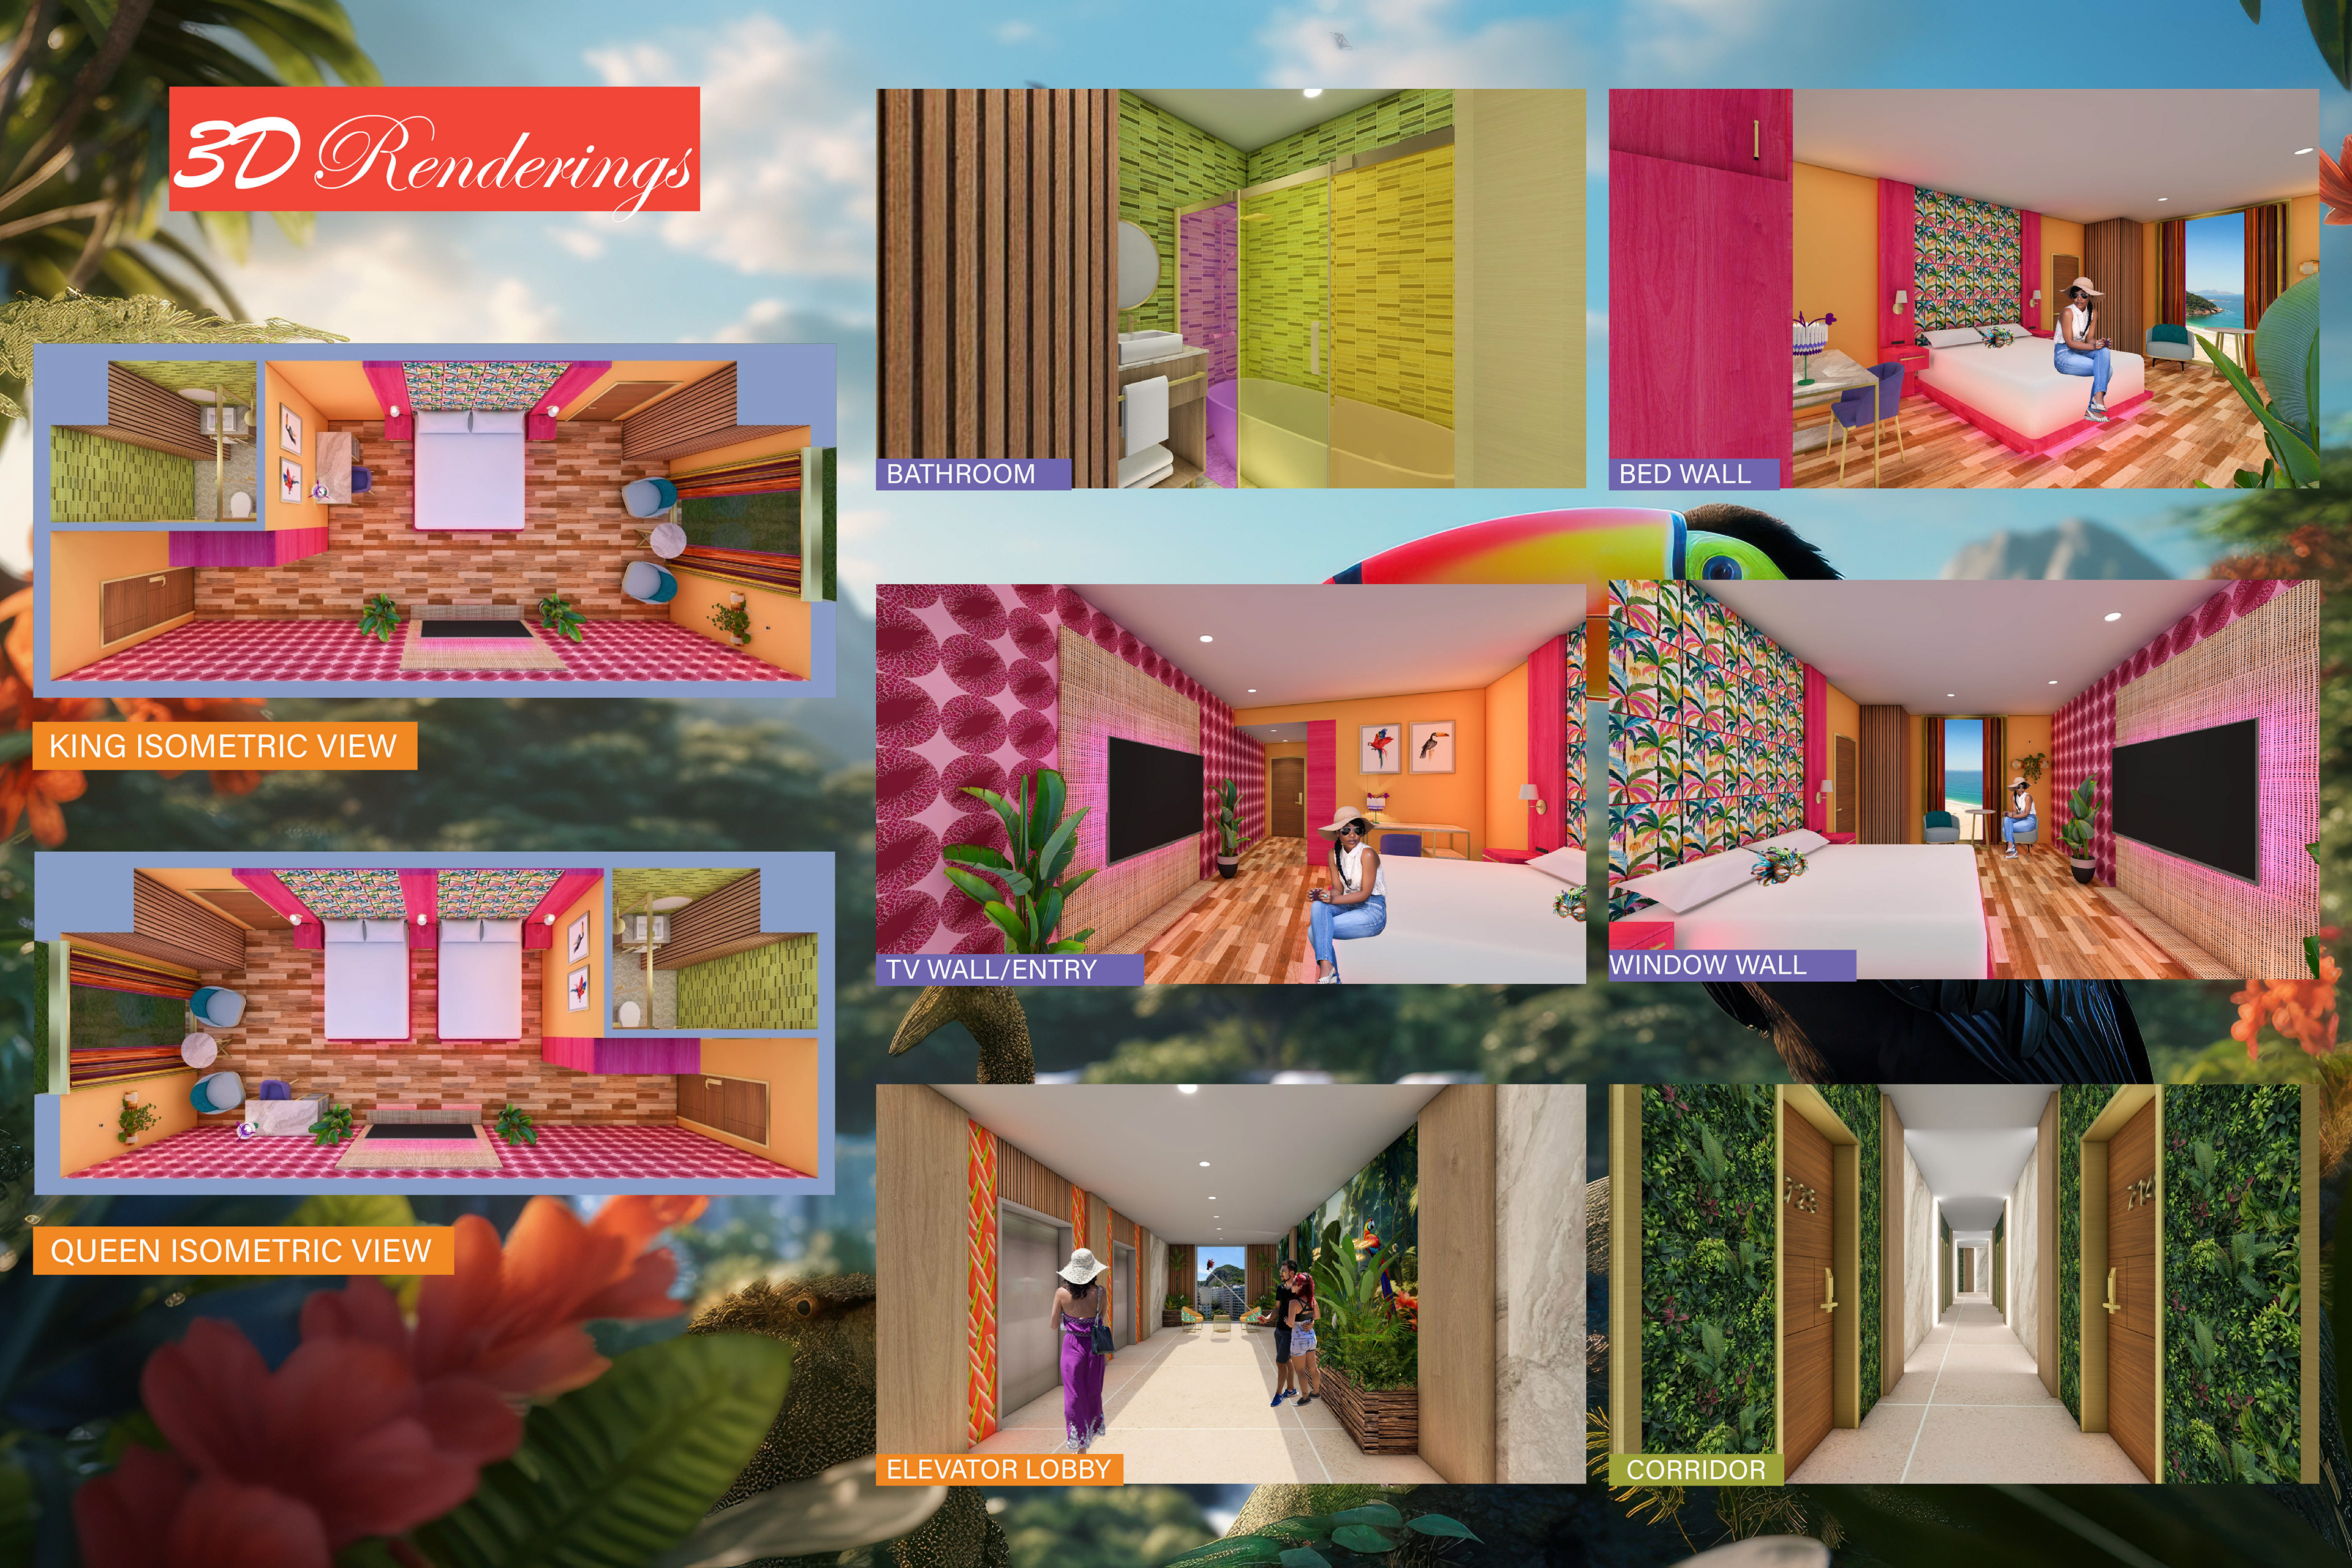
Guestroom design Presentation
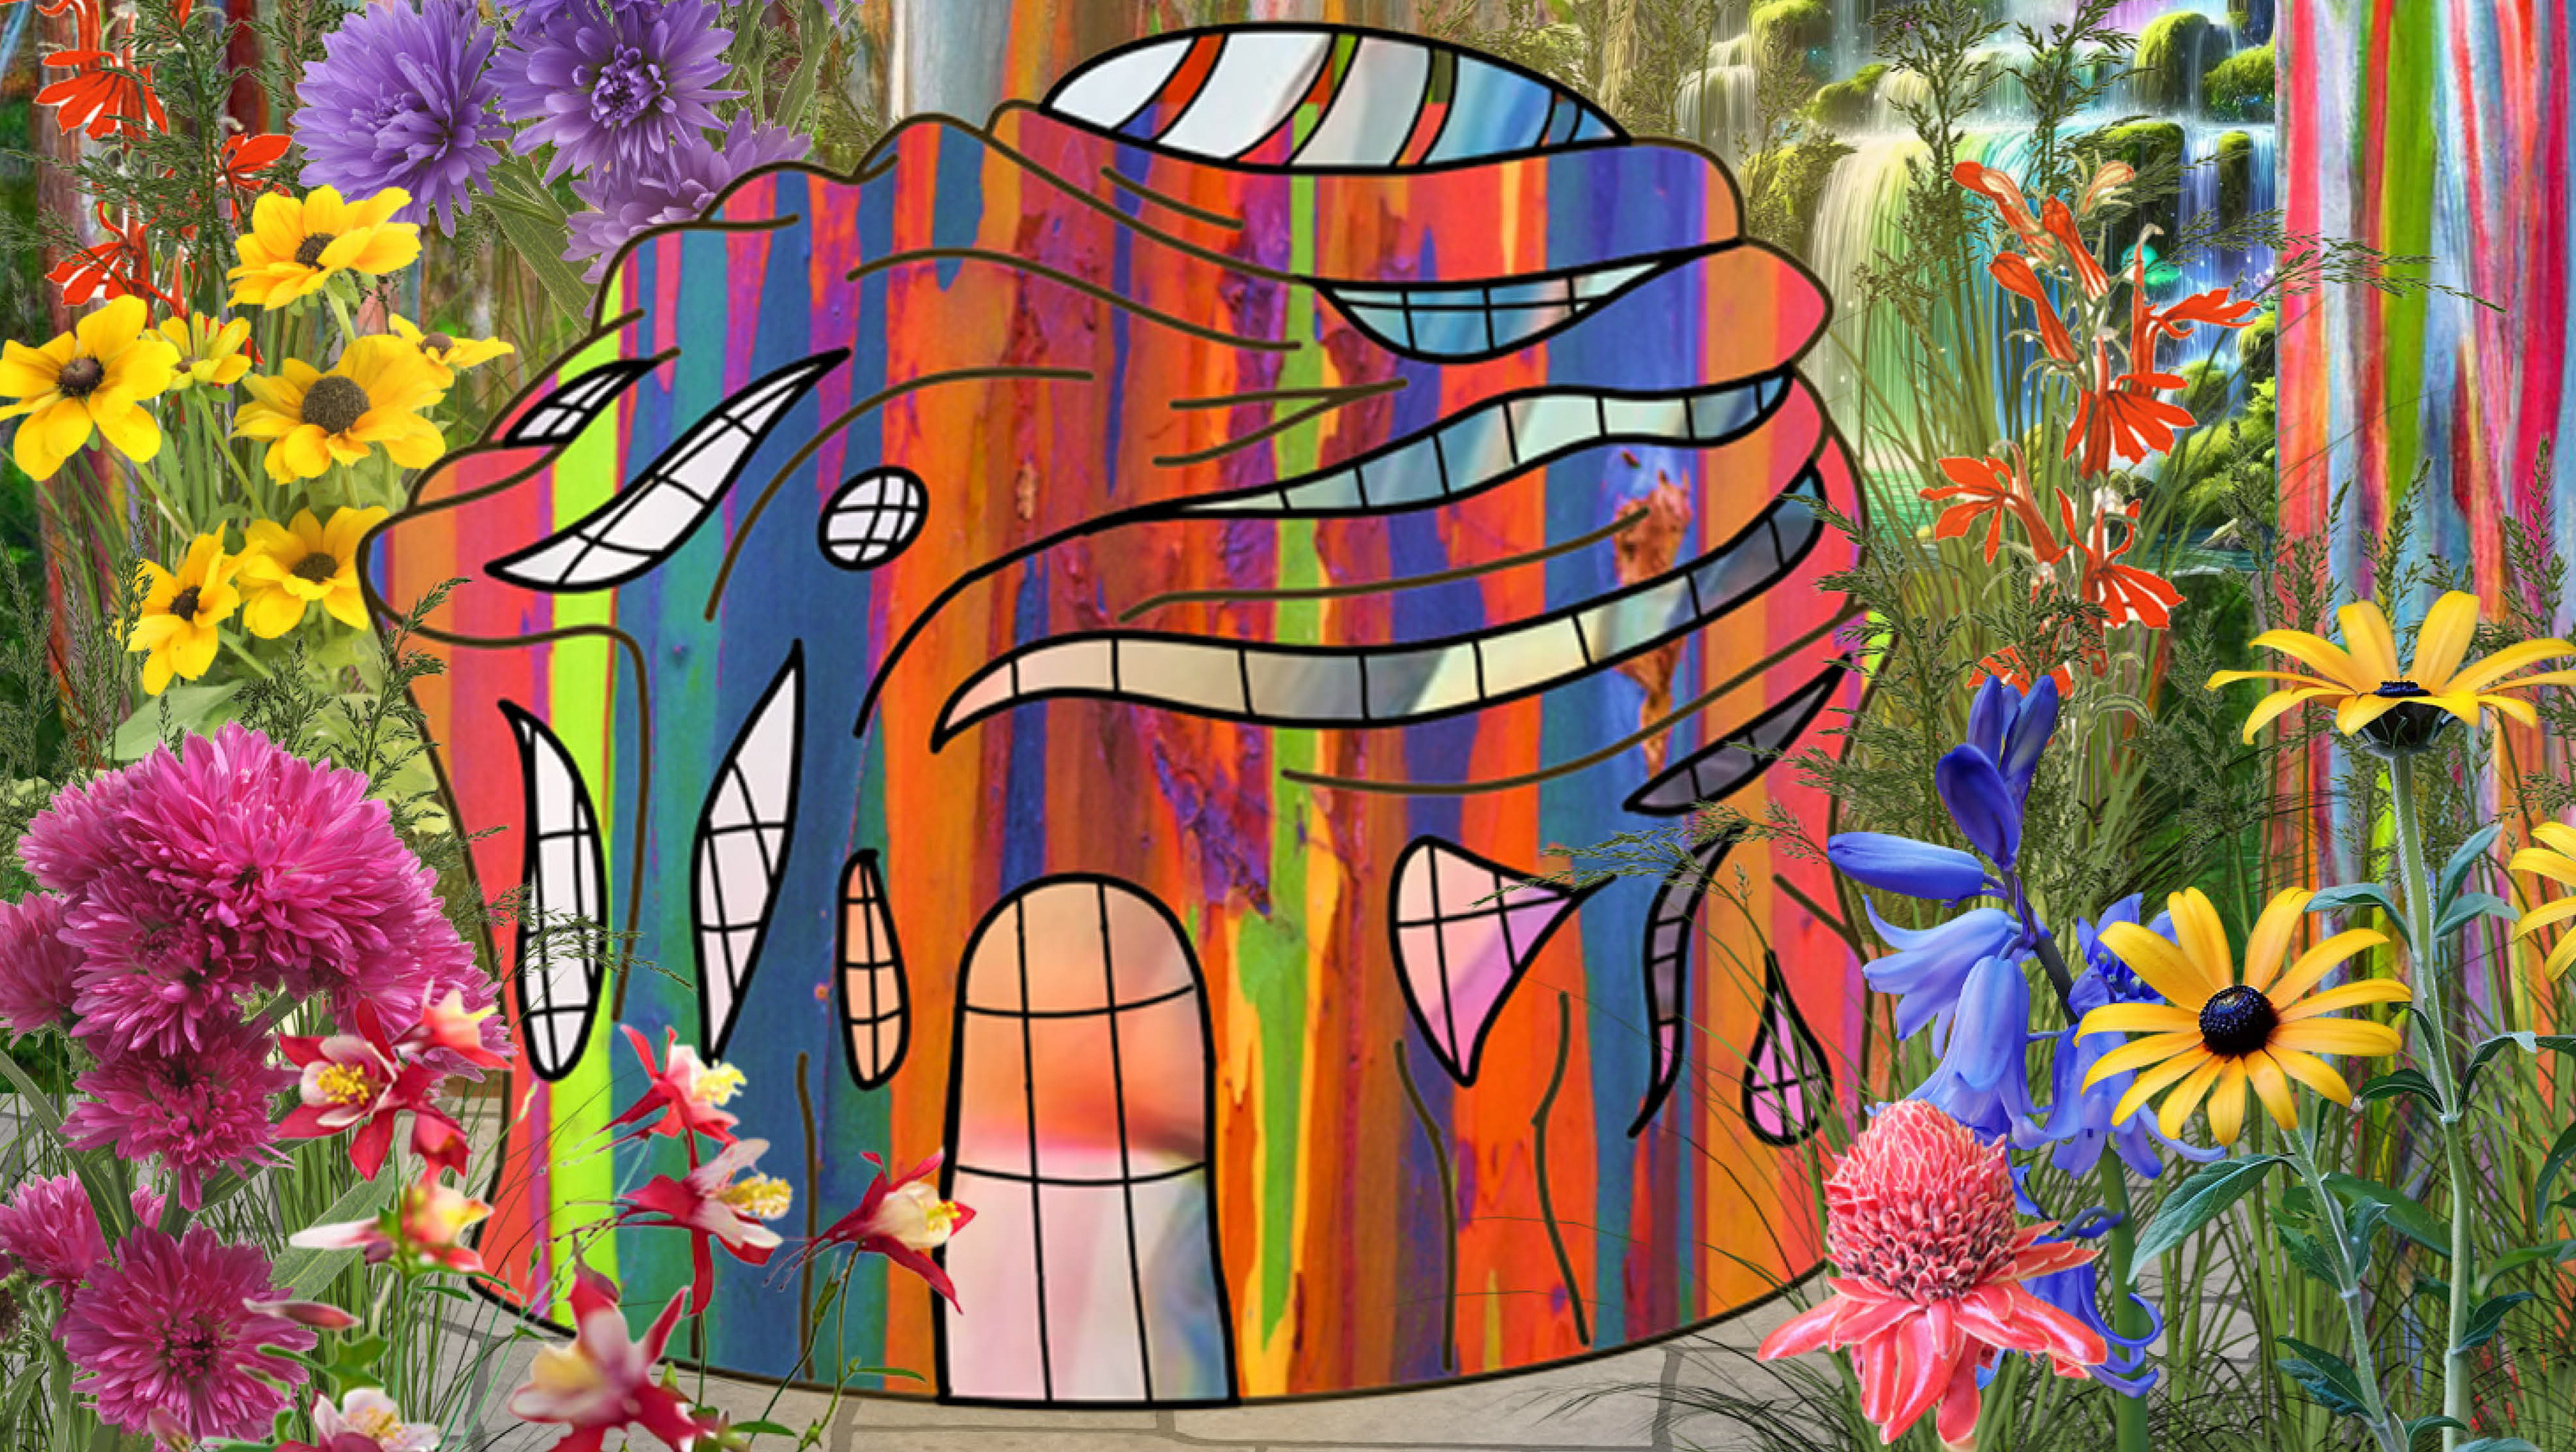
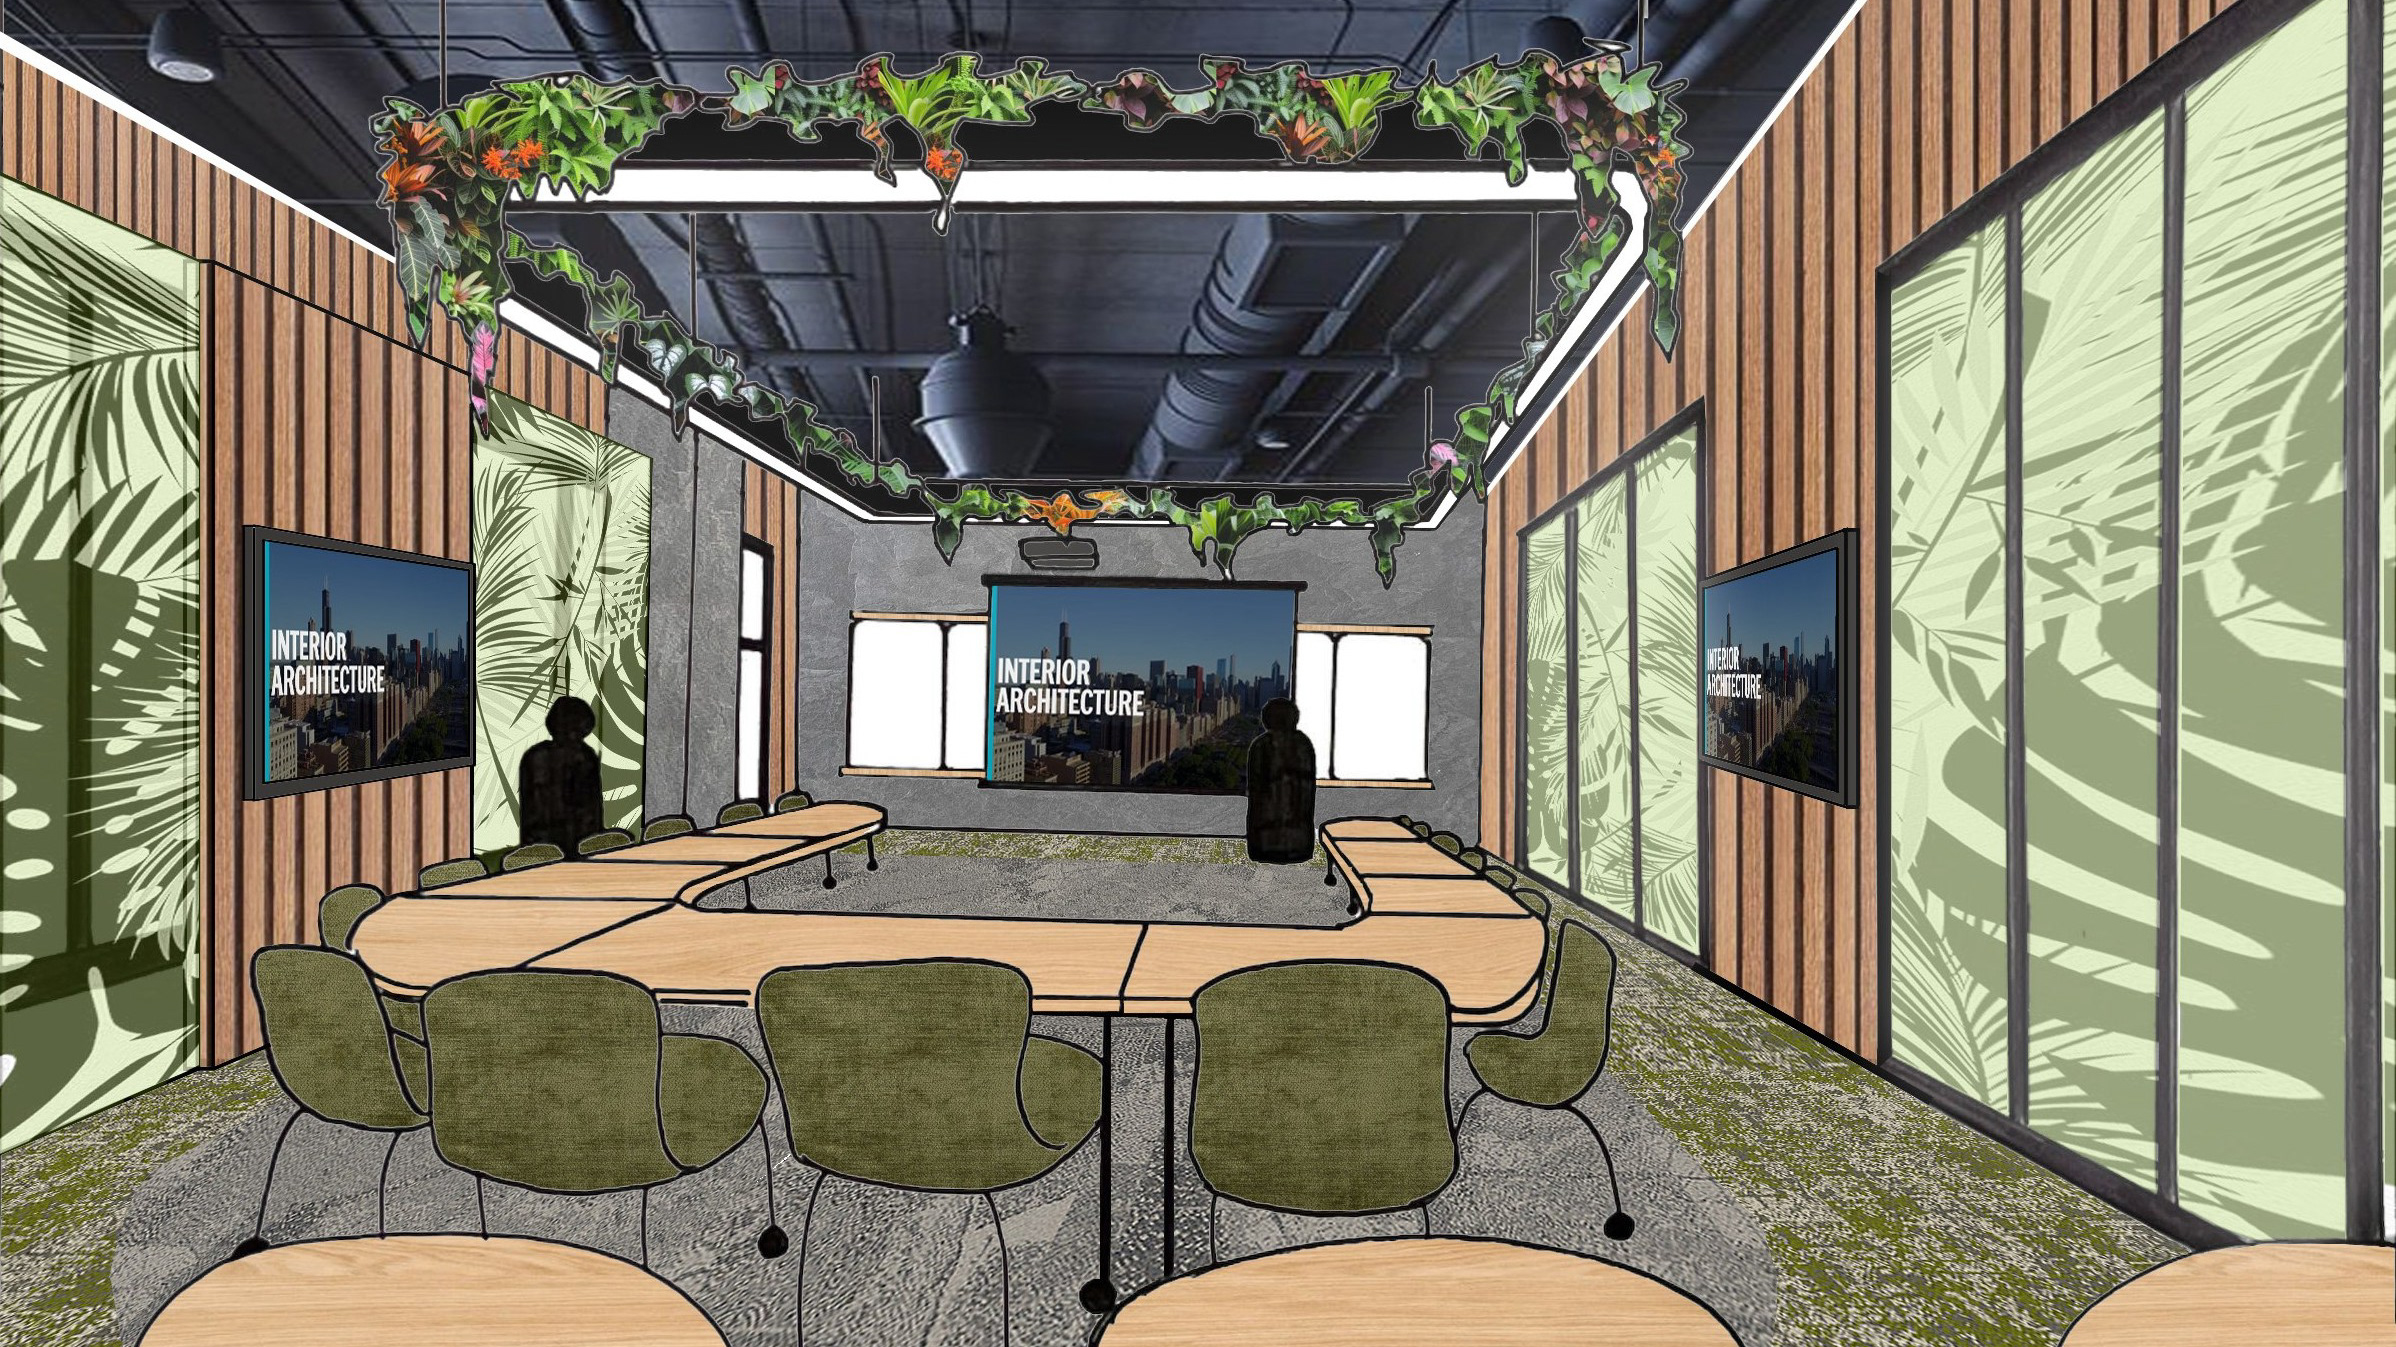
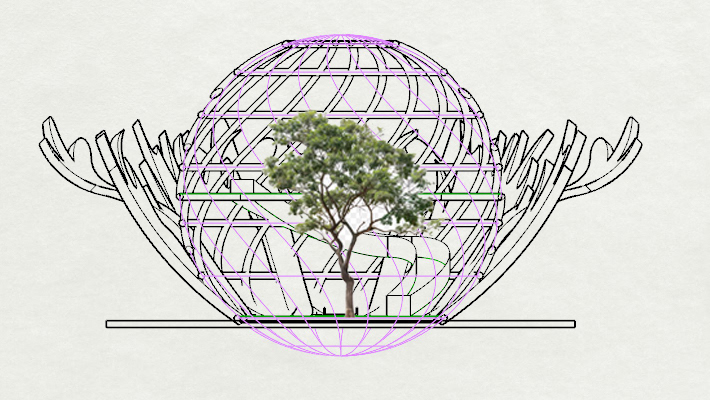
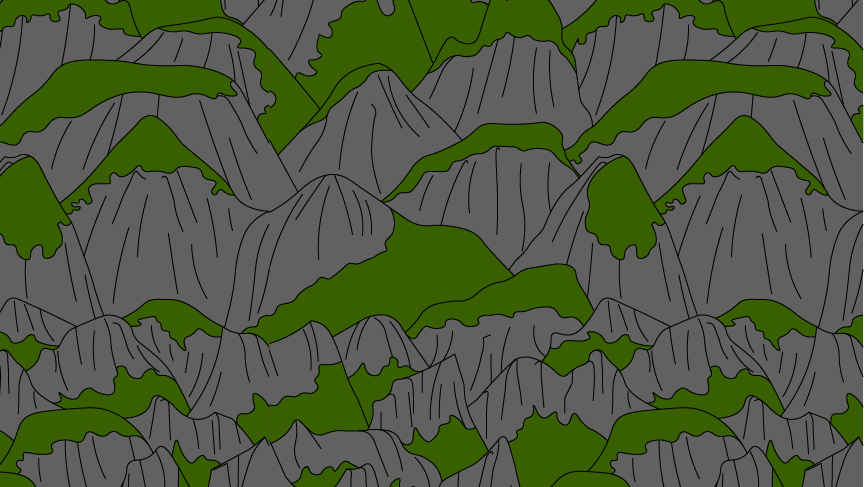
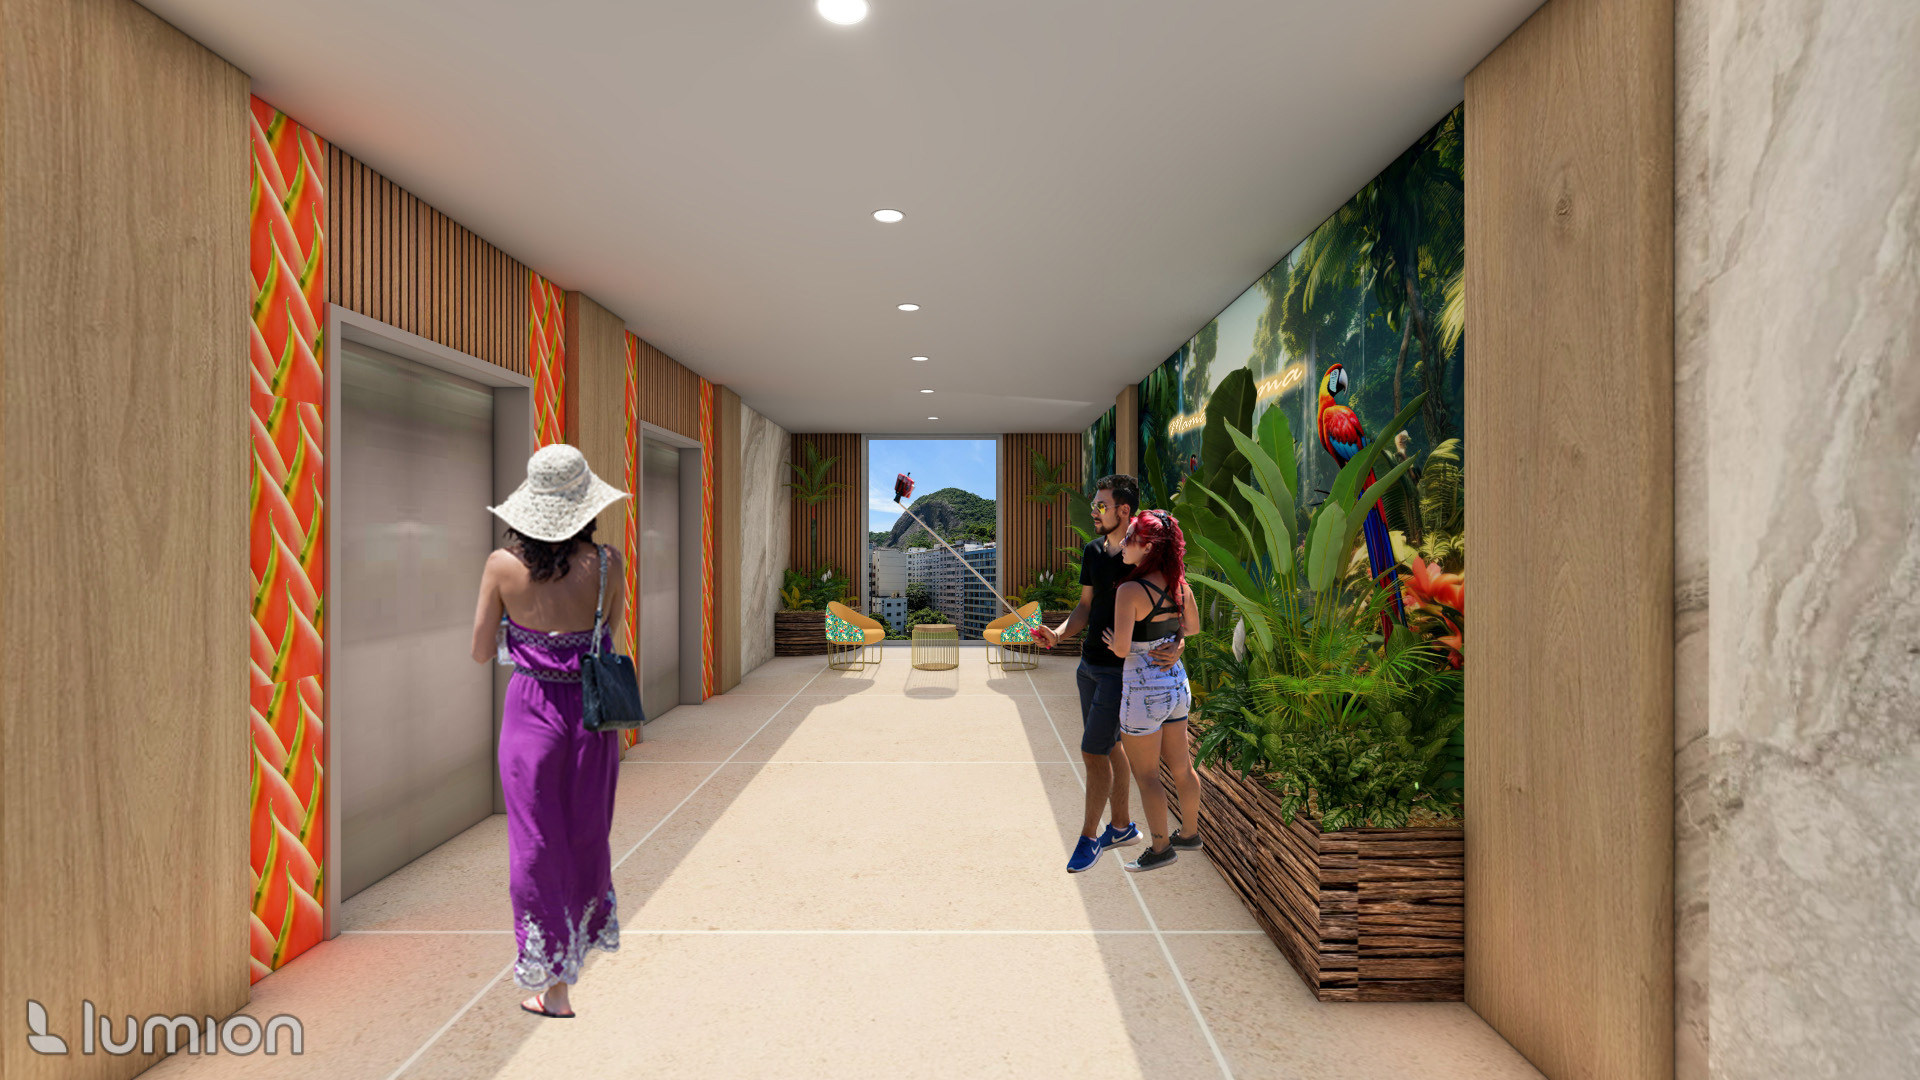
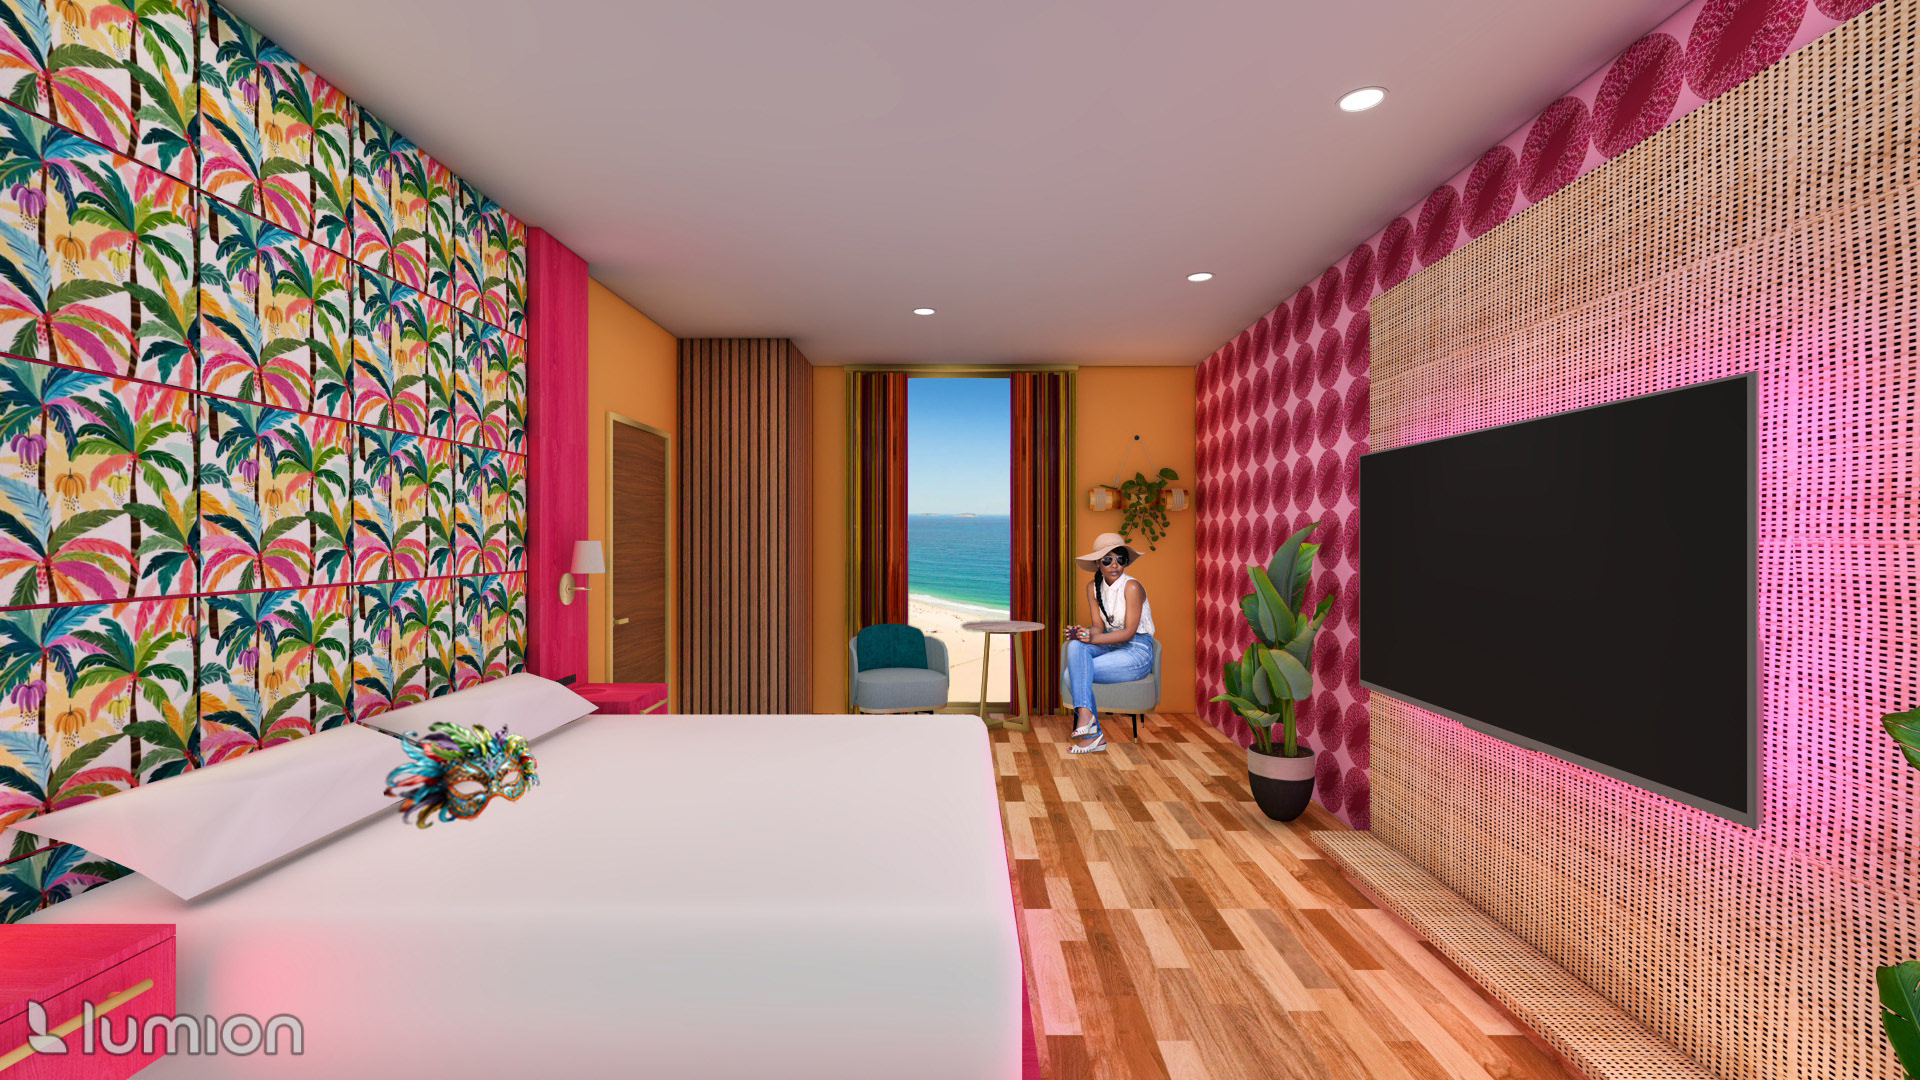
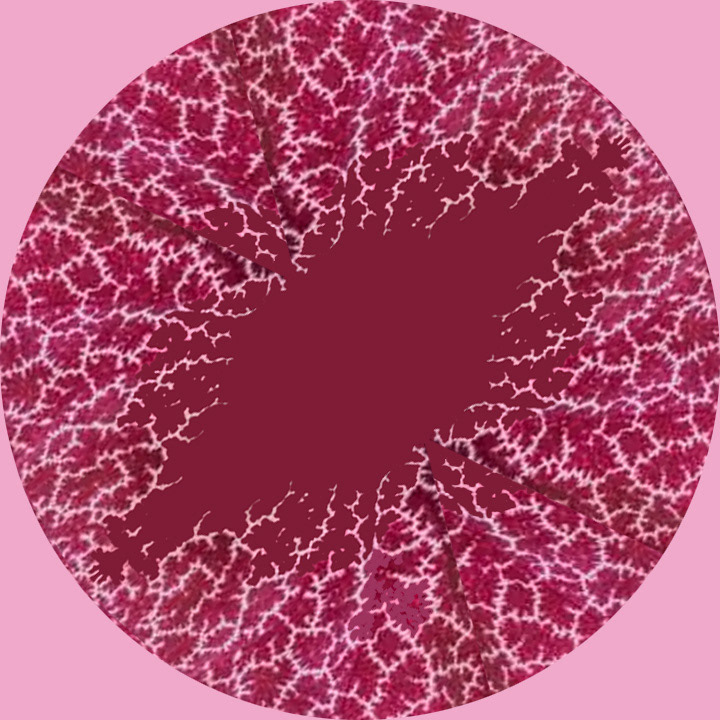
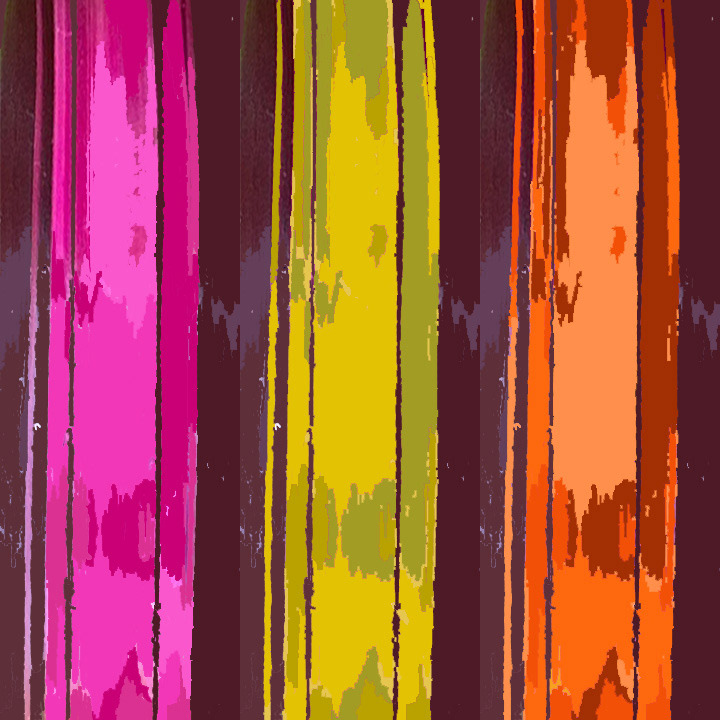
Mama Shelter Rio de Janeiro celebrates Brazil's geographical location through the use of natural materials to accommodate climate and colorful patterns to represent carnival culture. My hotel provides an immersive experience by bringing the outdoors in. Rio de Janeiro has a tropical climate, so I wanted to incorporate this into the built environment by fusing the sereneness of a resort hotel with the flamboyancy of Mama Shelter. I create a scene upon entering the elevator lobby using a rainforest mural and continue it into the guestroom corridor with vegetation. Guestrooms incorporate saturated colors and patterns inspired by the Rio de Janeiro Botanical Garden. I created 3 custom materials: (1) Heliconia Wallcovering used on the elevator bank wall, (2) Bromeliad Leaf Drapery used at the guestroom window, (3) Brazilian Dutchman's Pipe Wallcovering used on the guestroom TV wall.
24"x36" InDesign Board 1
24"x36" InDesign Board 2
24"x36" InDesign Board 3
24"x36" InDesign Board 4
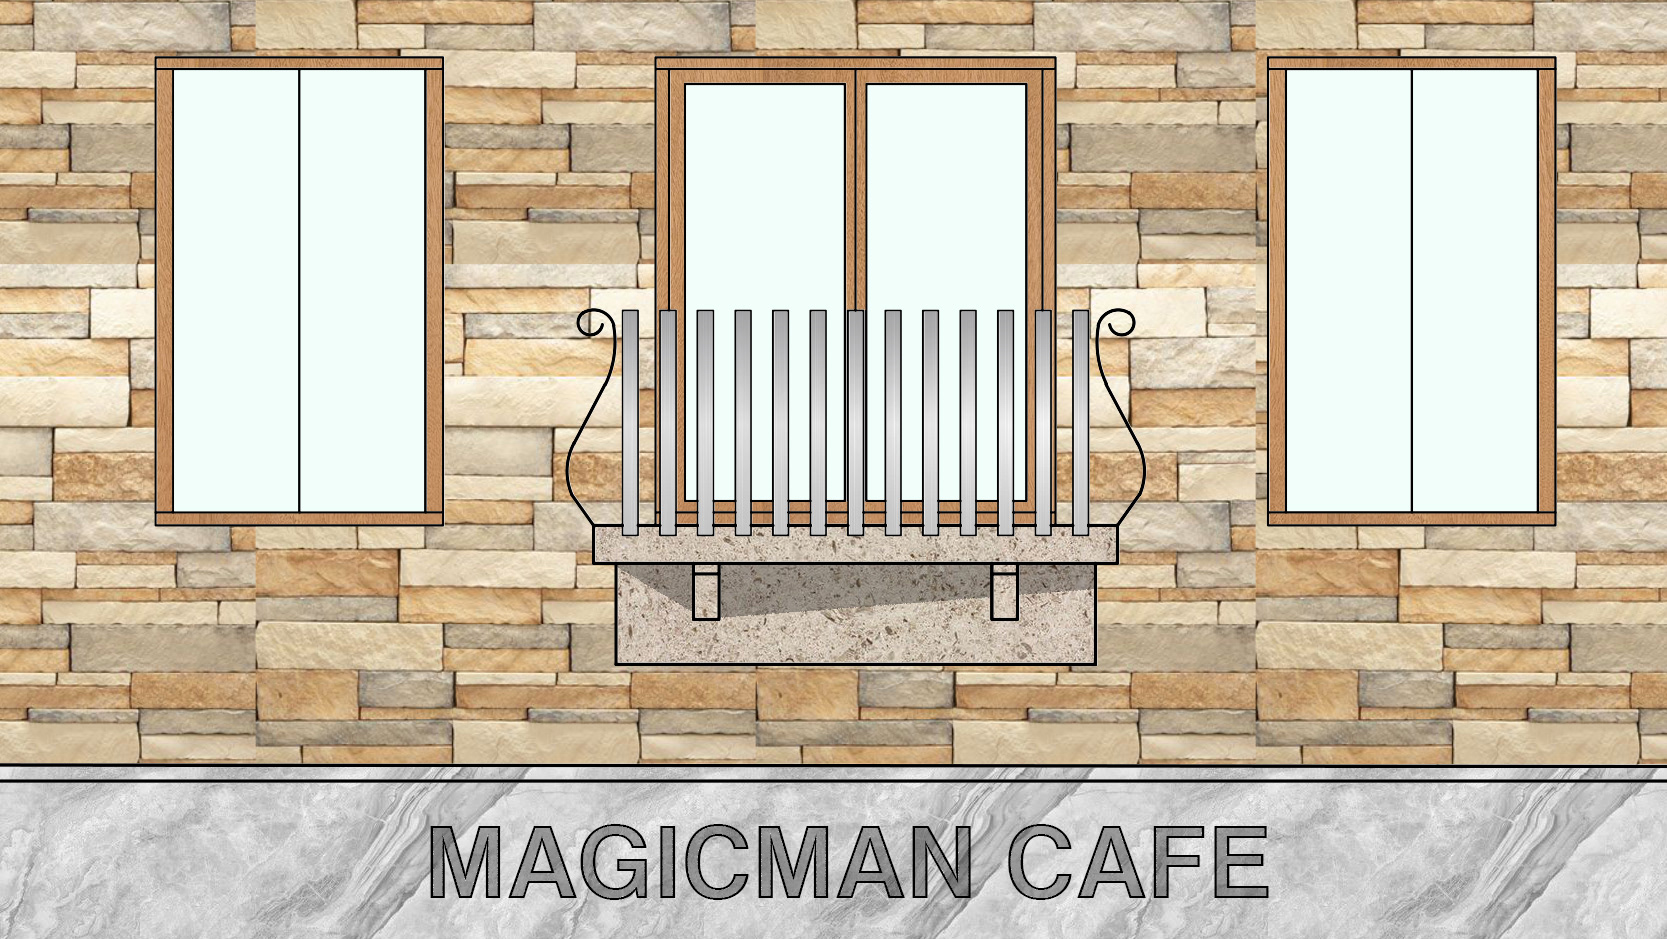
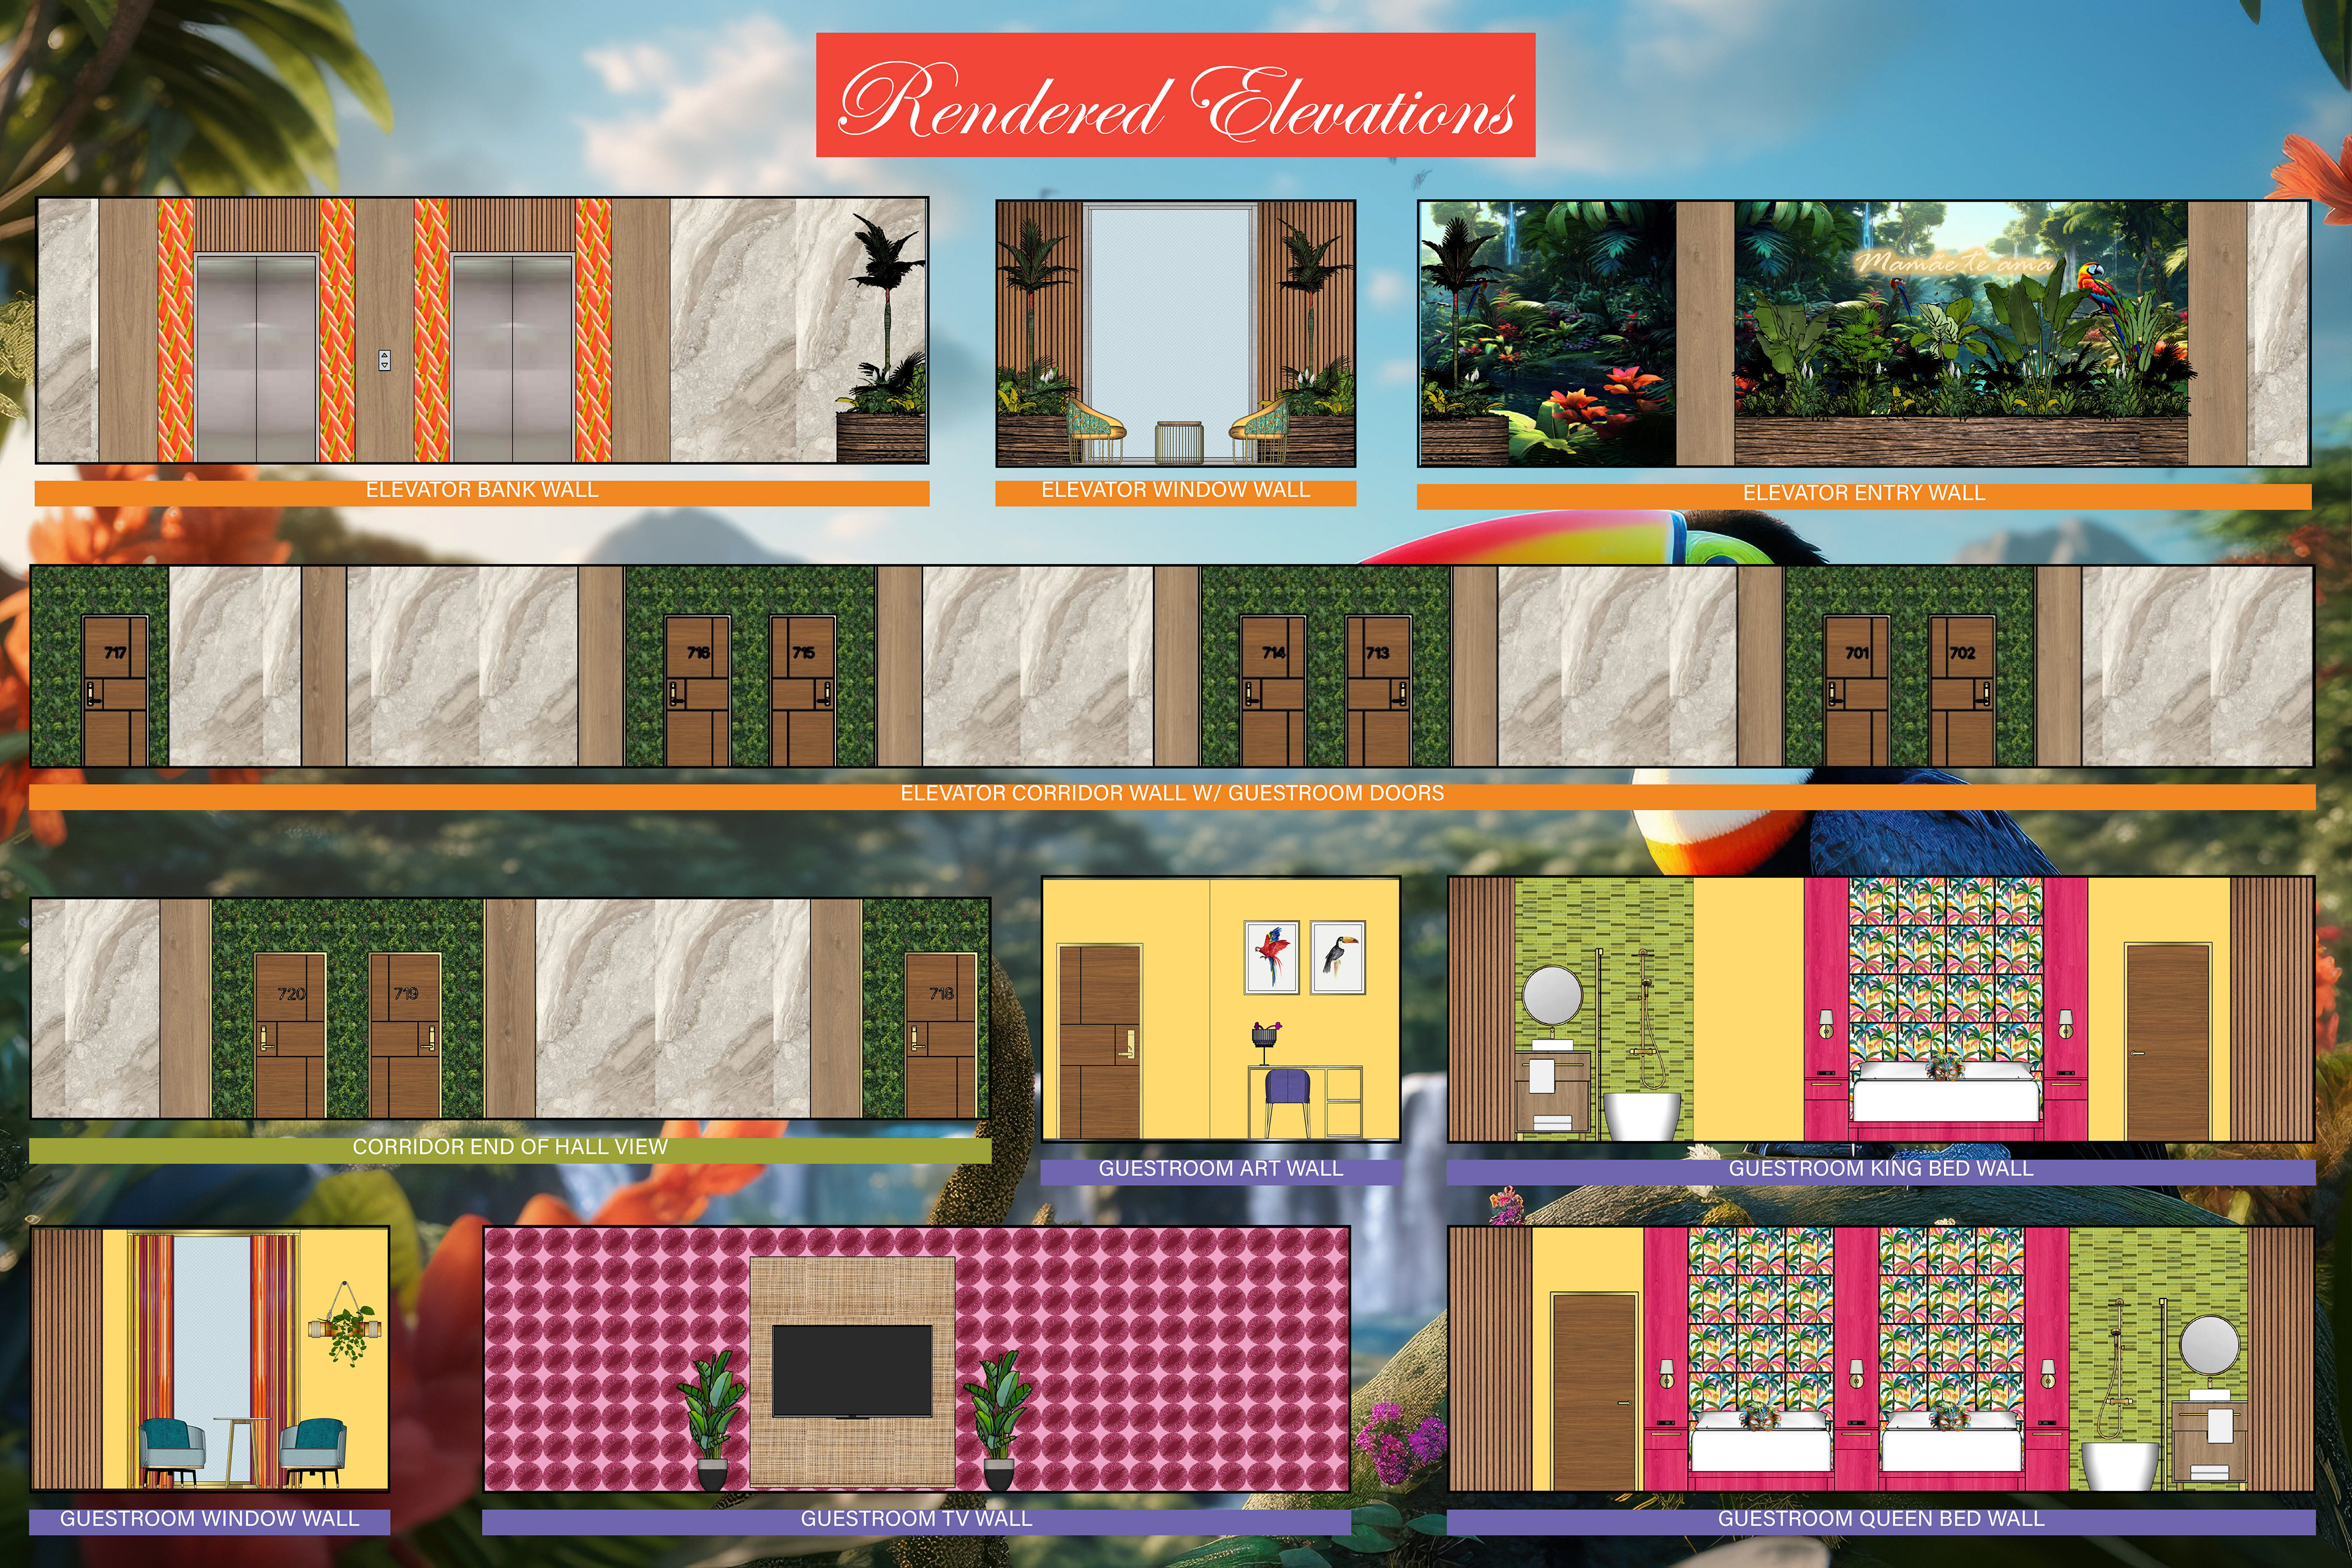
Rendered elevations
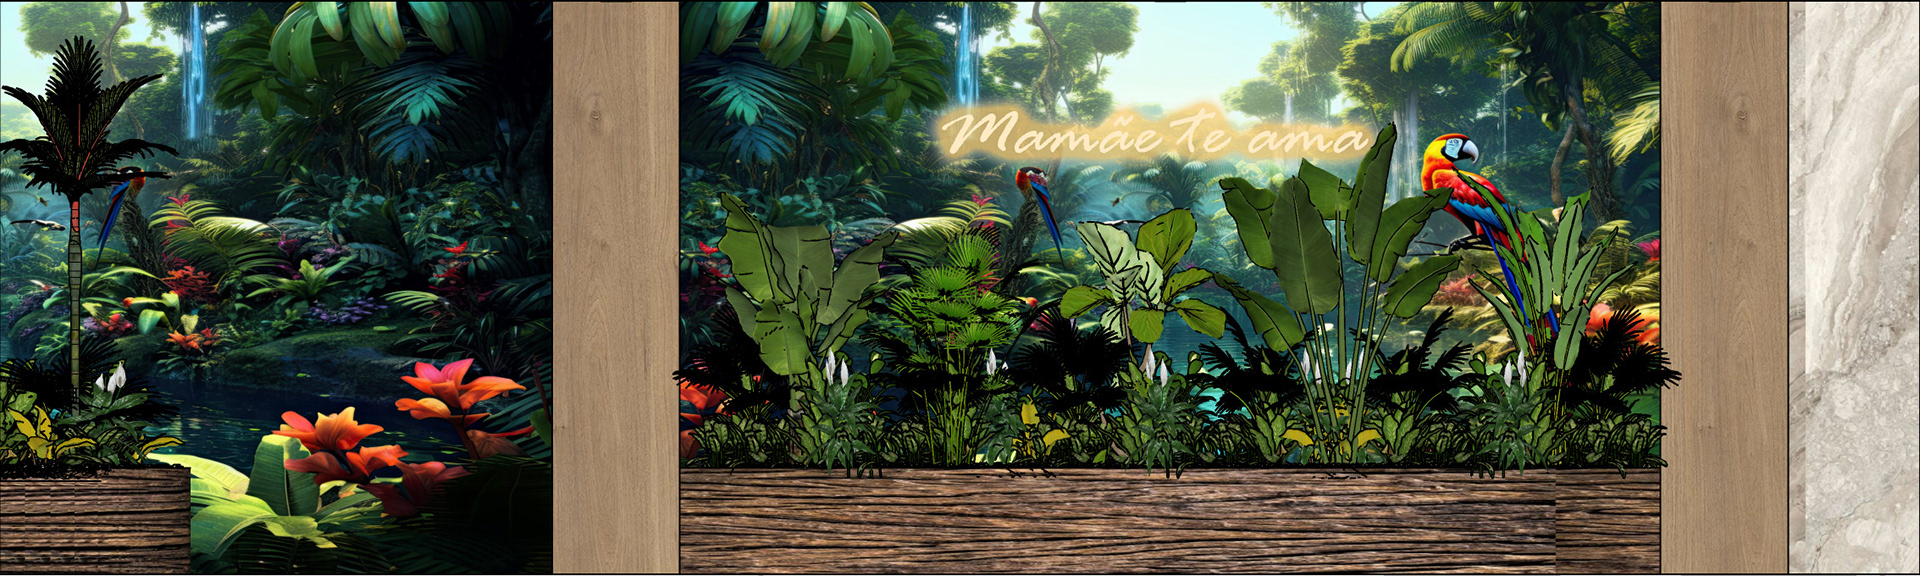
Elevator Lobby: Entry Wall
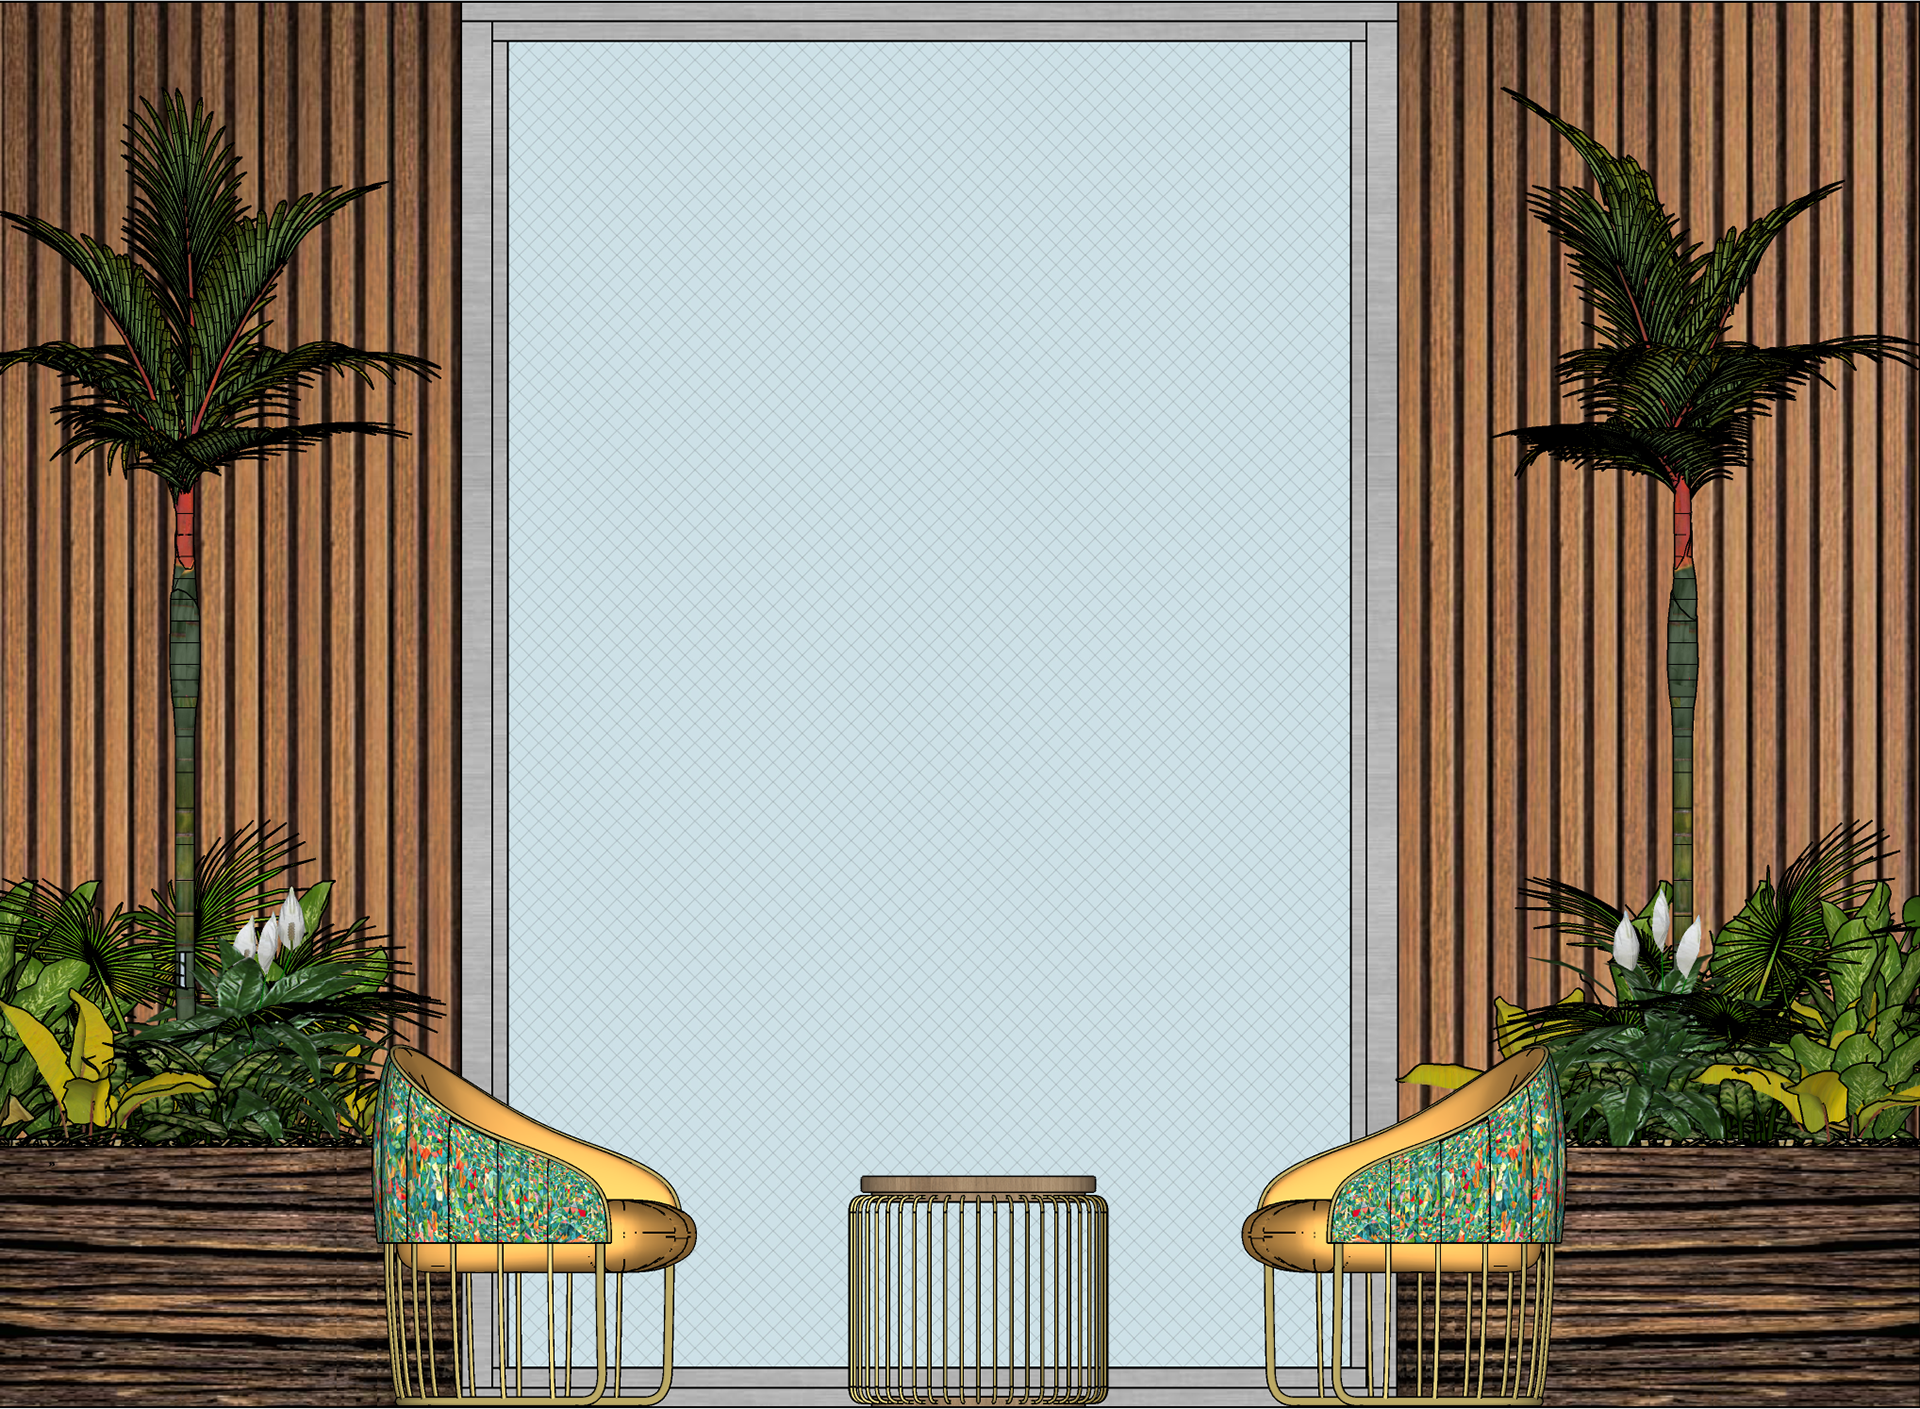
Elevator Lobby: Window Wall
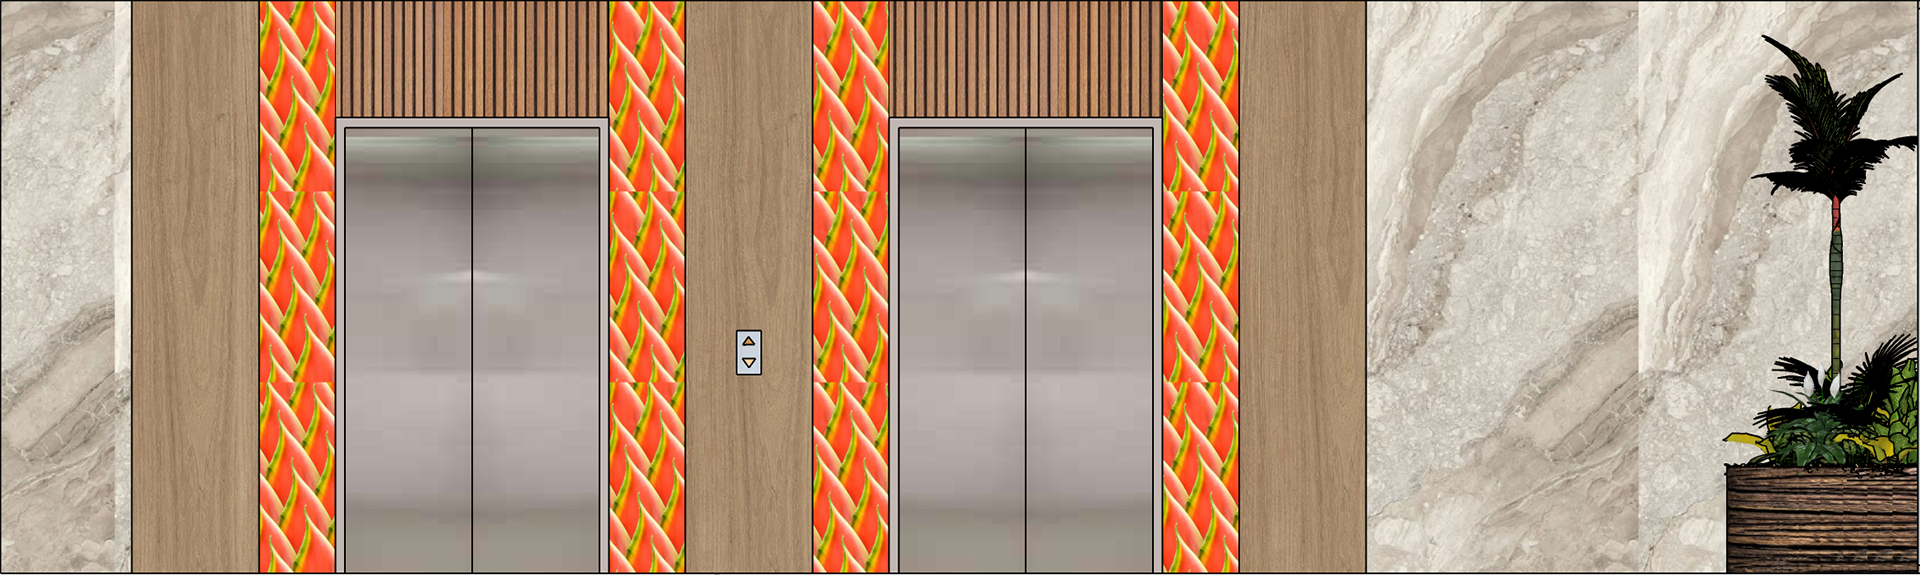
Elevator Lobby: Bank Wall

Elevator Lobby: Corridor Wall with Guestroom Doors
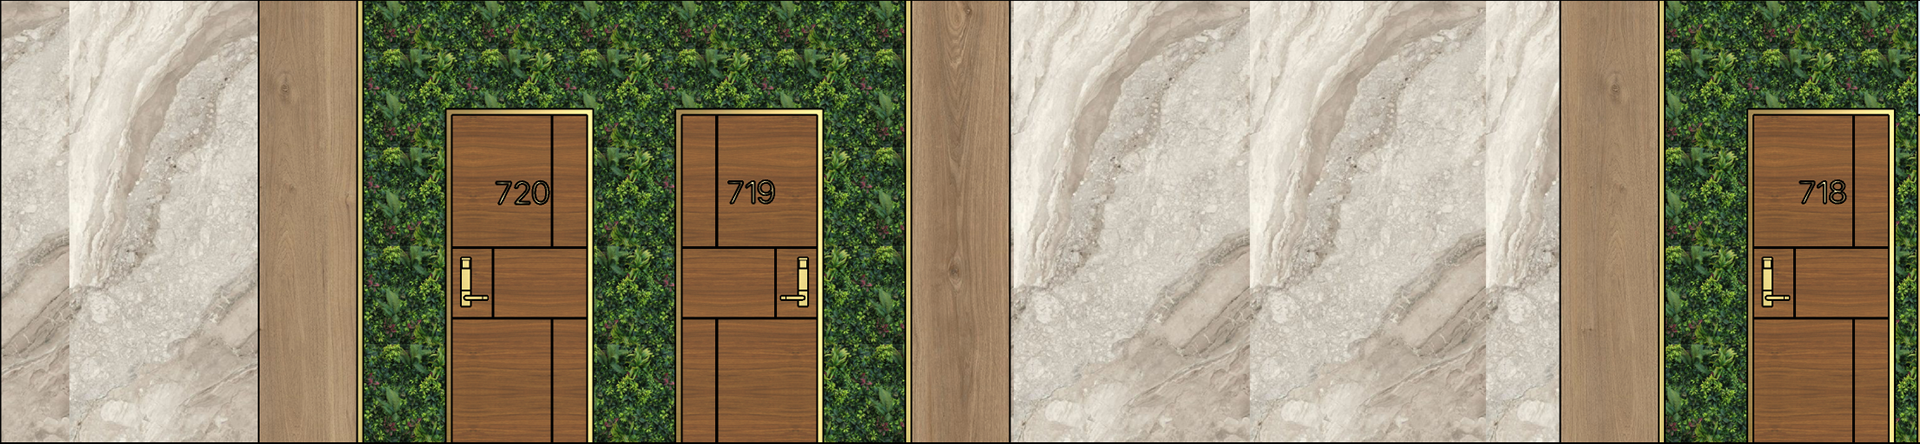
Corridor: End of Hall View
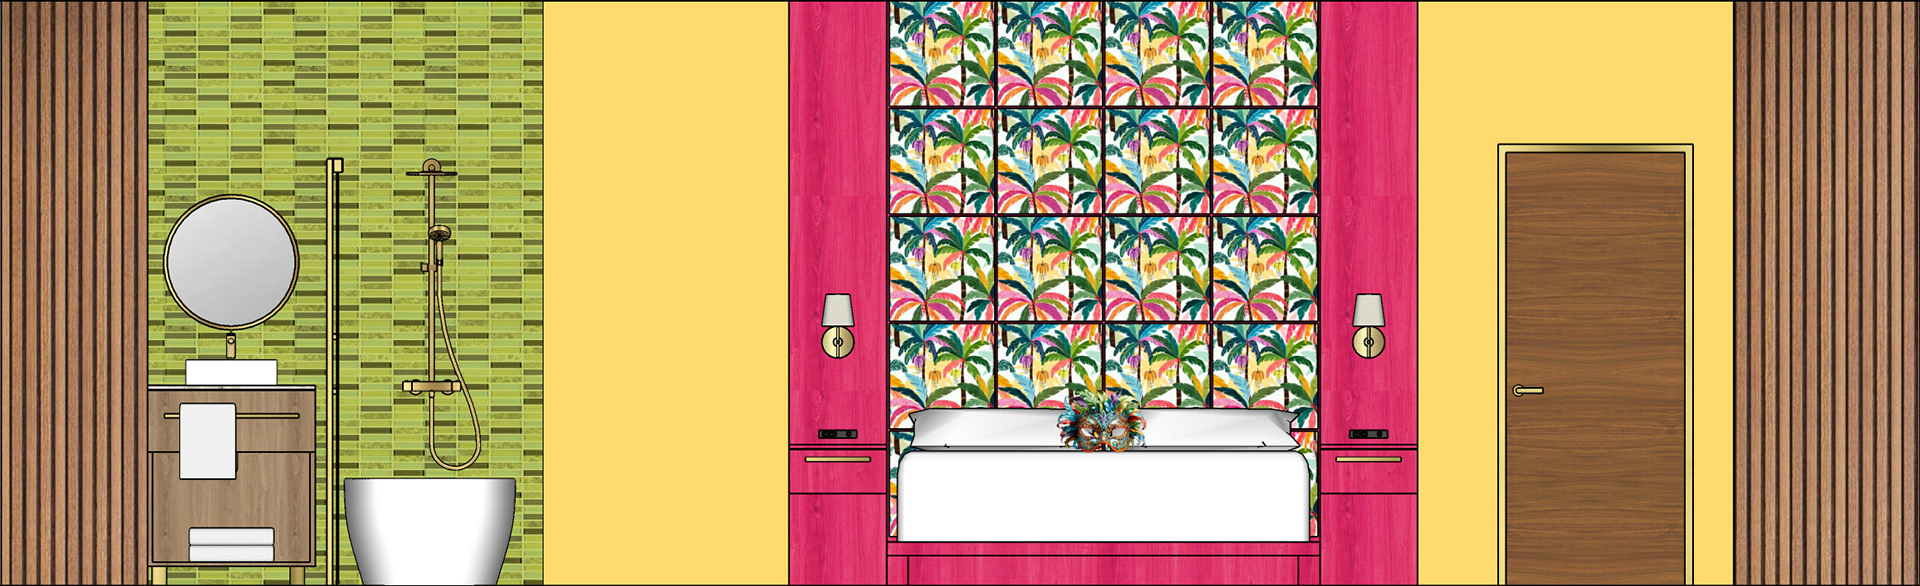
King Guestroom: Bed Wall with section through bathroom
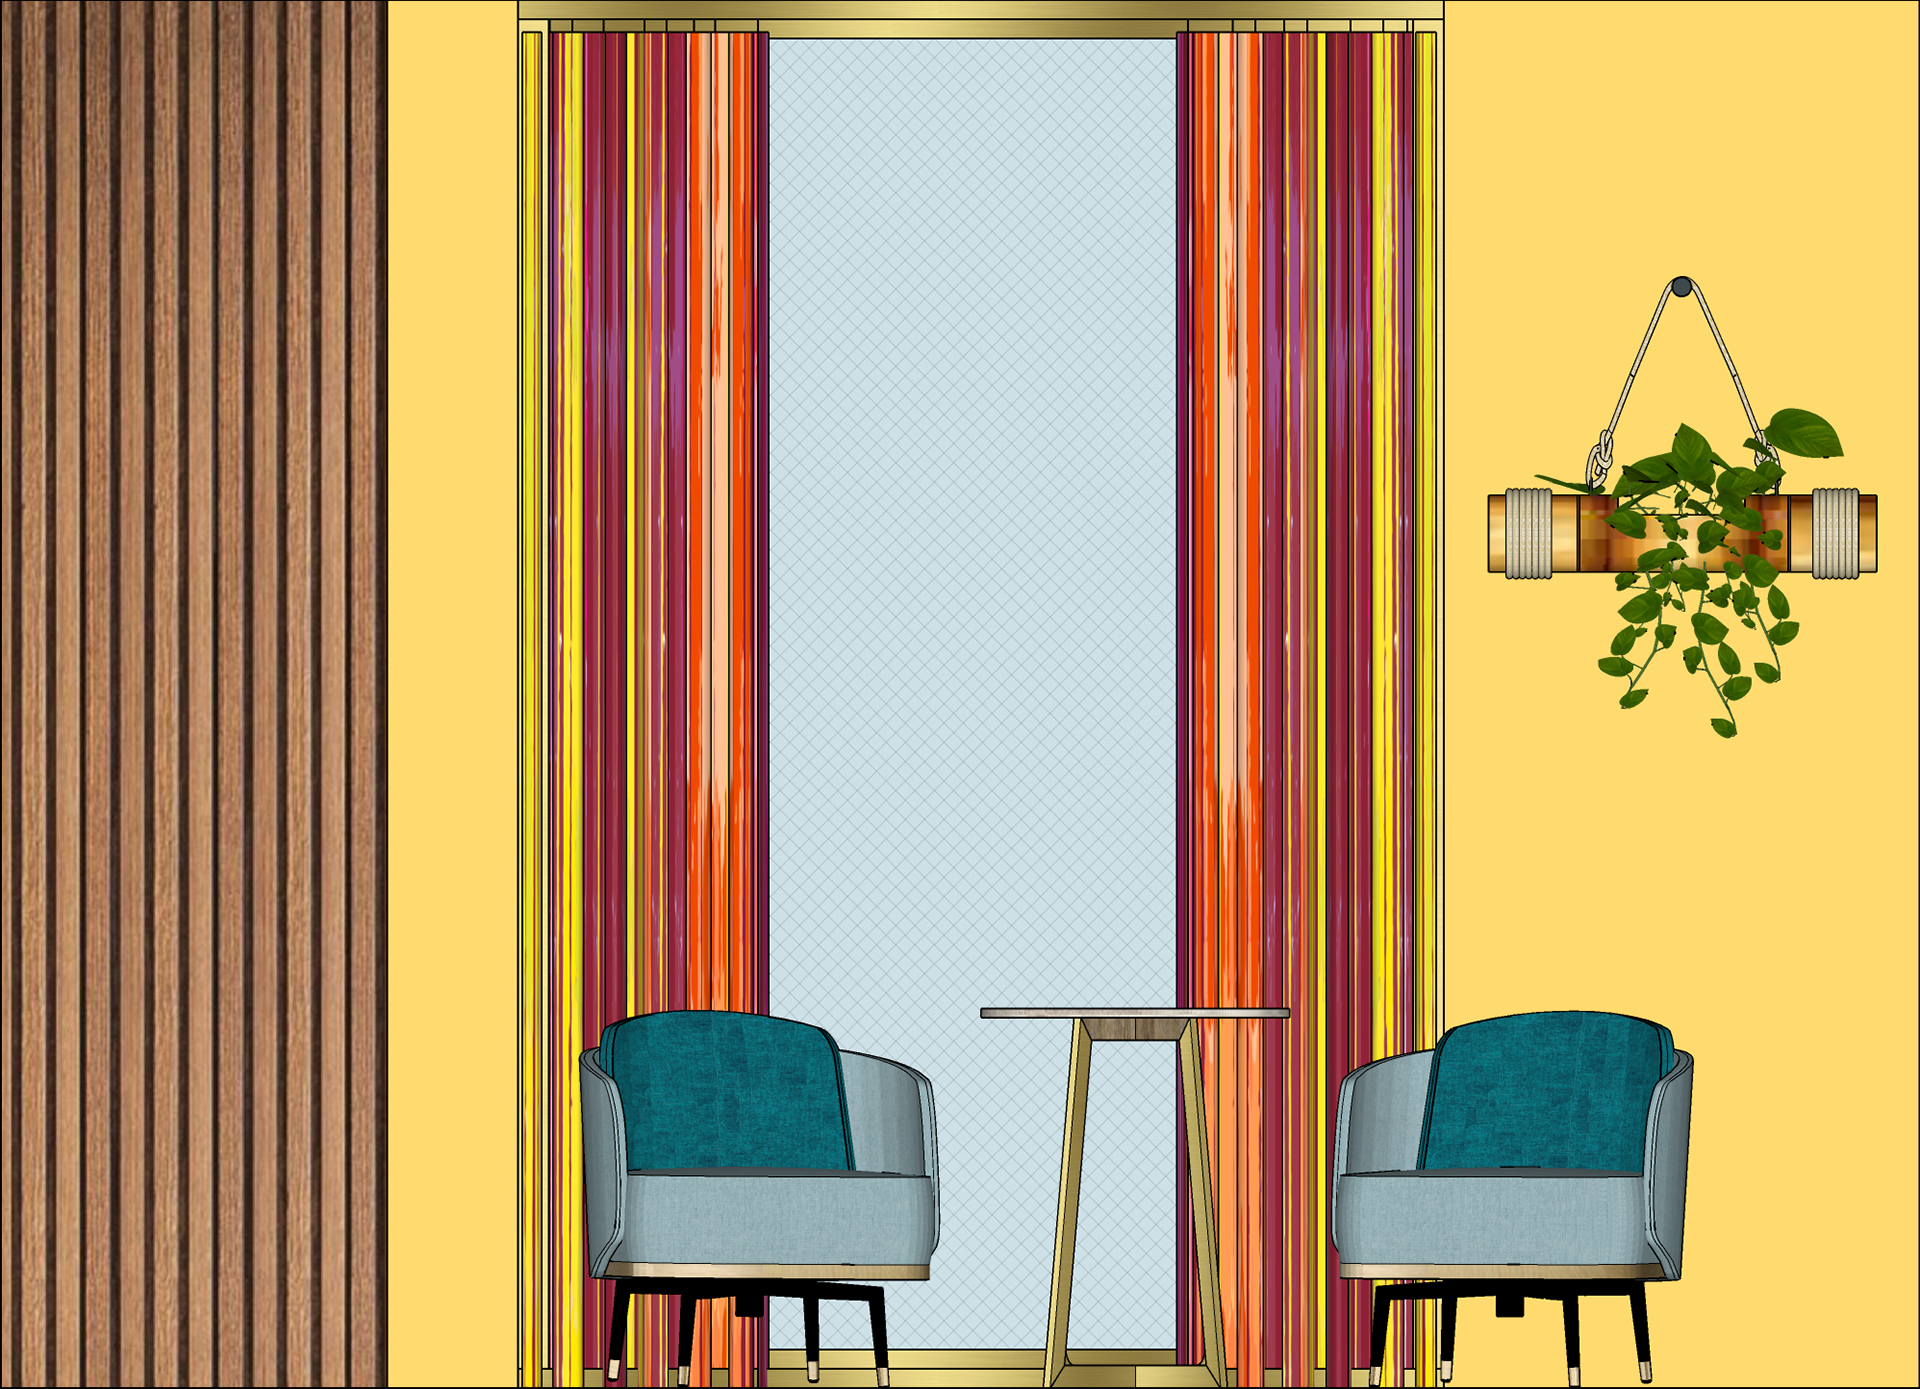
King Guestroom: Window Wall

King Guestroom: Art Wall

King Guestroom: TV Wall
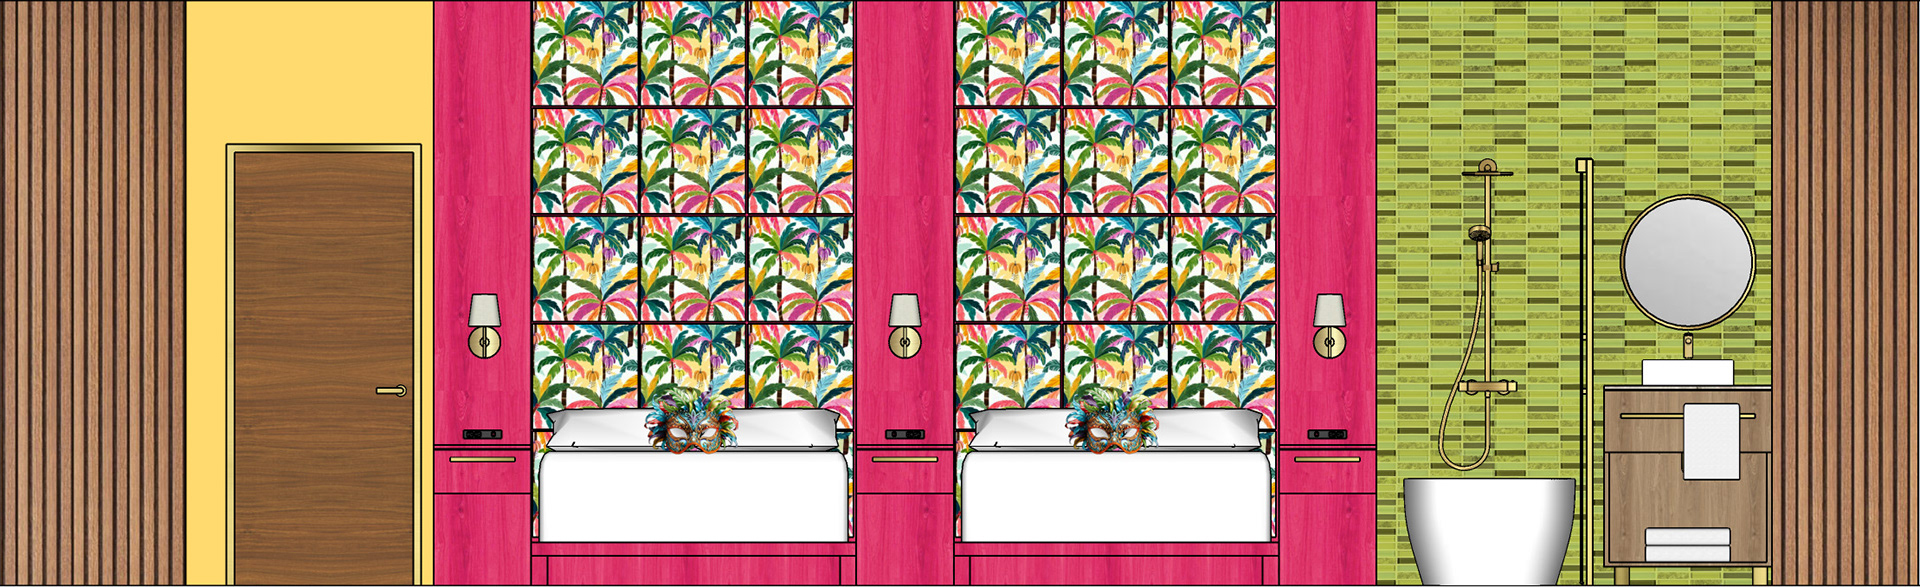
Queen Guestroom: Bed Wall with section through bathroom
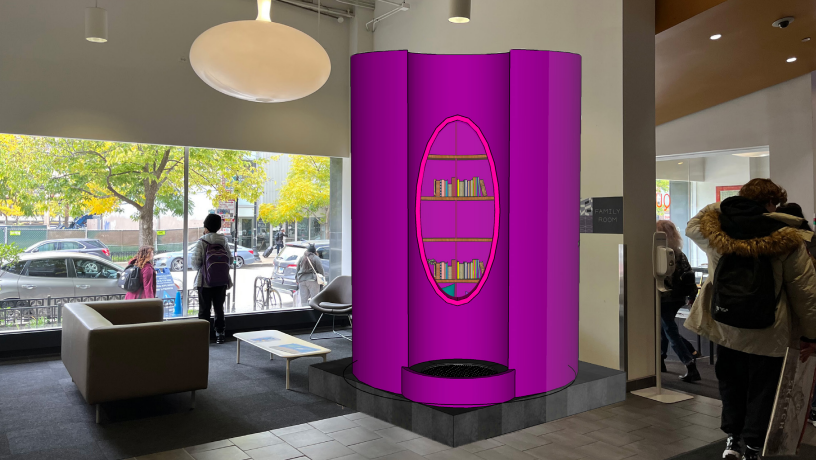
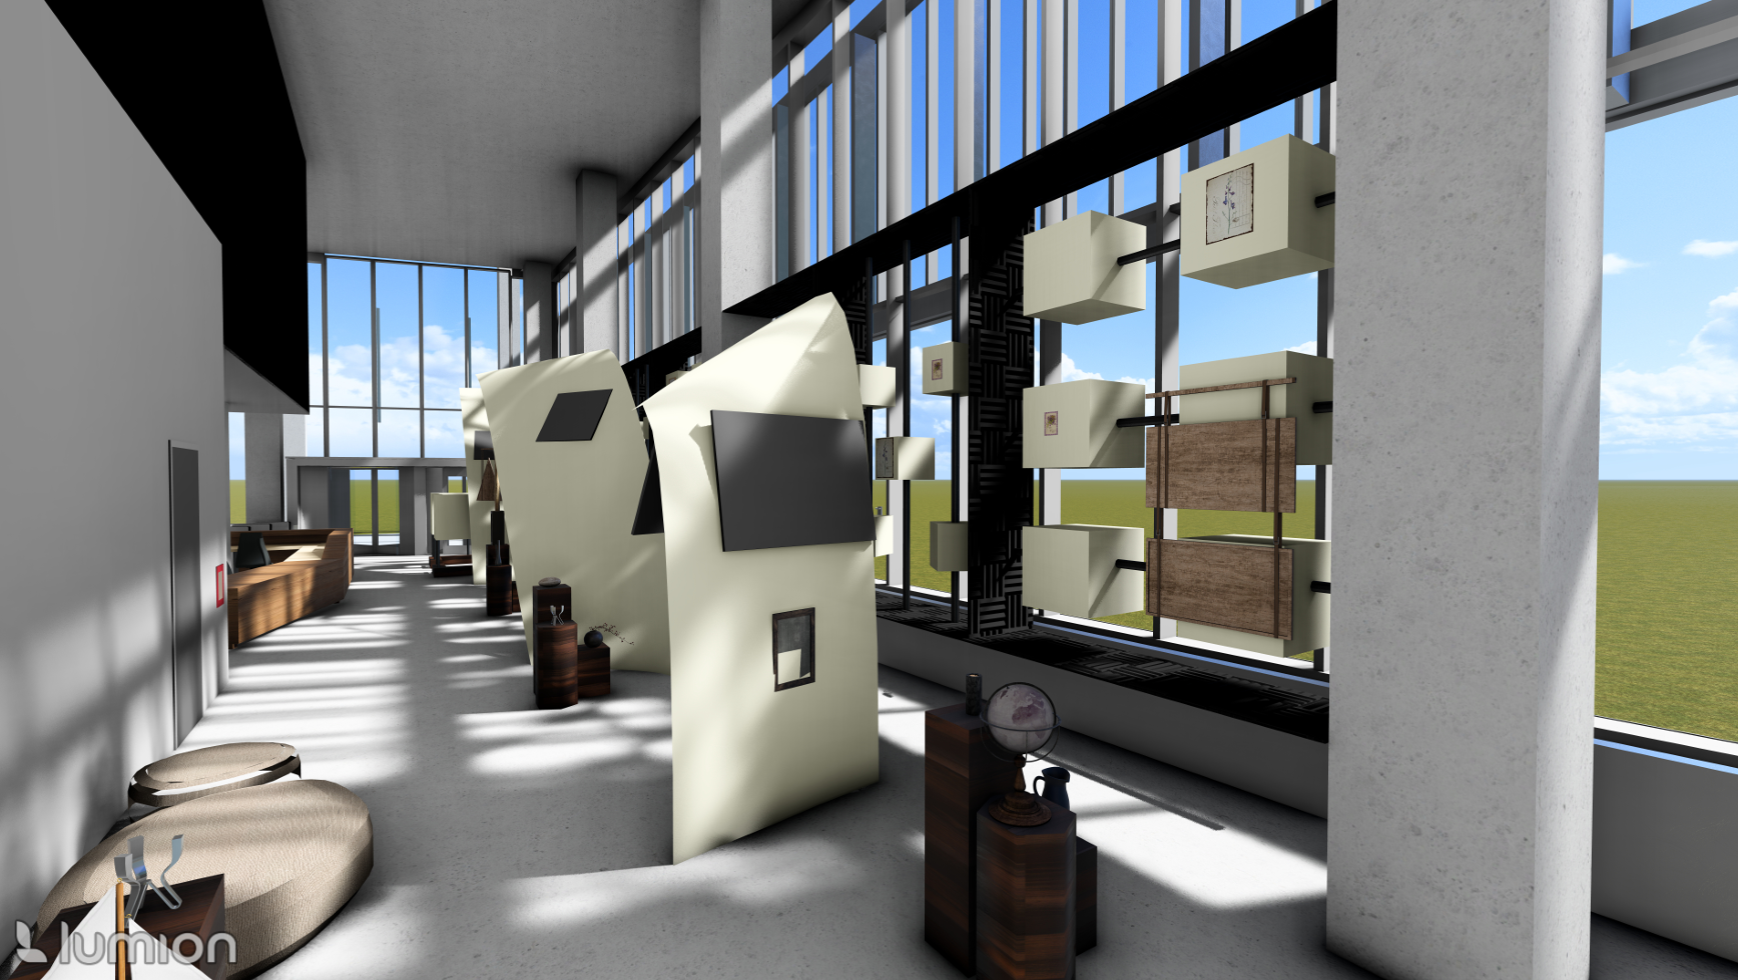
3d renderings
Elevator Lobby

Corridor
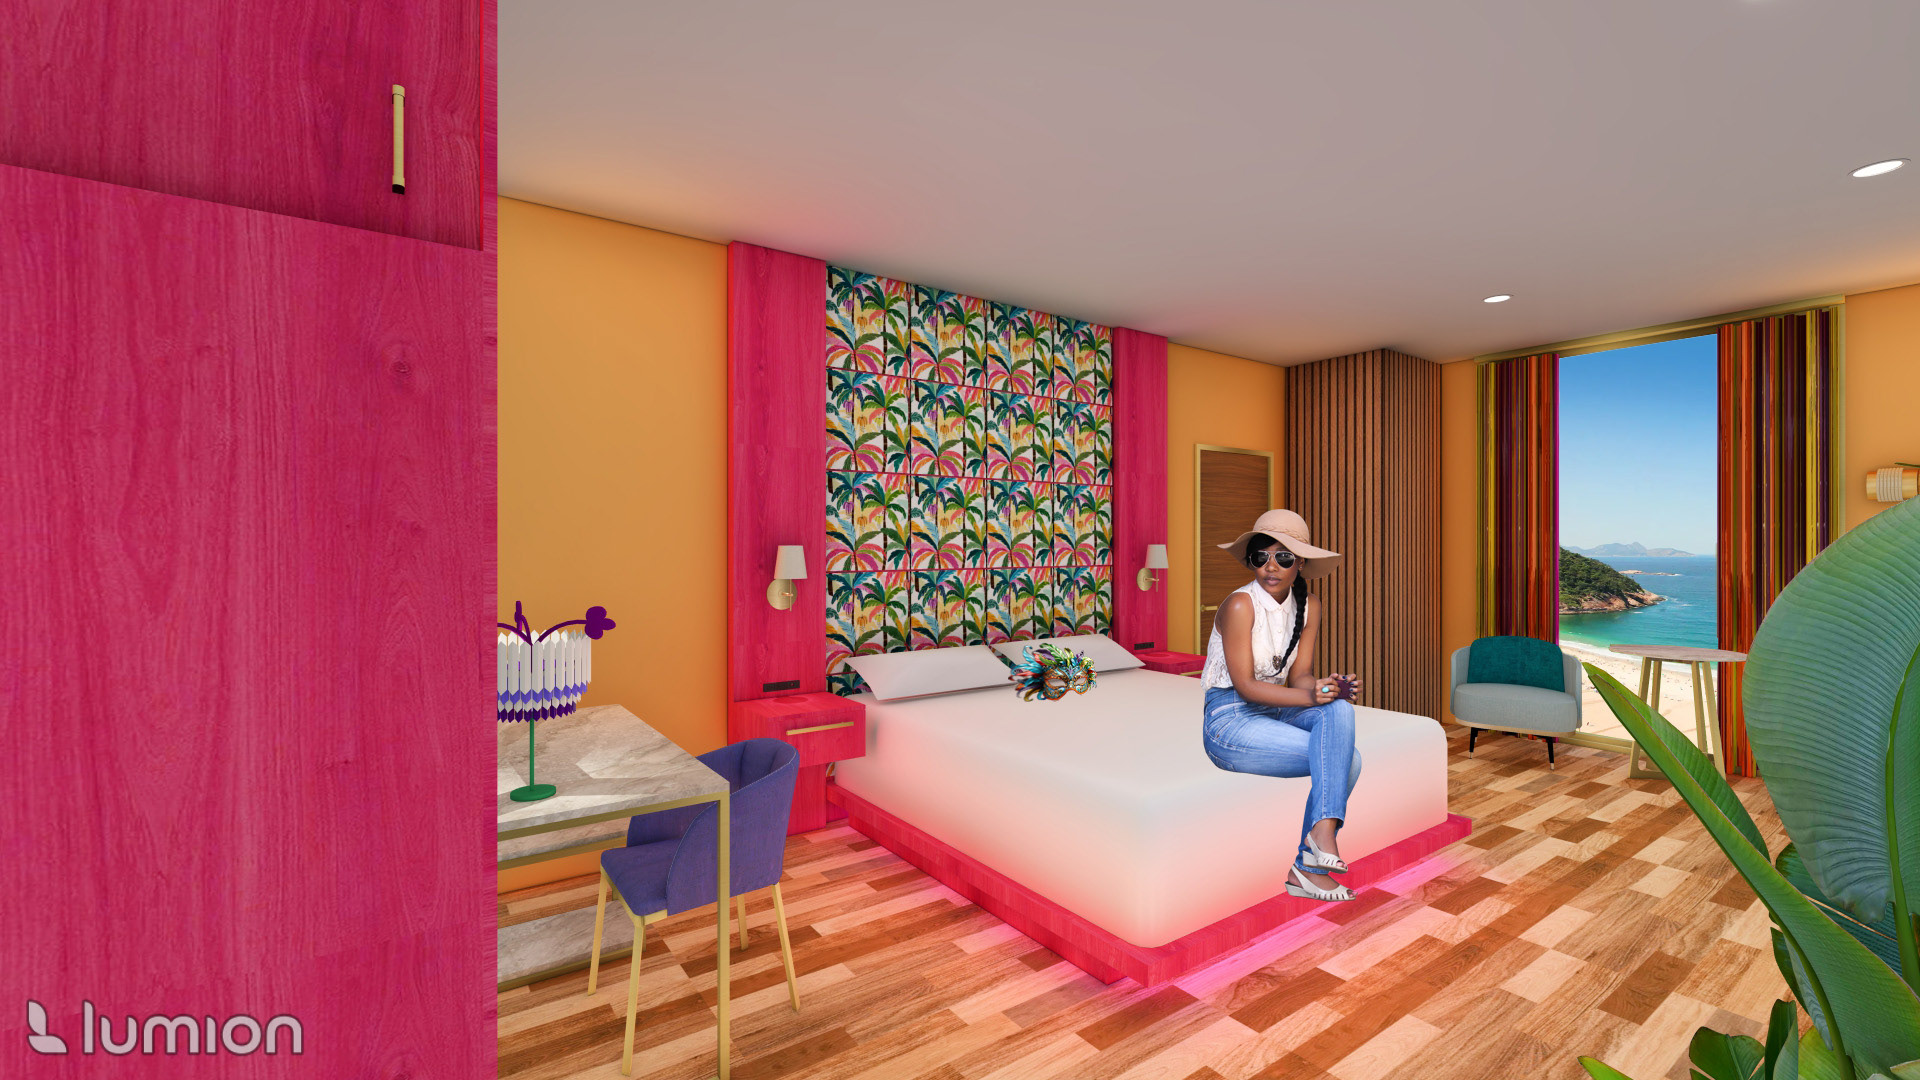
Guestroom: Bed Wall
Guestroom: Window Wall
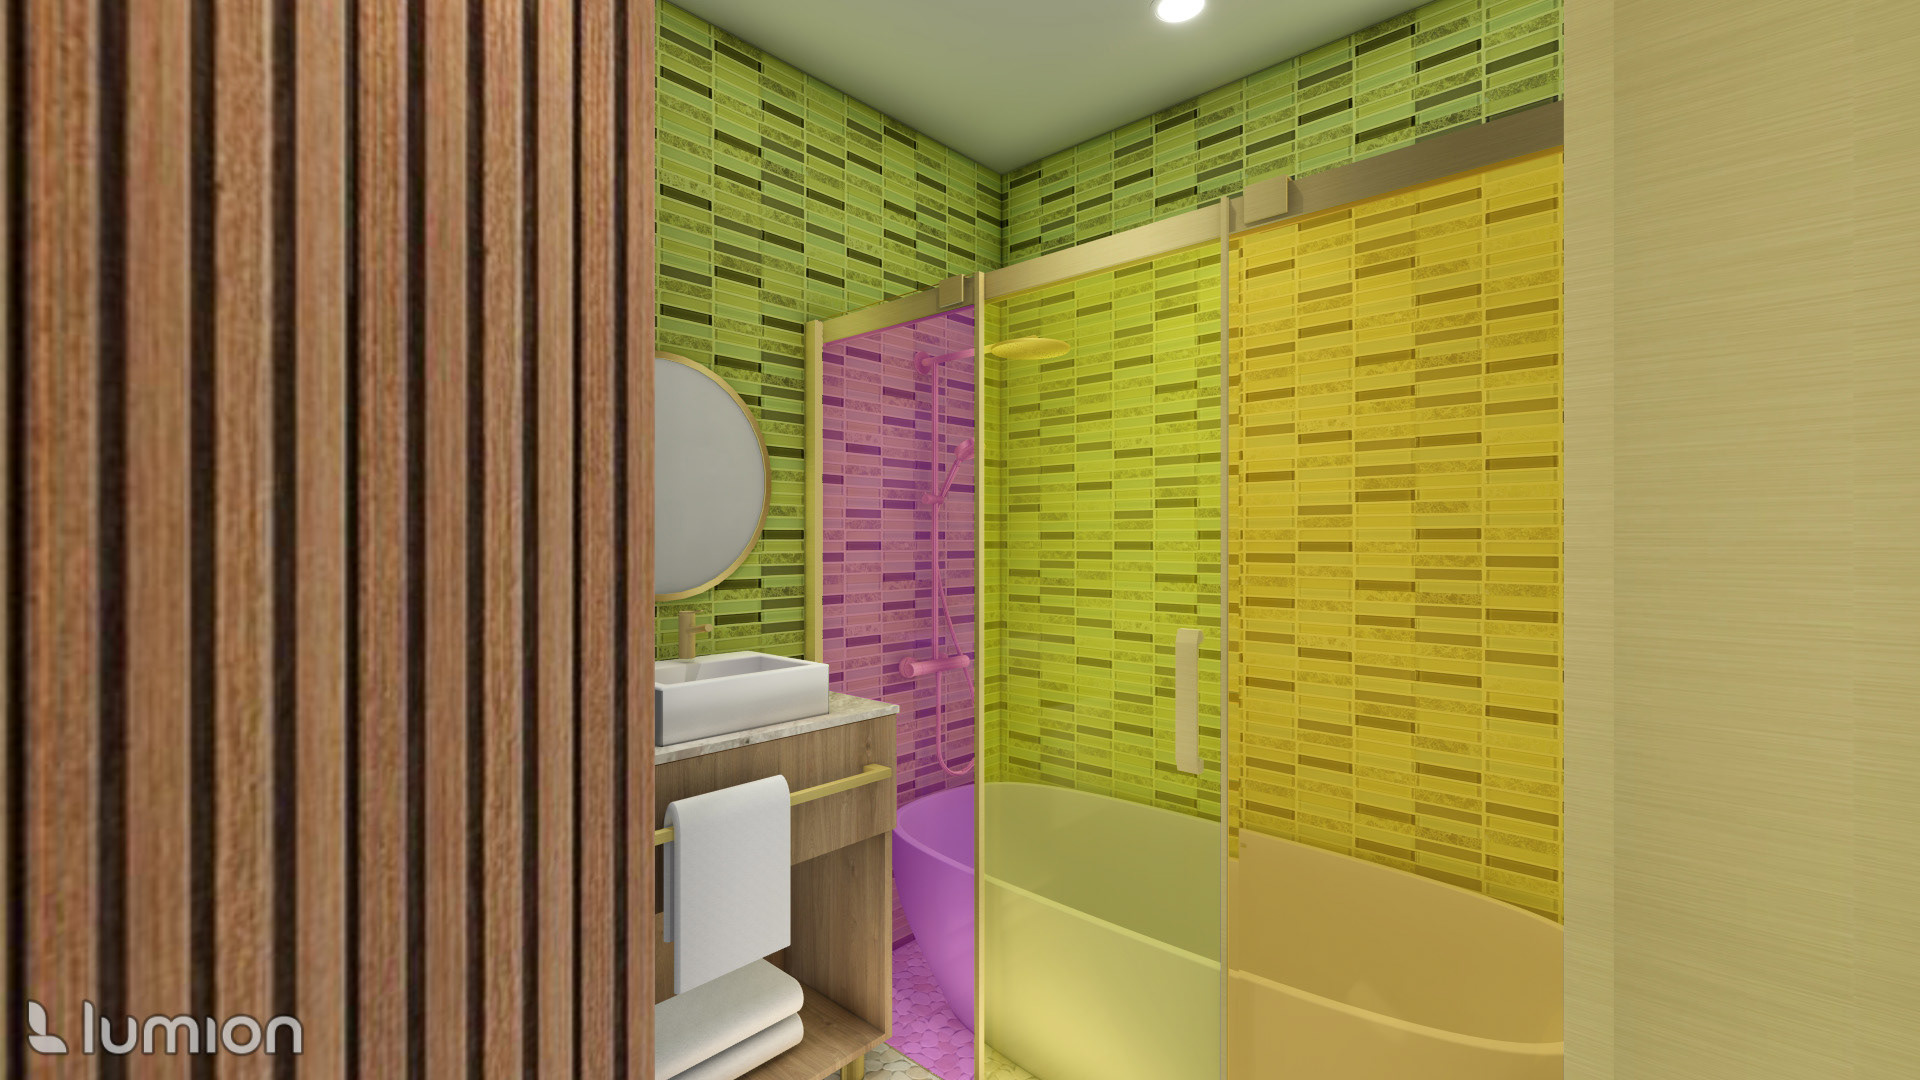
Guestroom: Bathroom
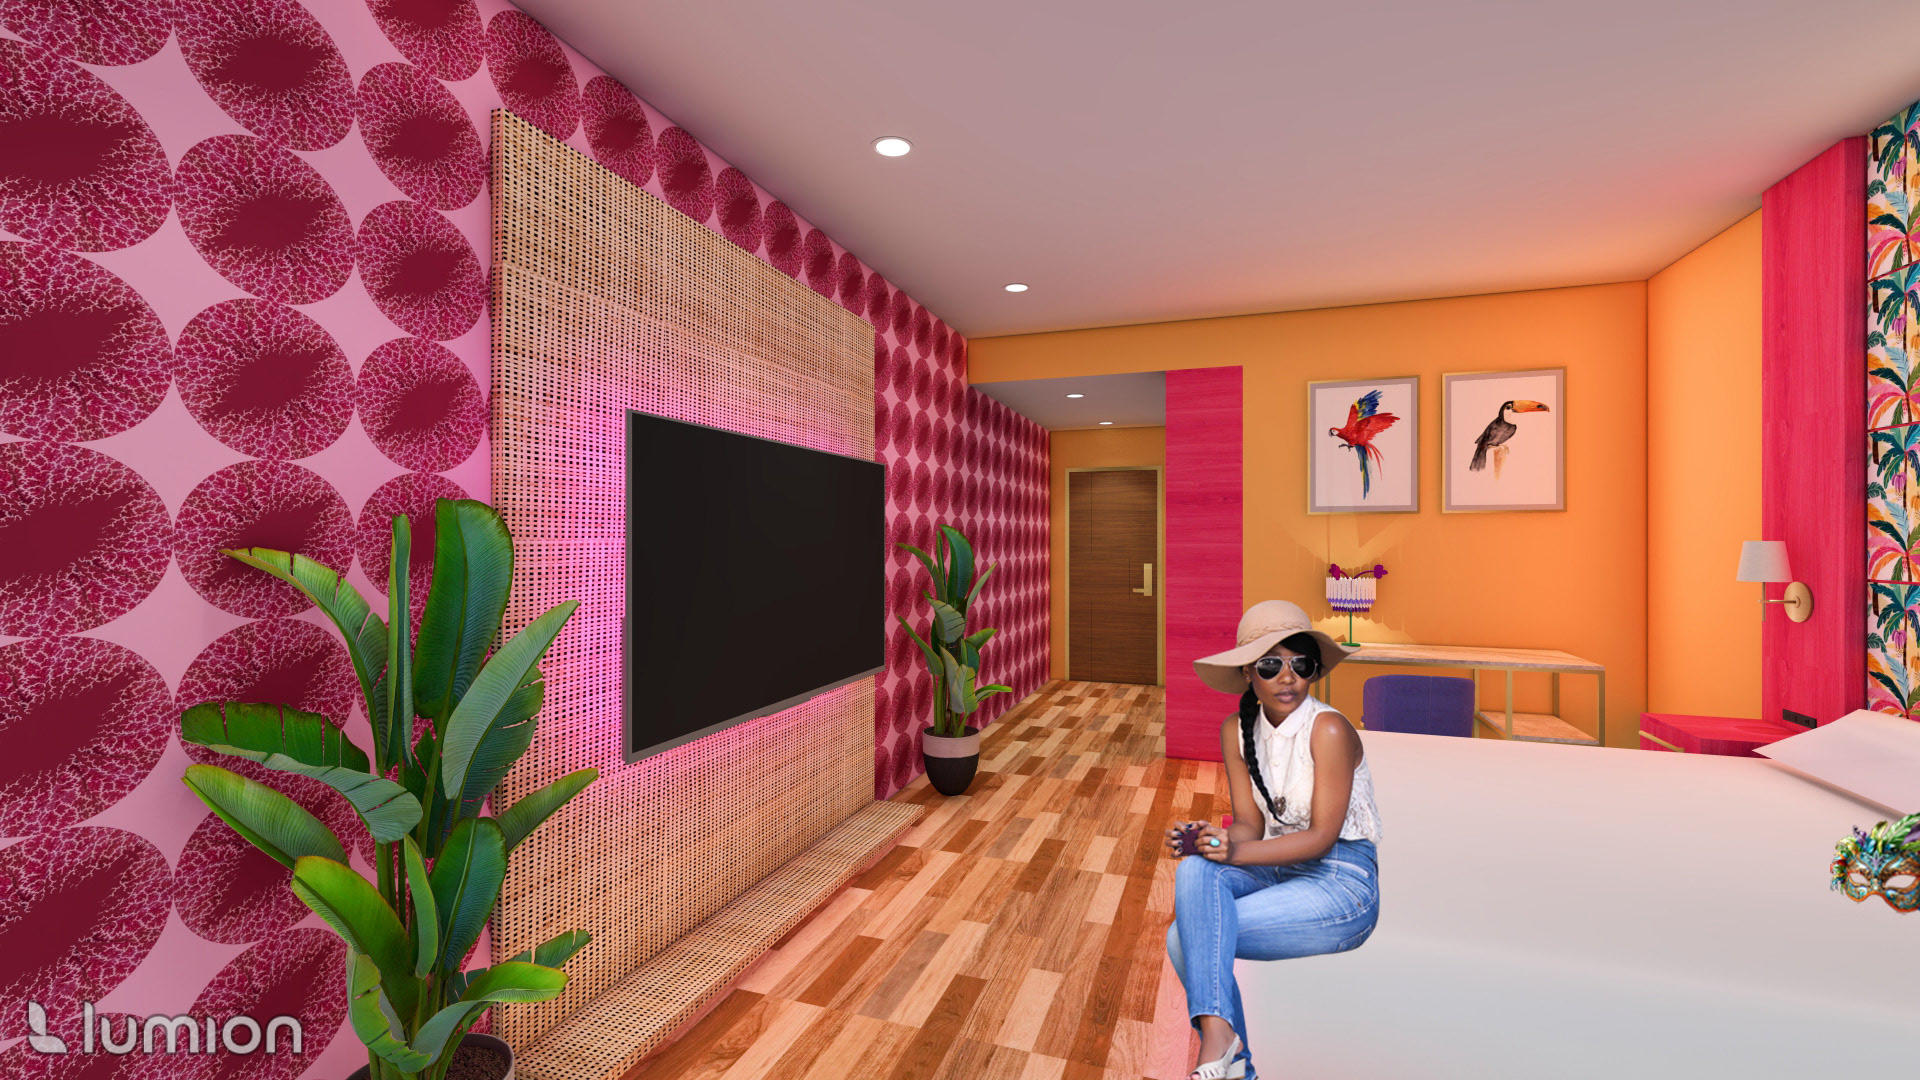
Guestroom: TV Wall/Entry
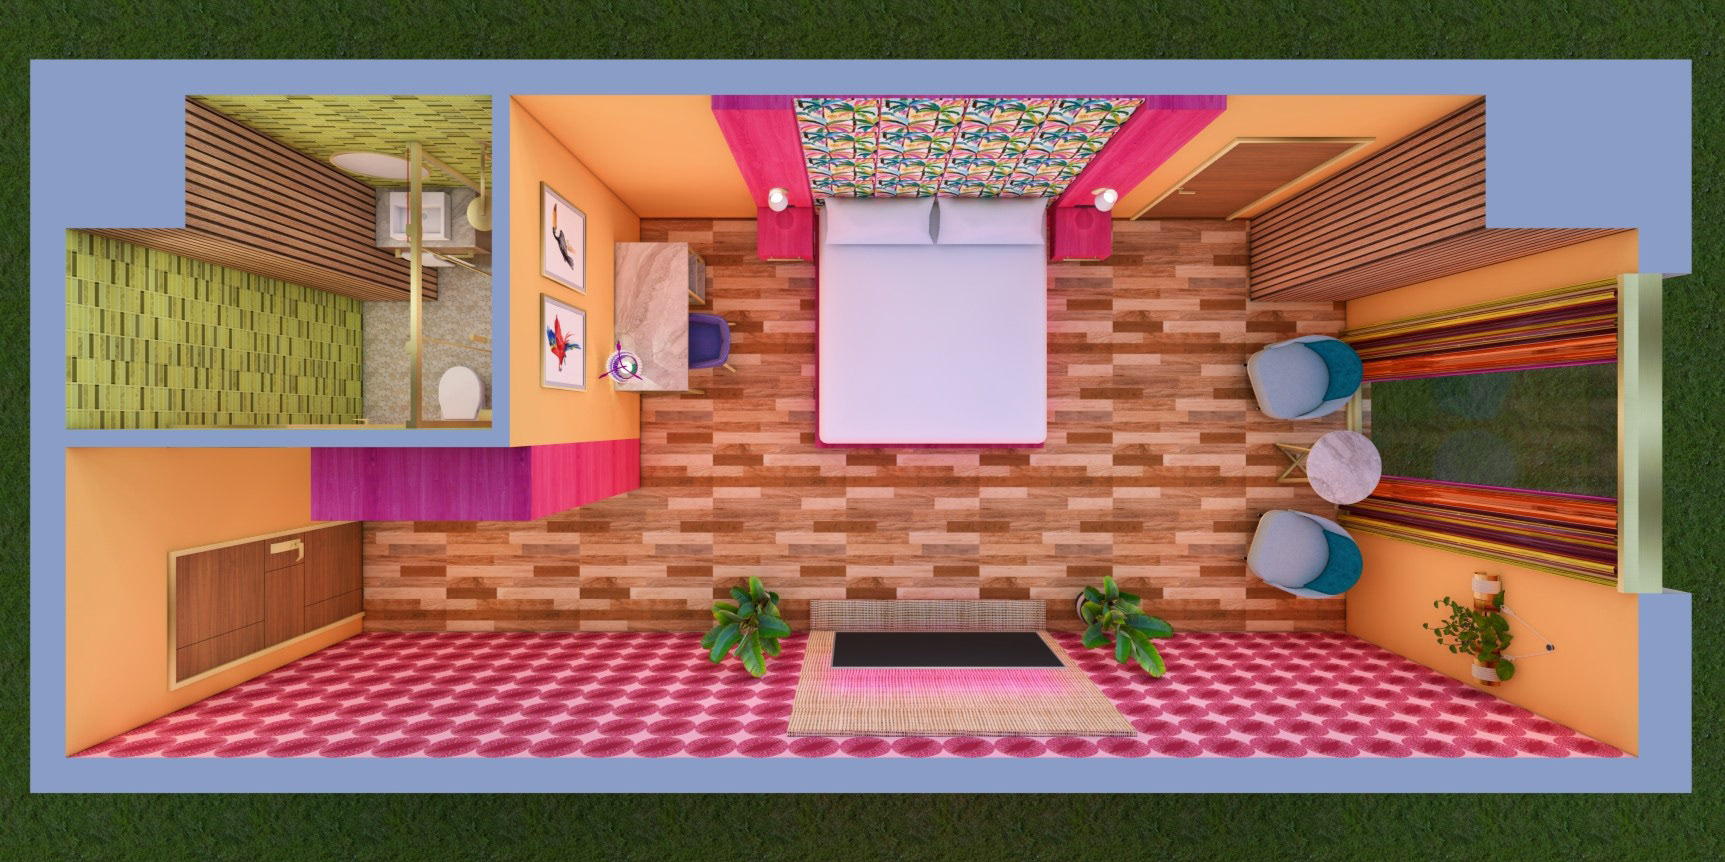
King Guestroom: isometric view
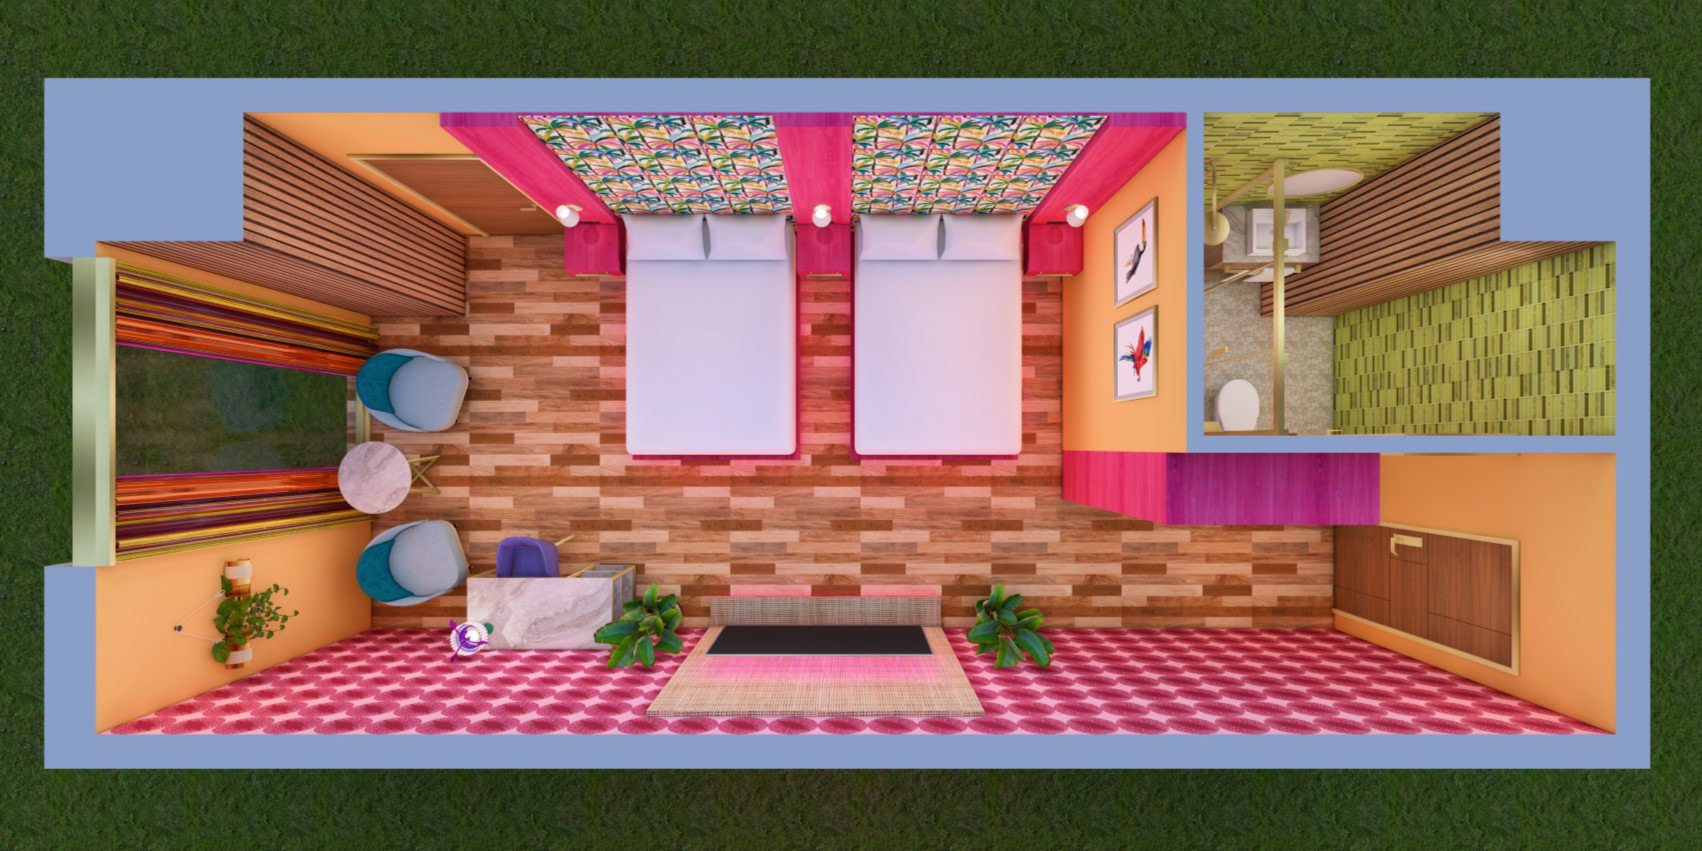
Queen Guestroom: isometric view
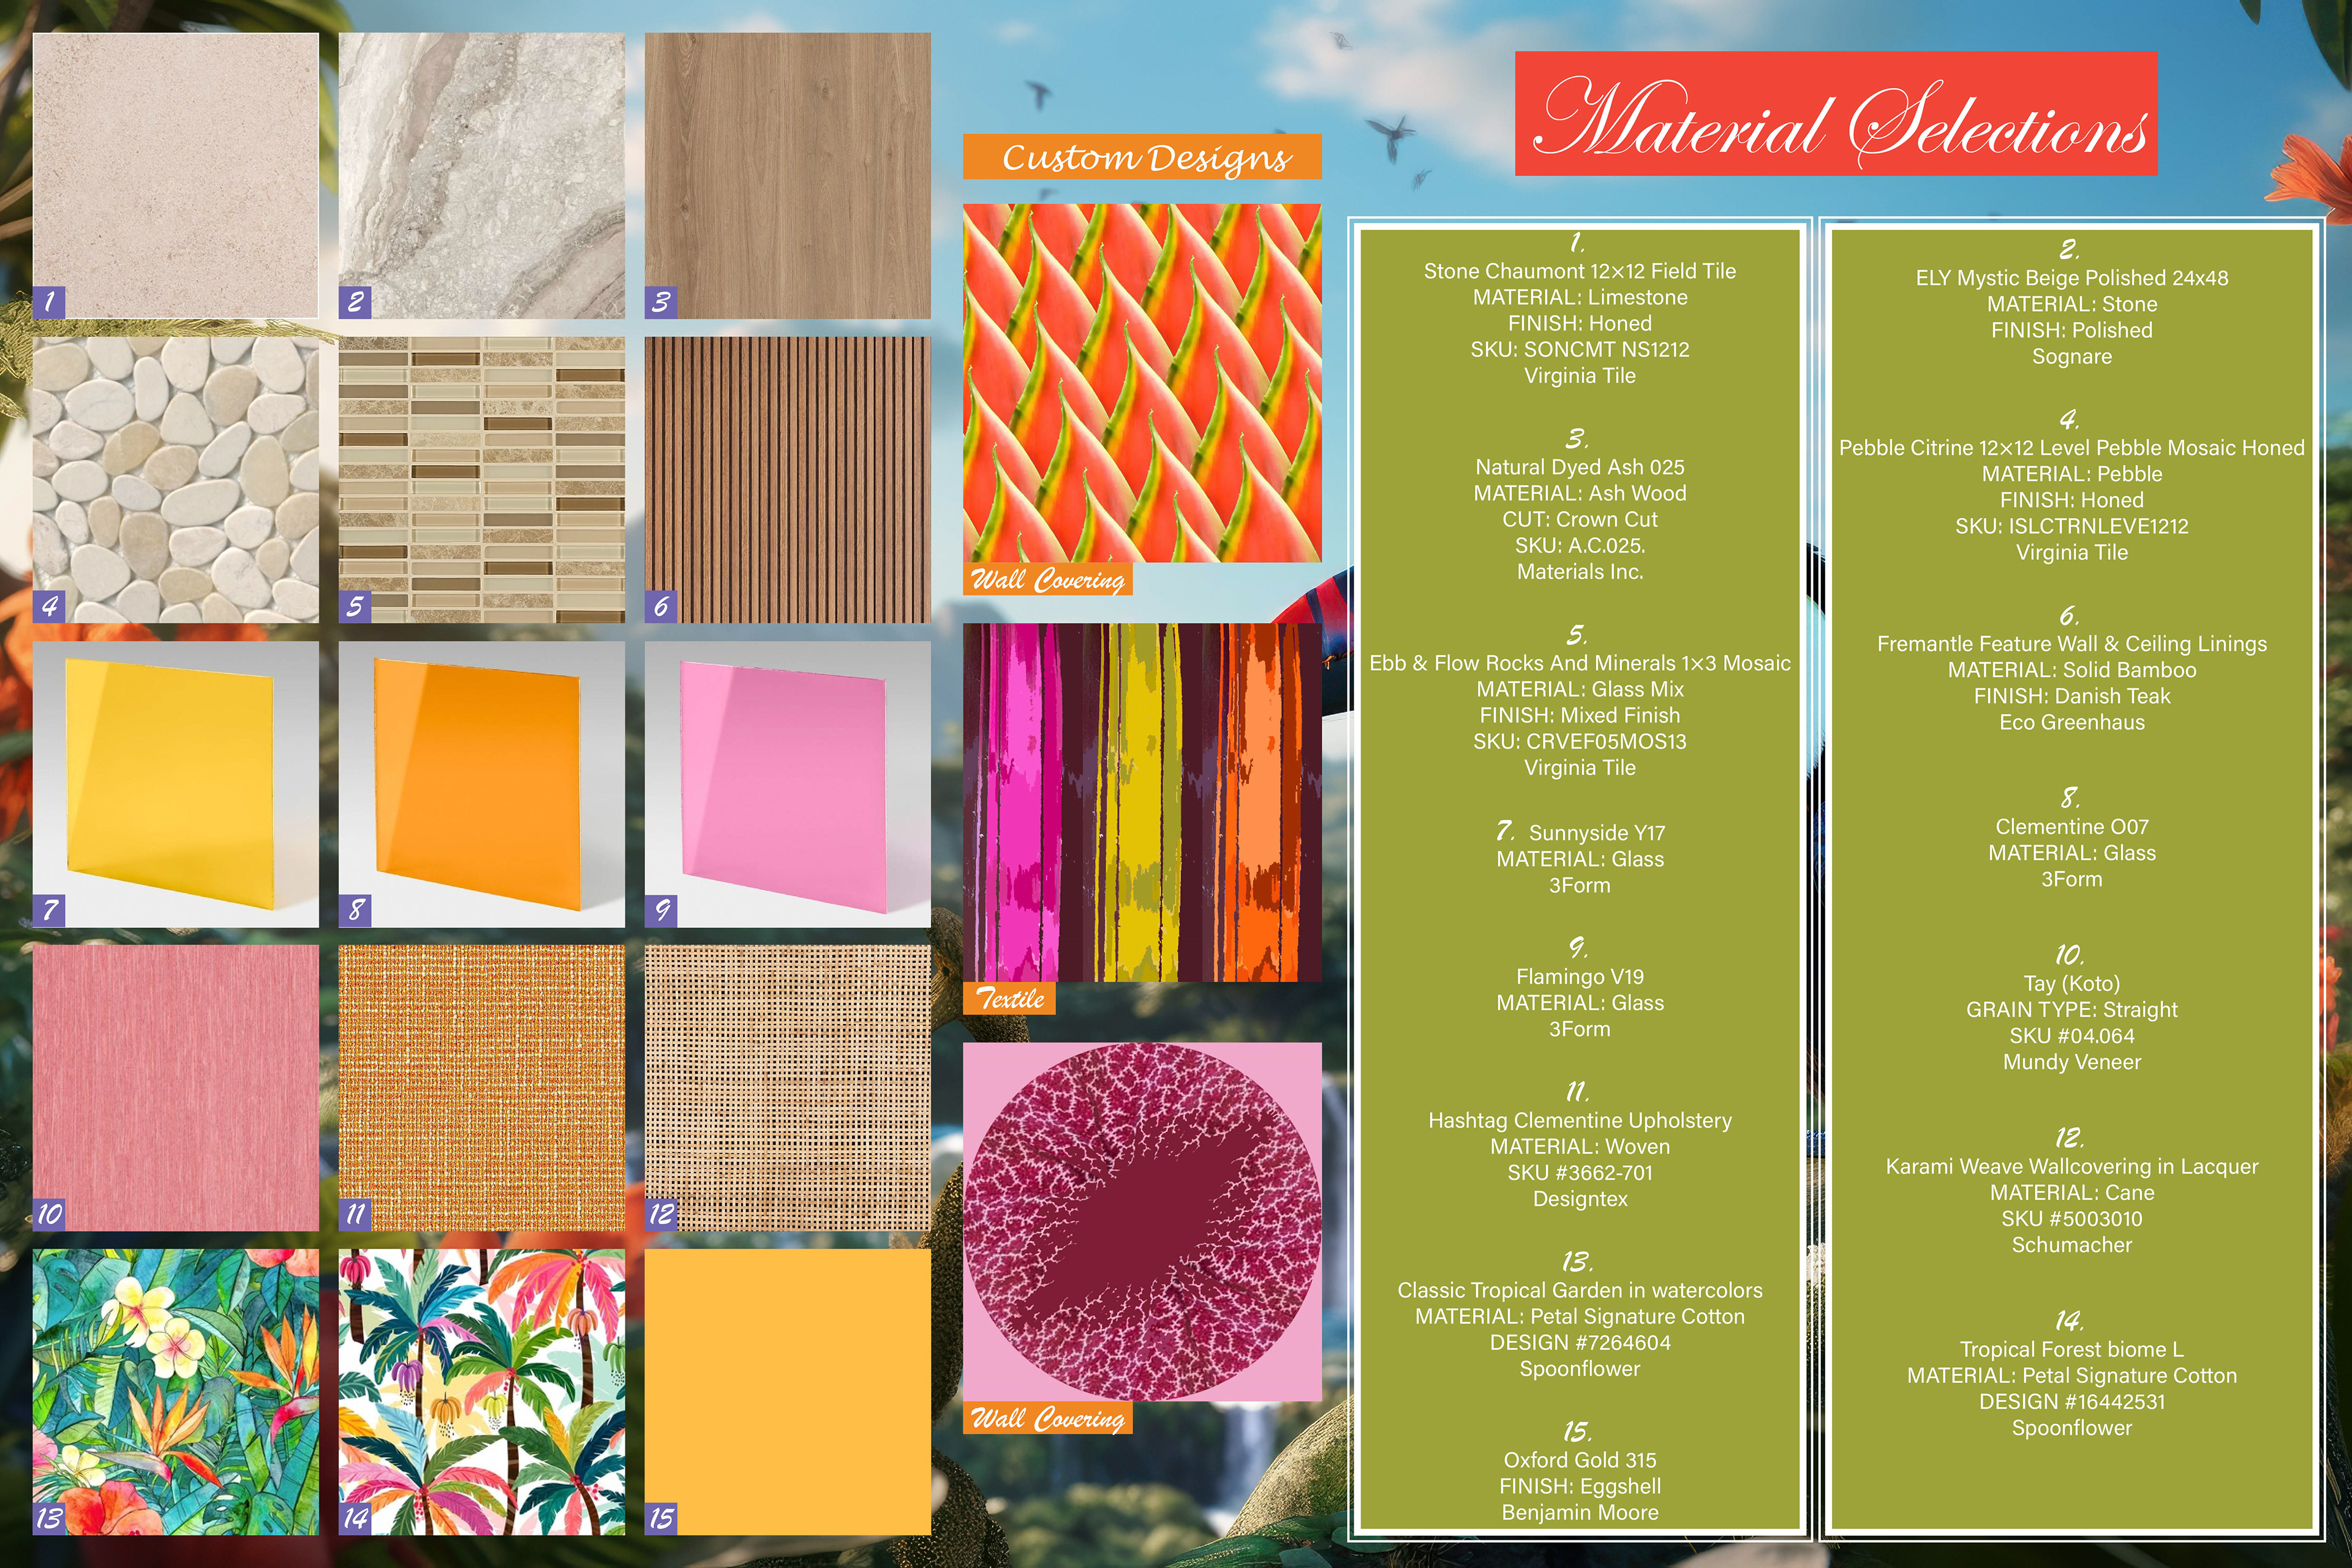
Material palette & specifications
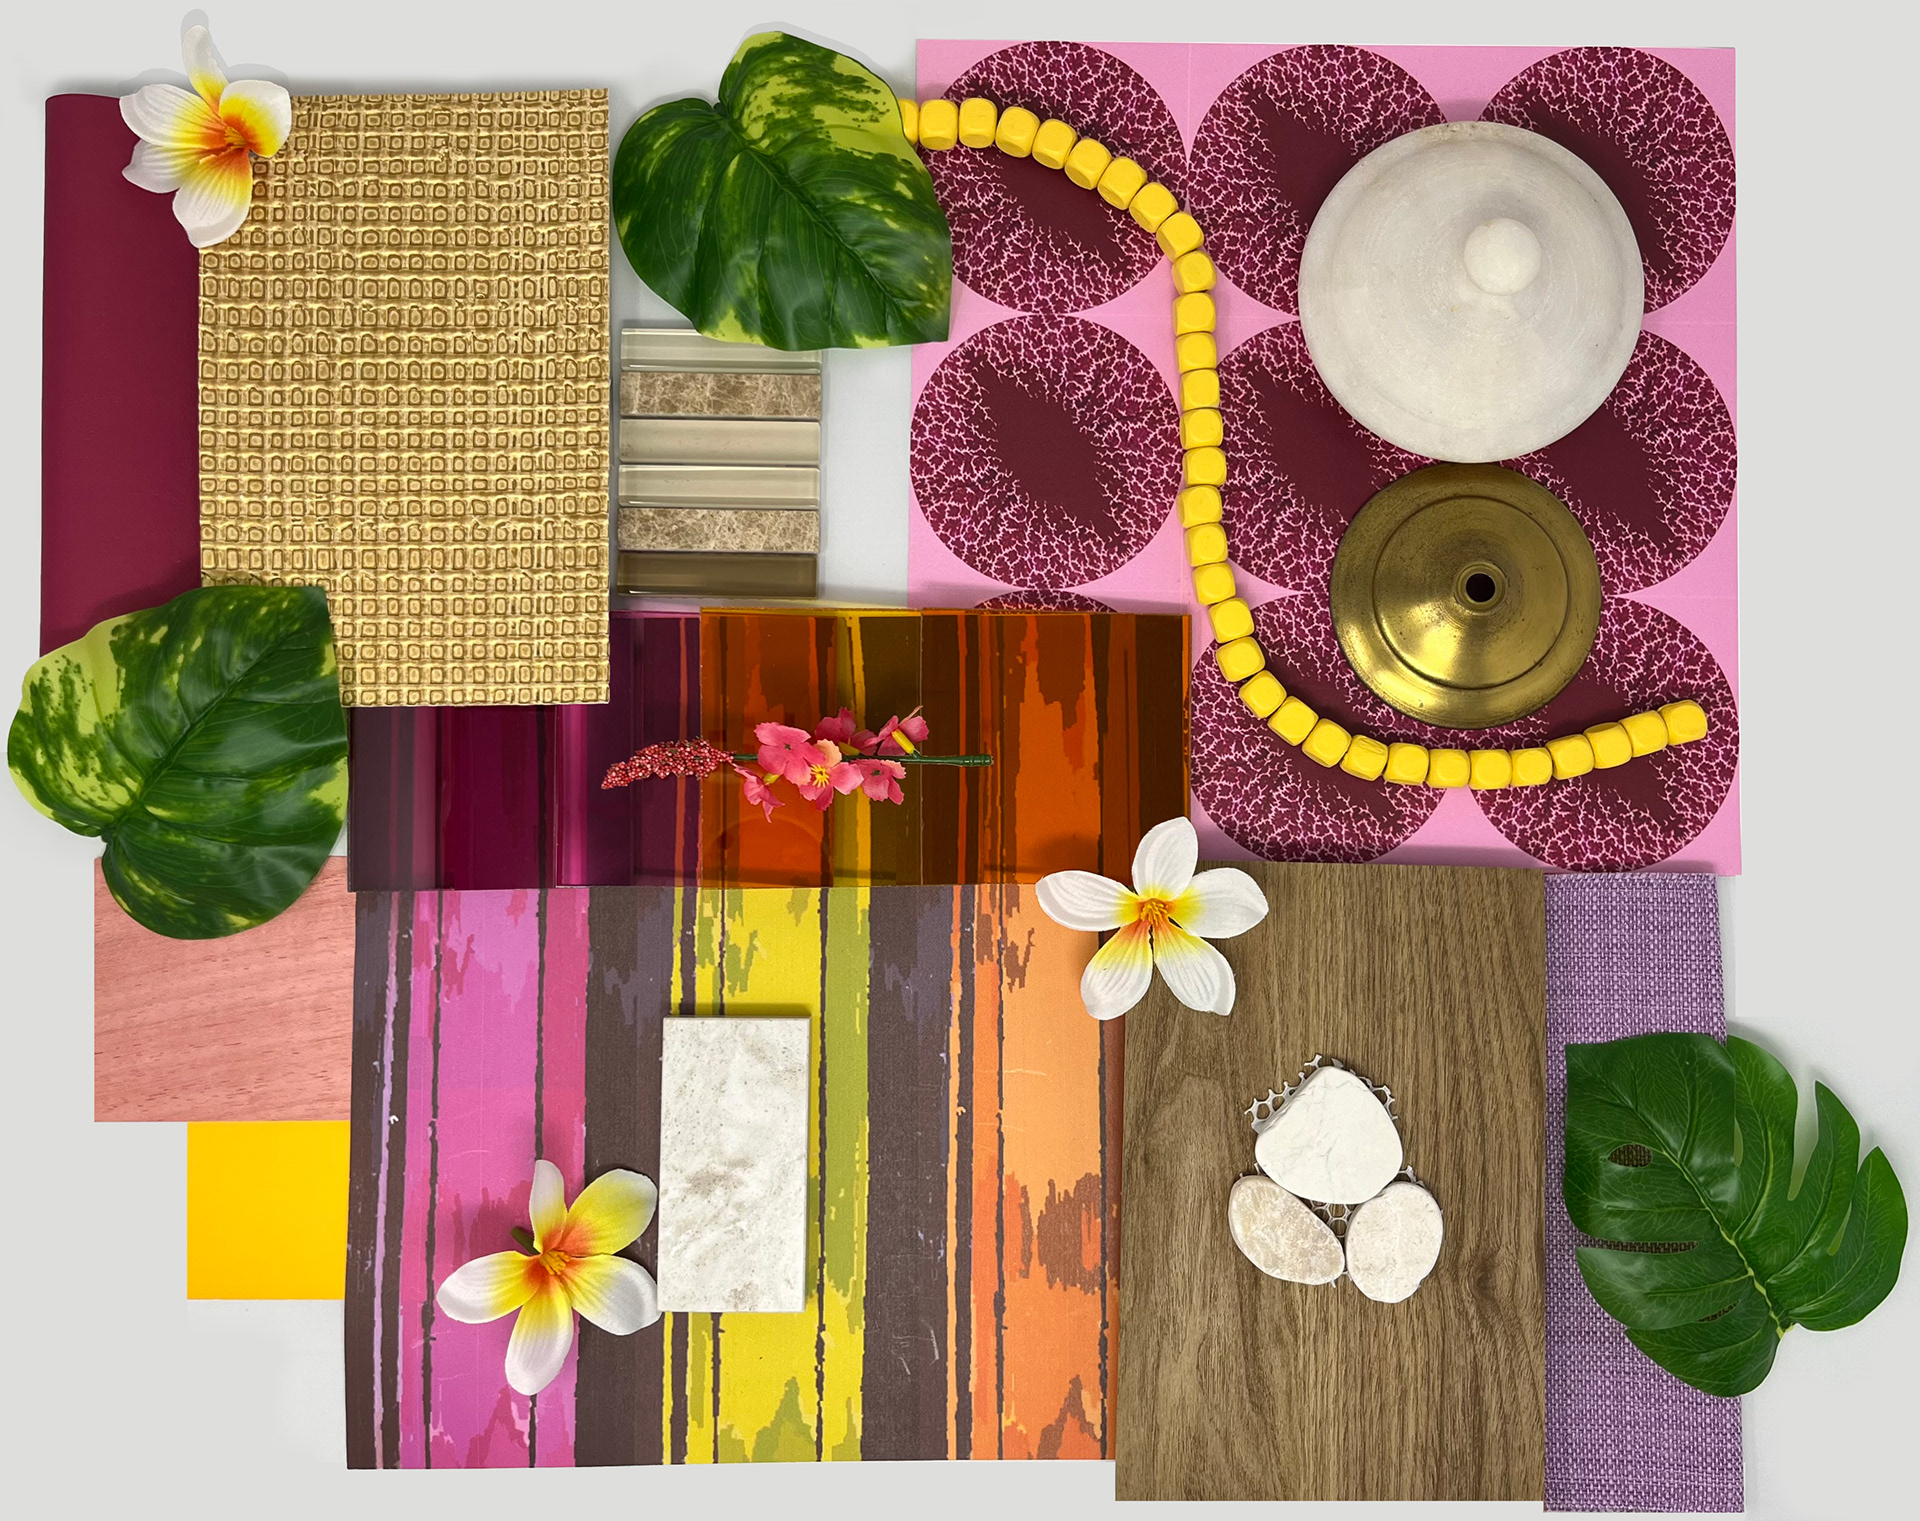
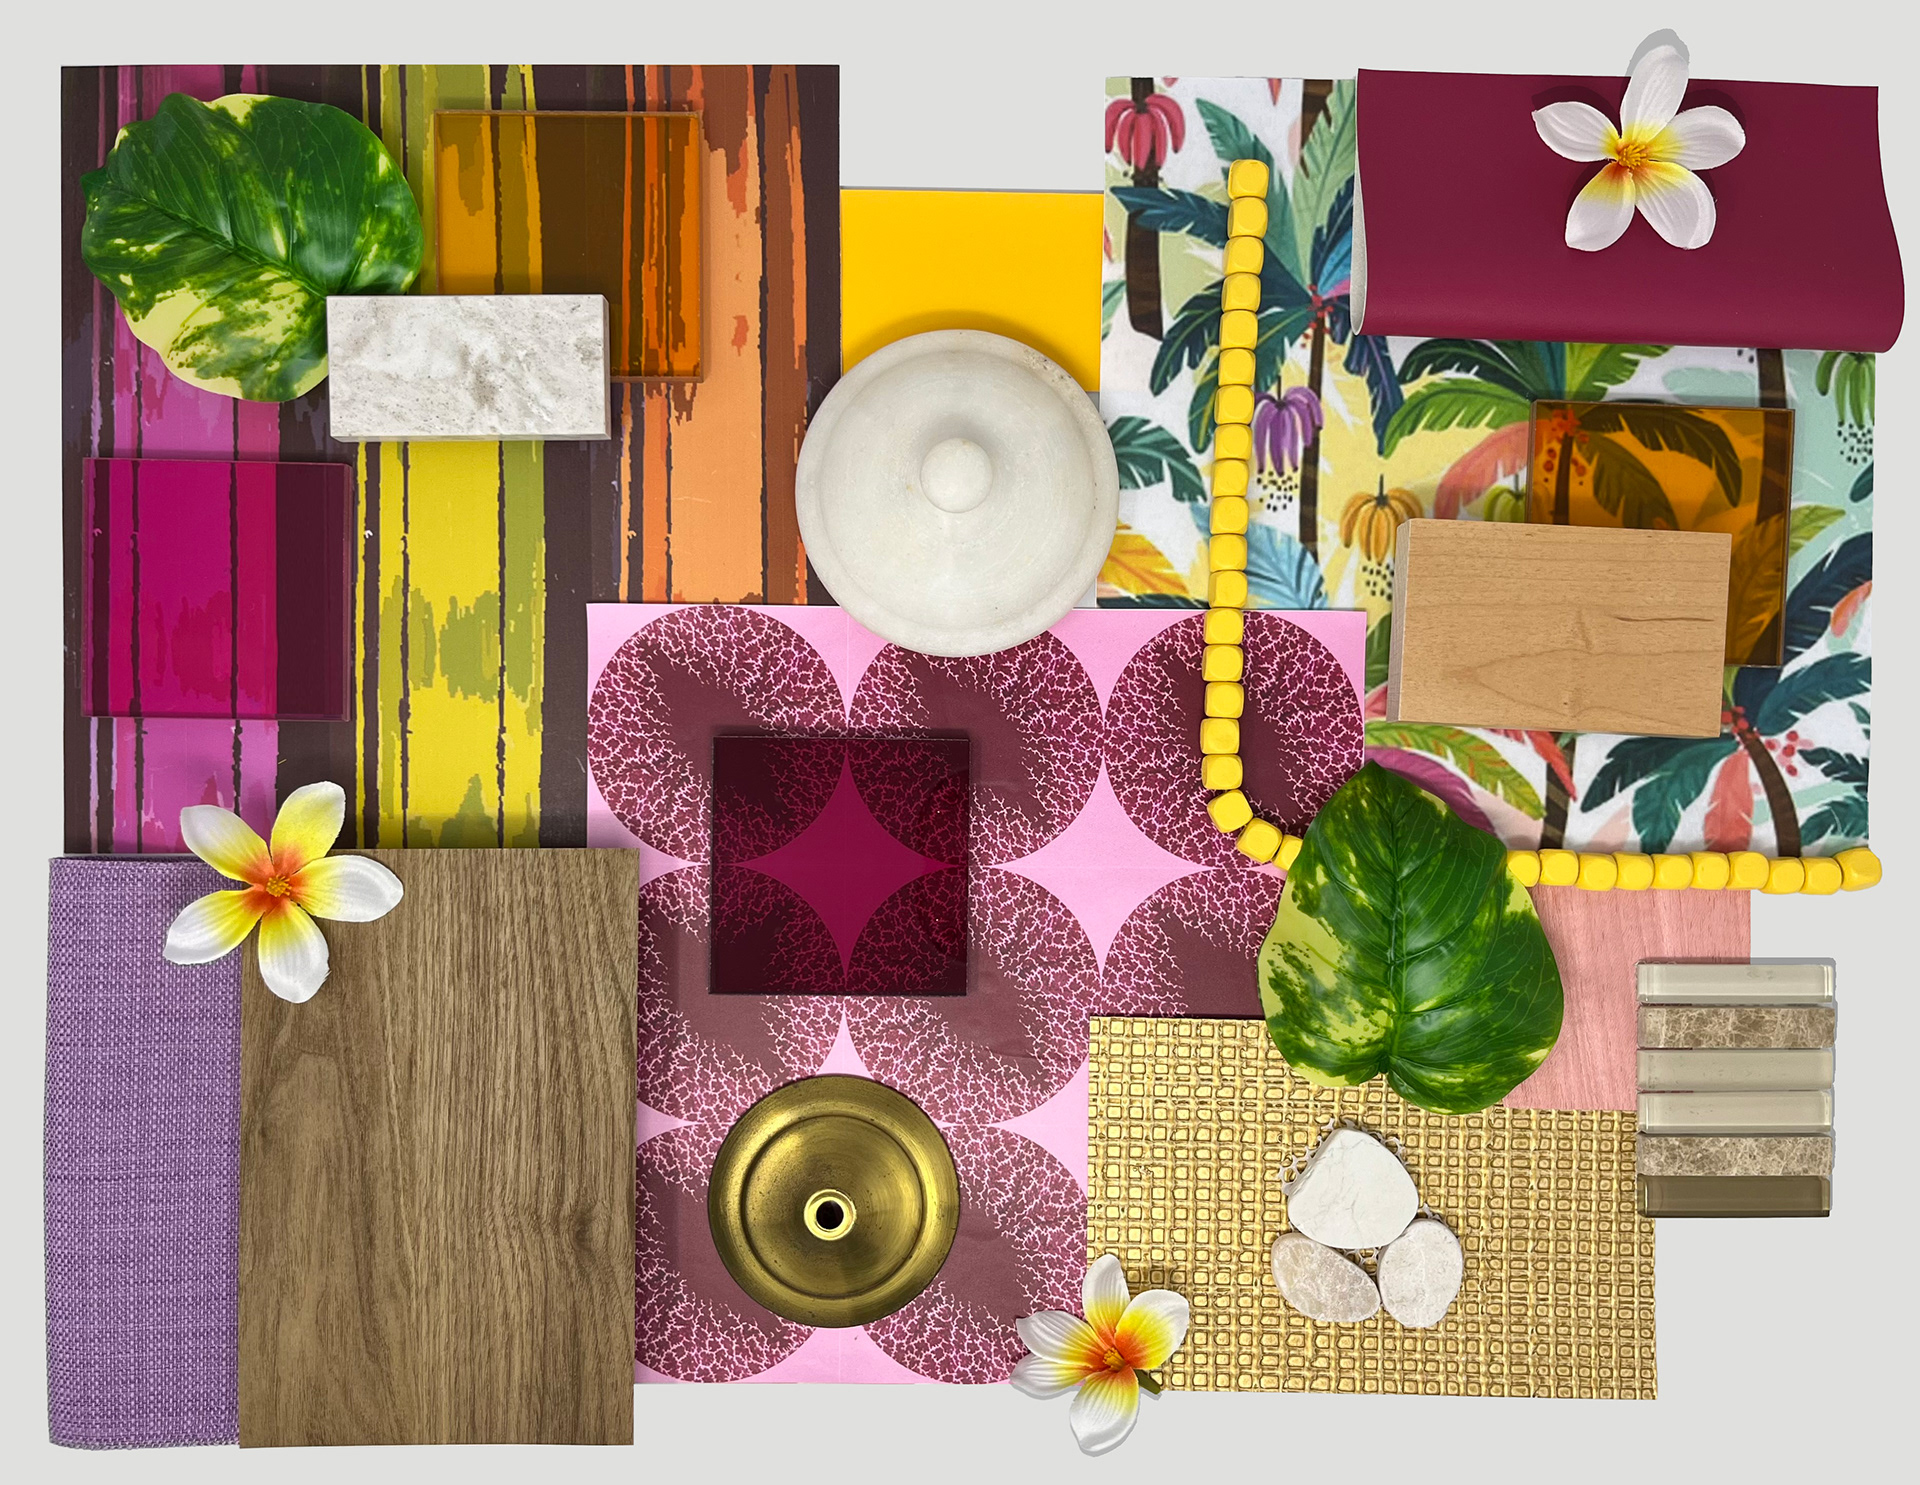
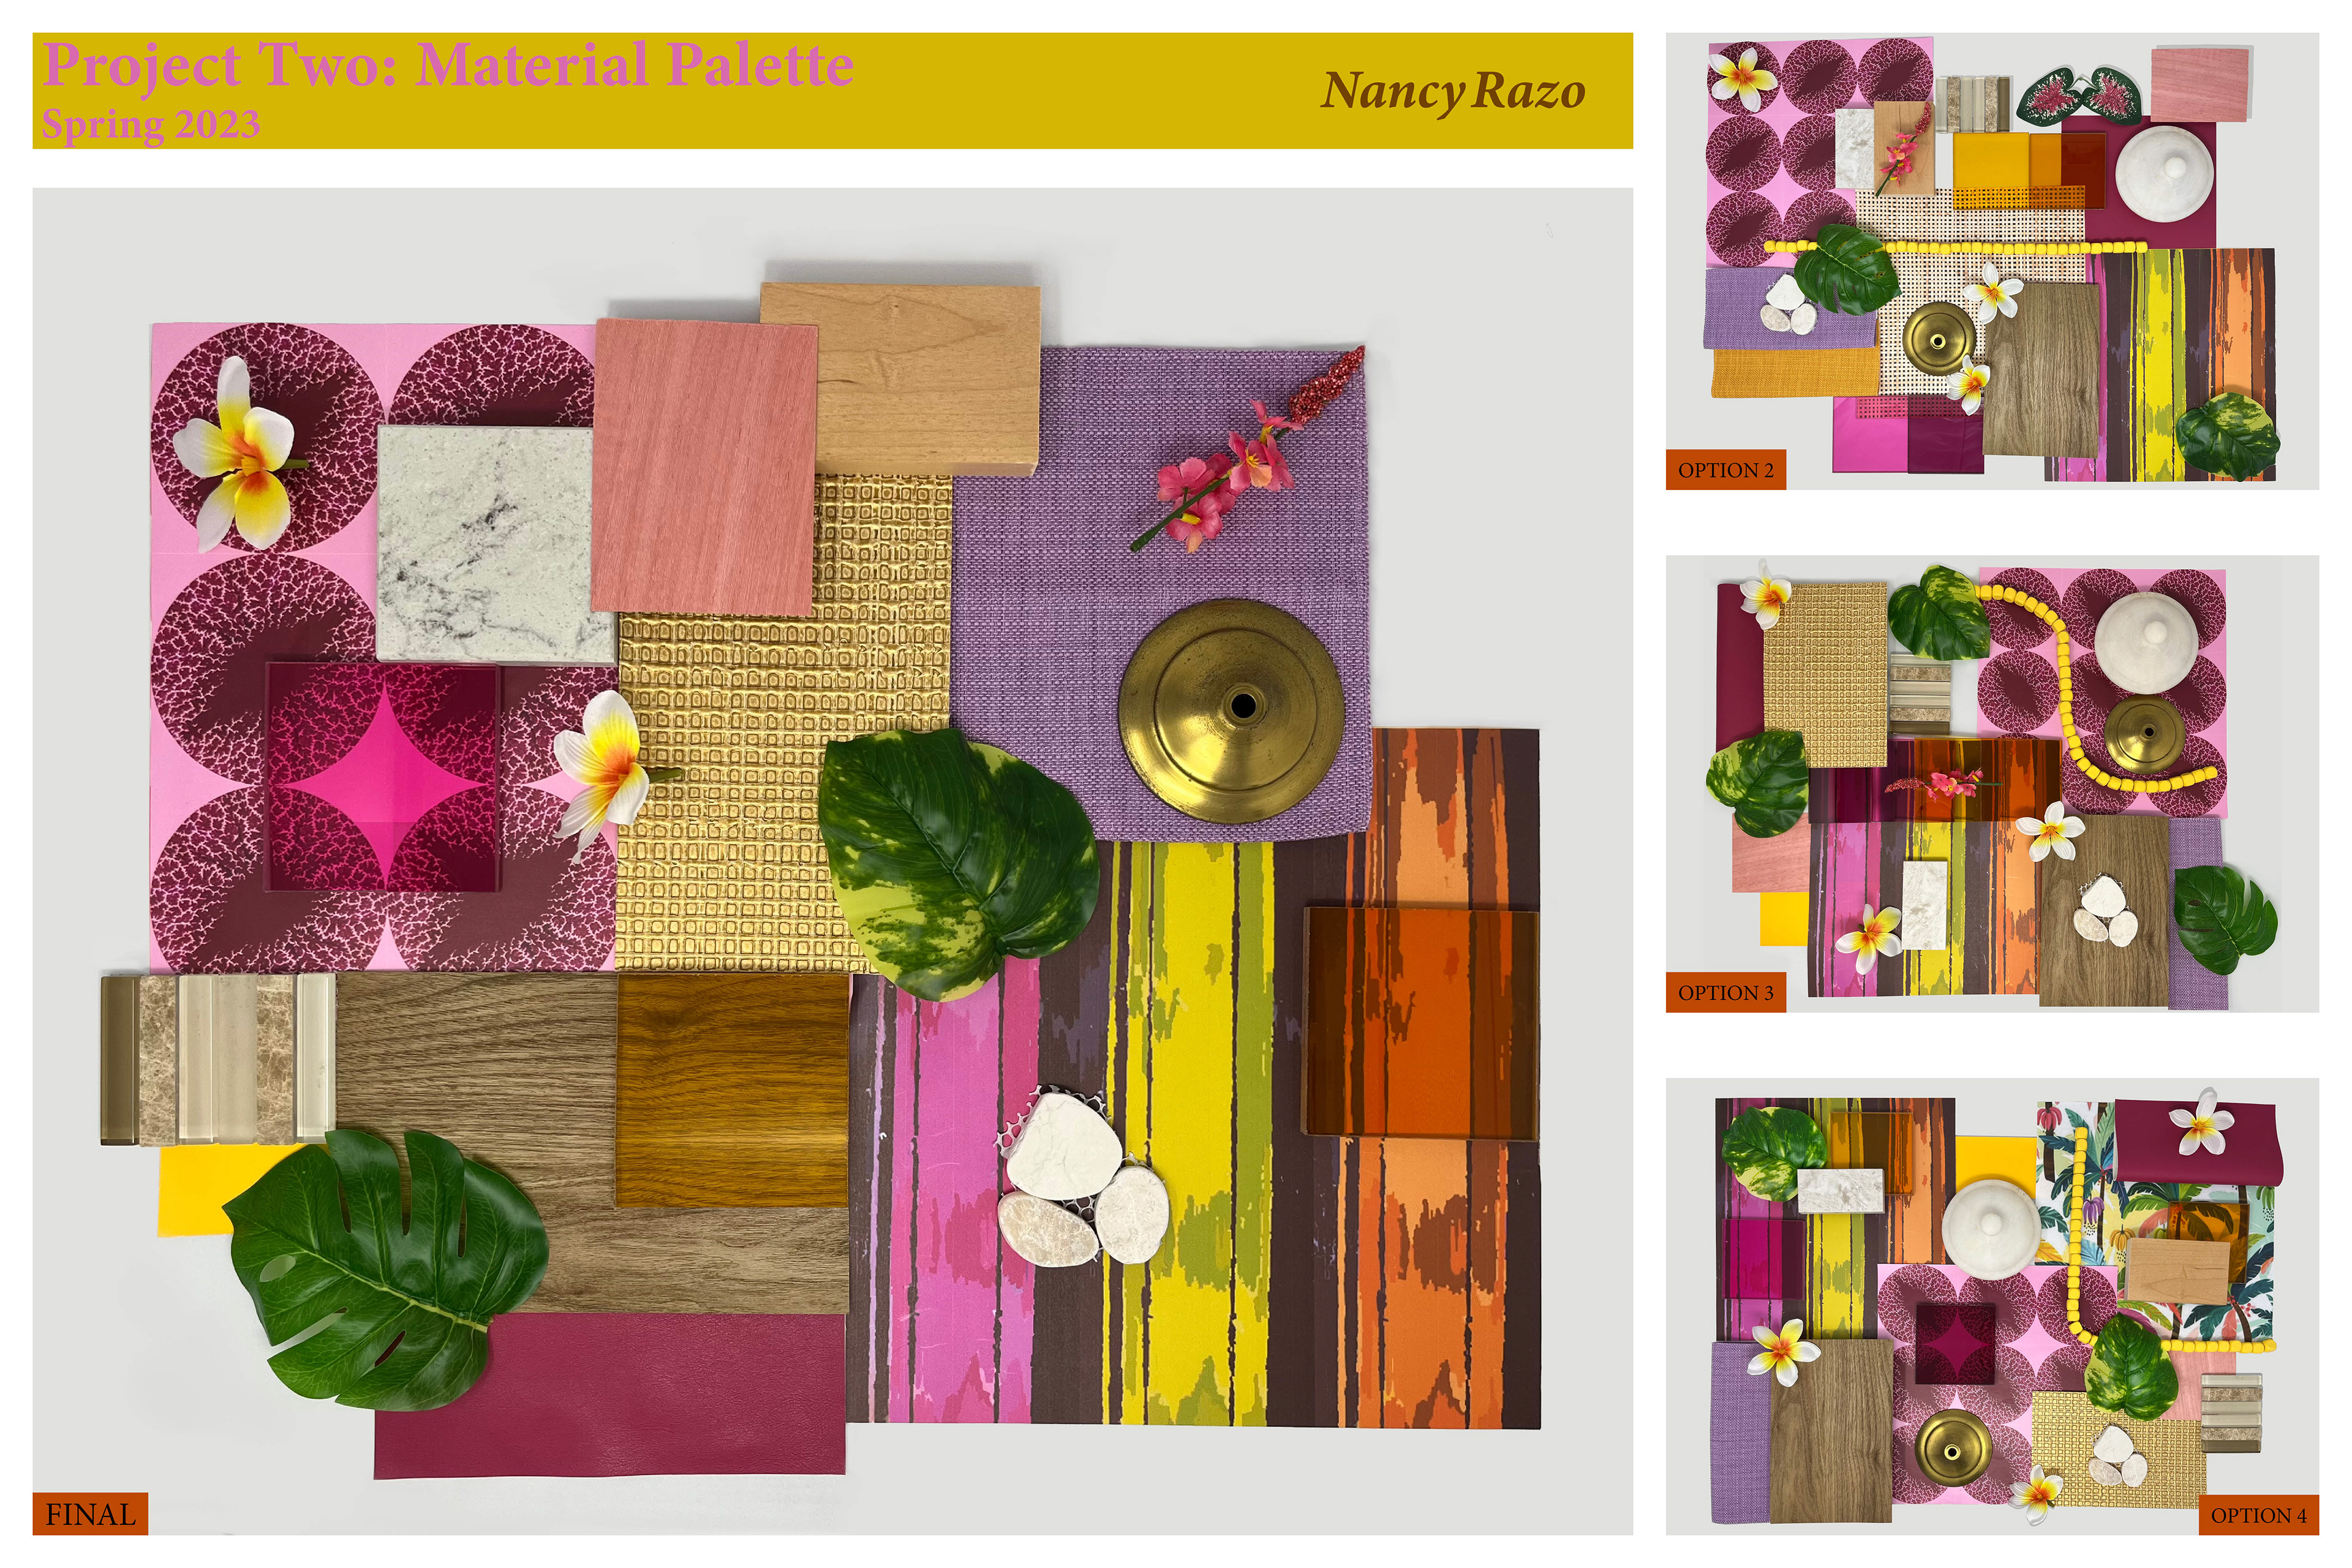
At this stage of the Hotel Project, I advanced in creating TWO real-life samples of my custom materials using the fabrication facility at my school. First was a vinyl wallcovering of the Brazilian Dutchman's Pipe pattern used on the guestroom TV wall. Second was a textile fabric of the Bromeliad Leaf Drapery used at the guestroom window. Then, I created FOUR professional & artistic compositions of my material palette by exploring various options of photography, photoshop placement, lighting, and background color. I selected the first composition as my final palette because it appears far cleaner, and crisper compared to the other options. I also believe that the distribution of color is more balanced. Lastly, I created a 24" x 36" InDesign board of the options studied to present in class.
The second part of this stage consisted of selecting FIVE guestroom materials for specifications, TWO of which must be custom to align with MAMA SHELTER.
Custom Material 1 - Brazilian Dutchman's Pipe (Vinyl Wallcovering)
Custom Material 2 - Bromeliad Leaf (Drapery)
MATERIAL PALETTES & PRESENTATION BOARD
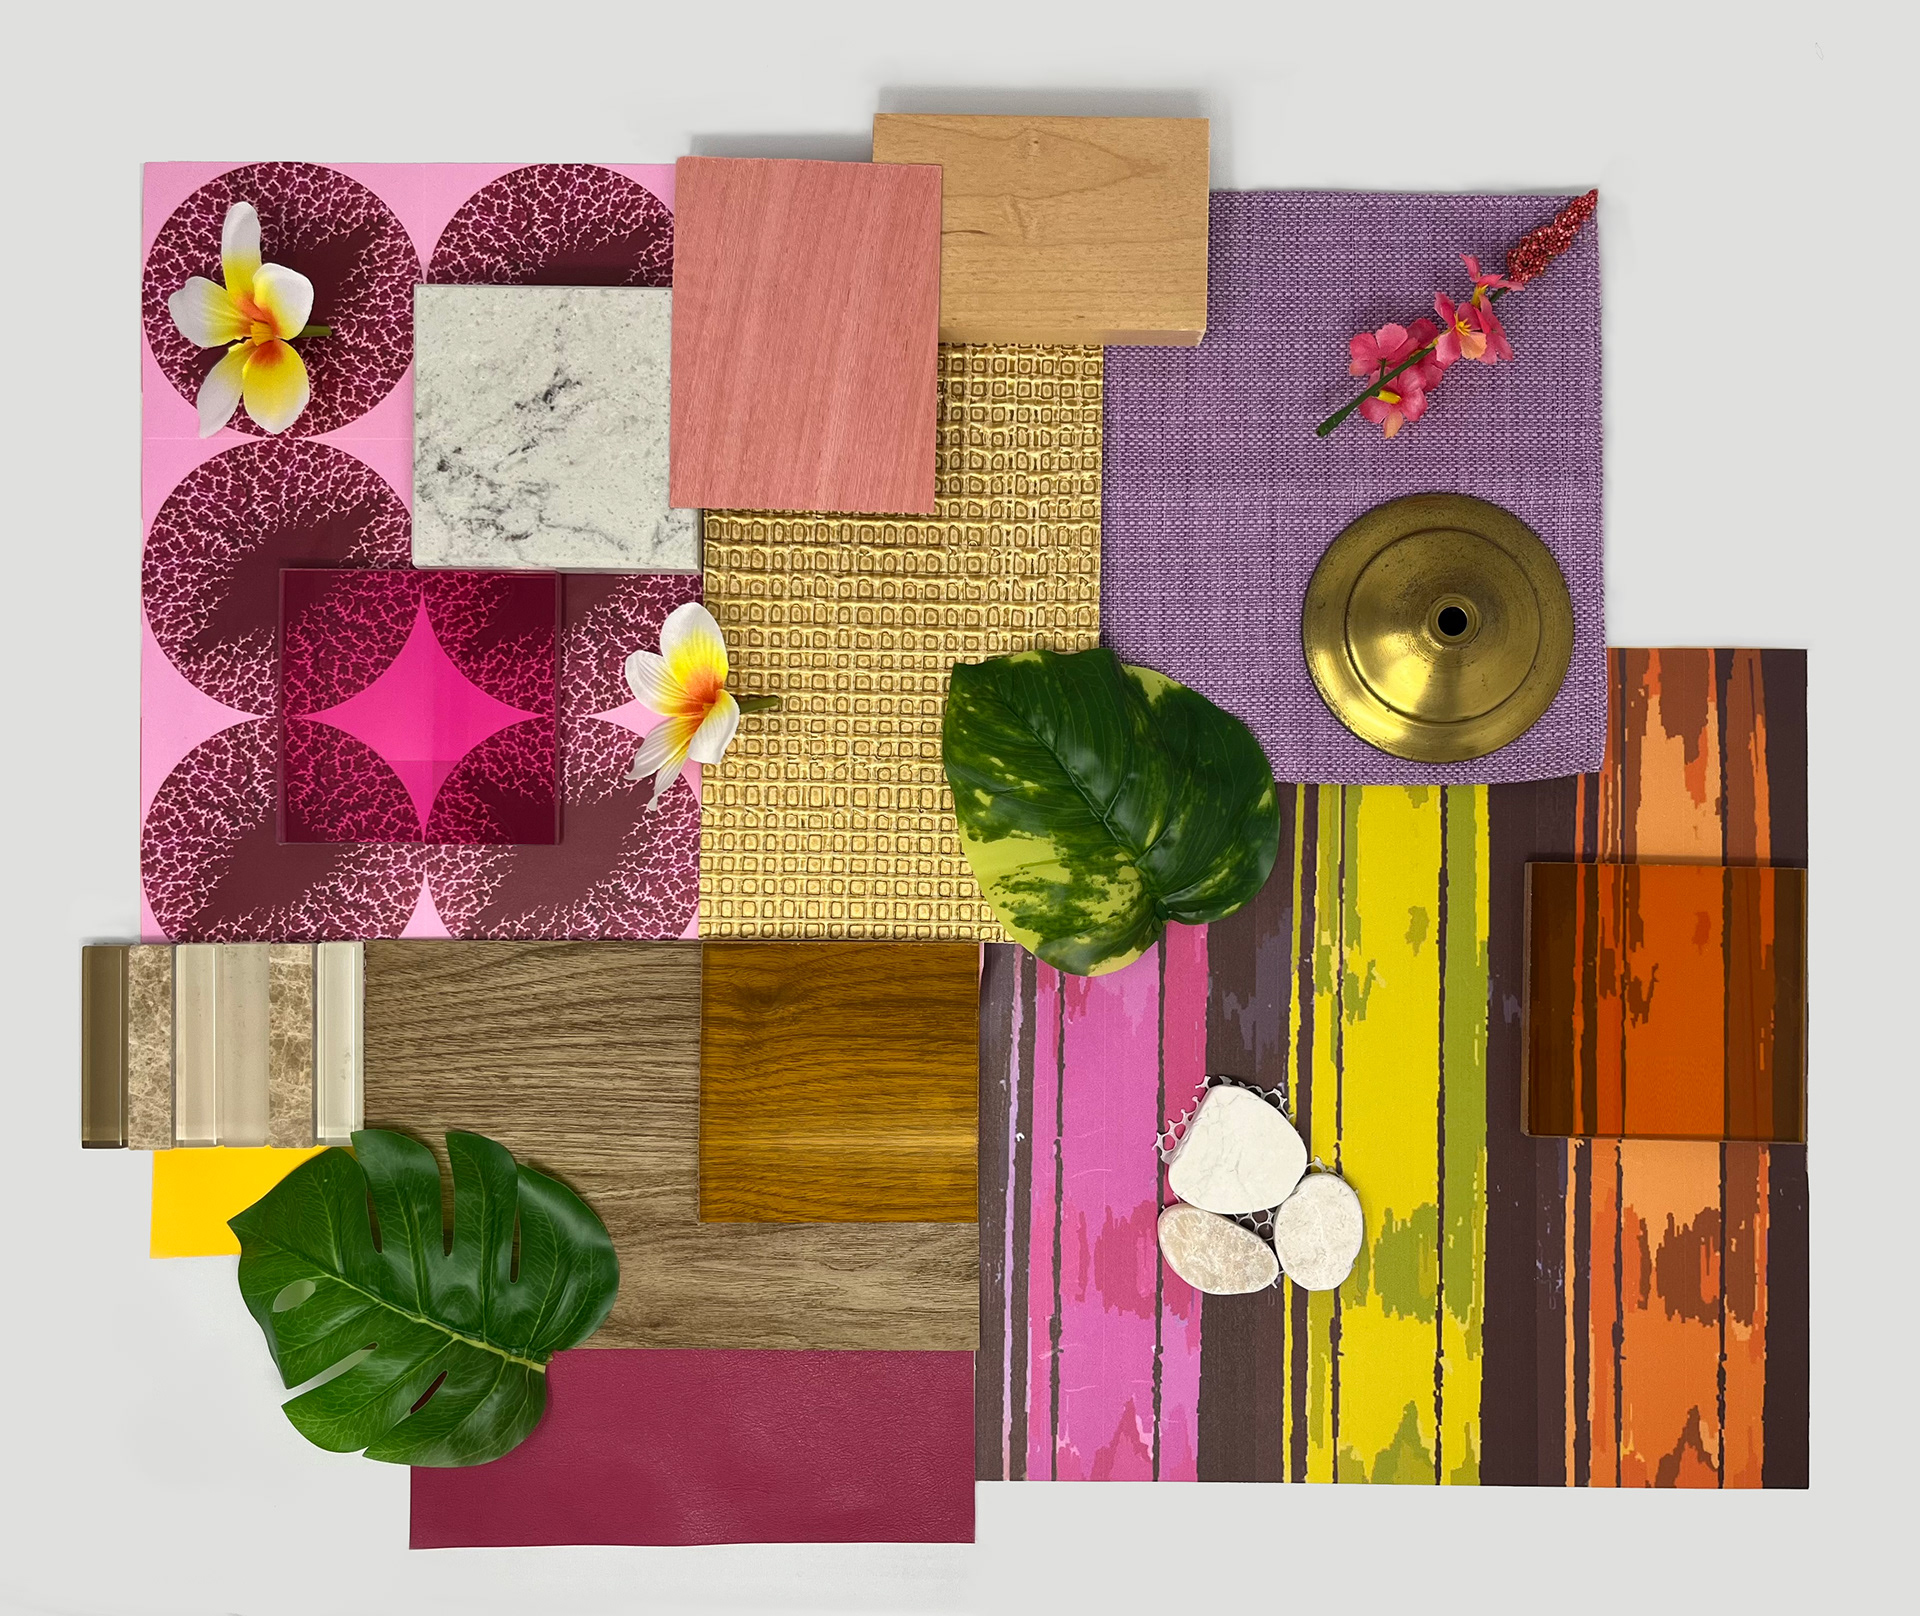
Composition 1
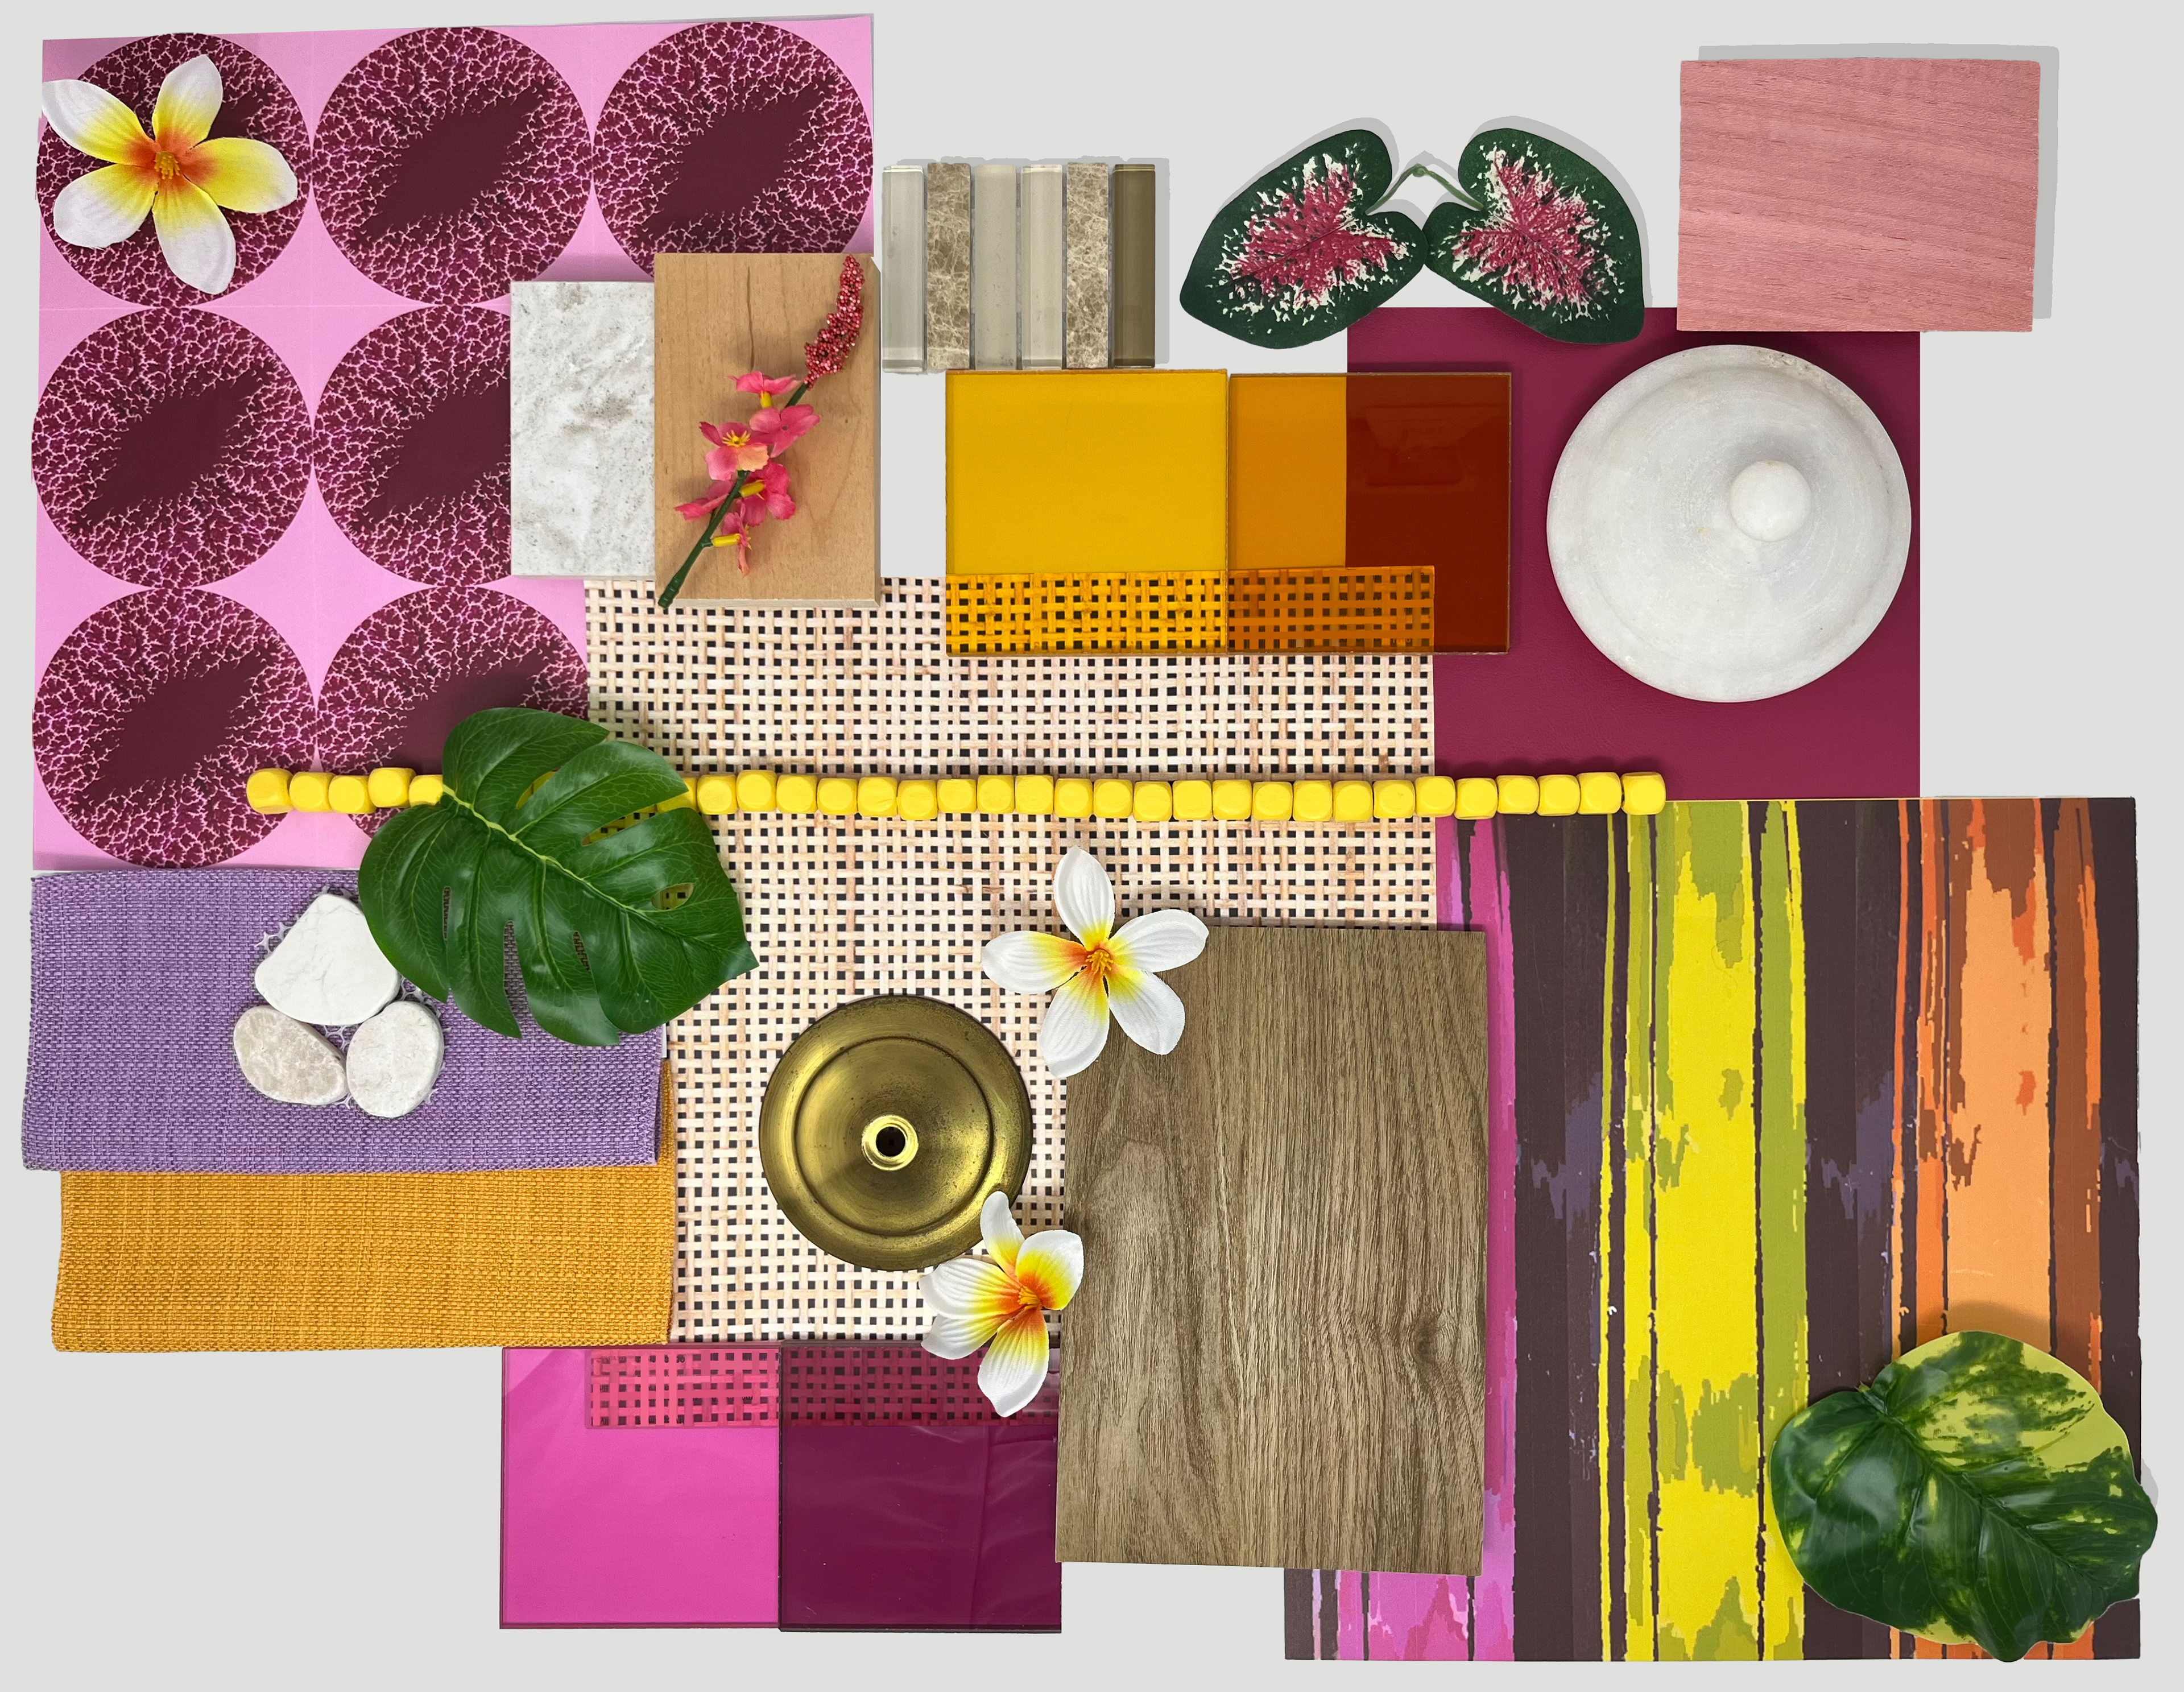
Composition 2
Composition 3
Composition 4
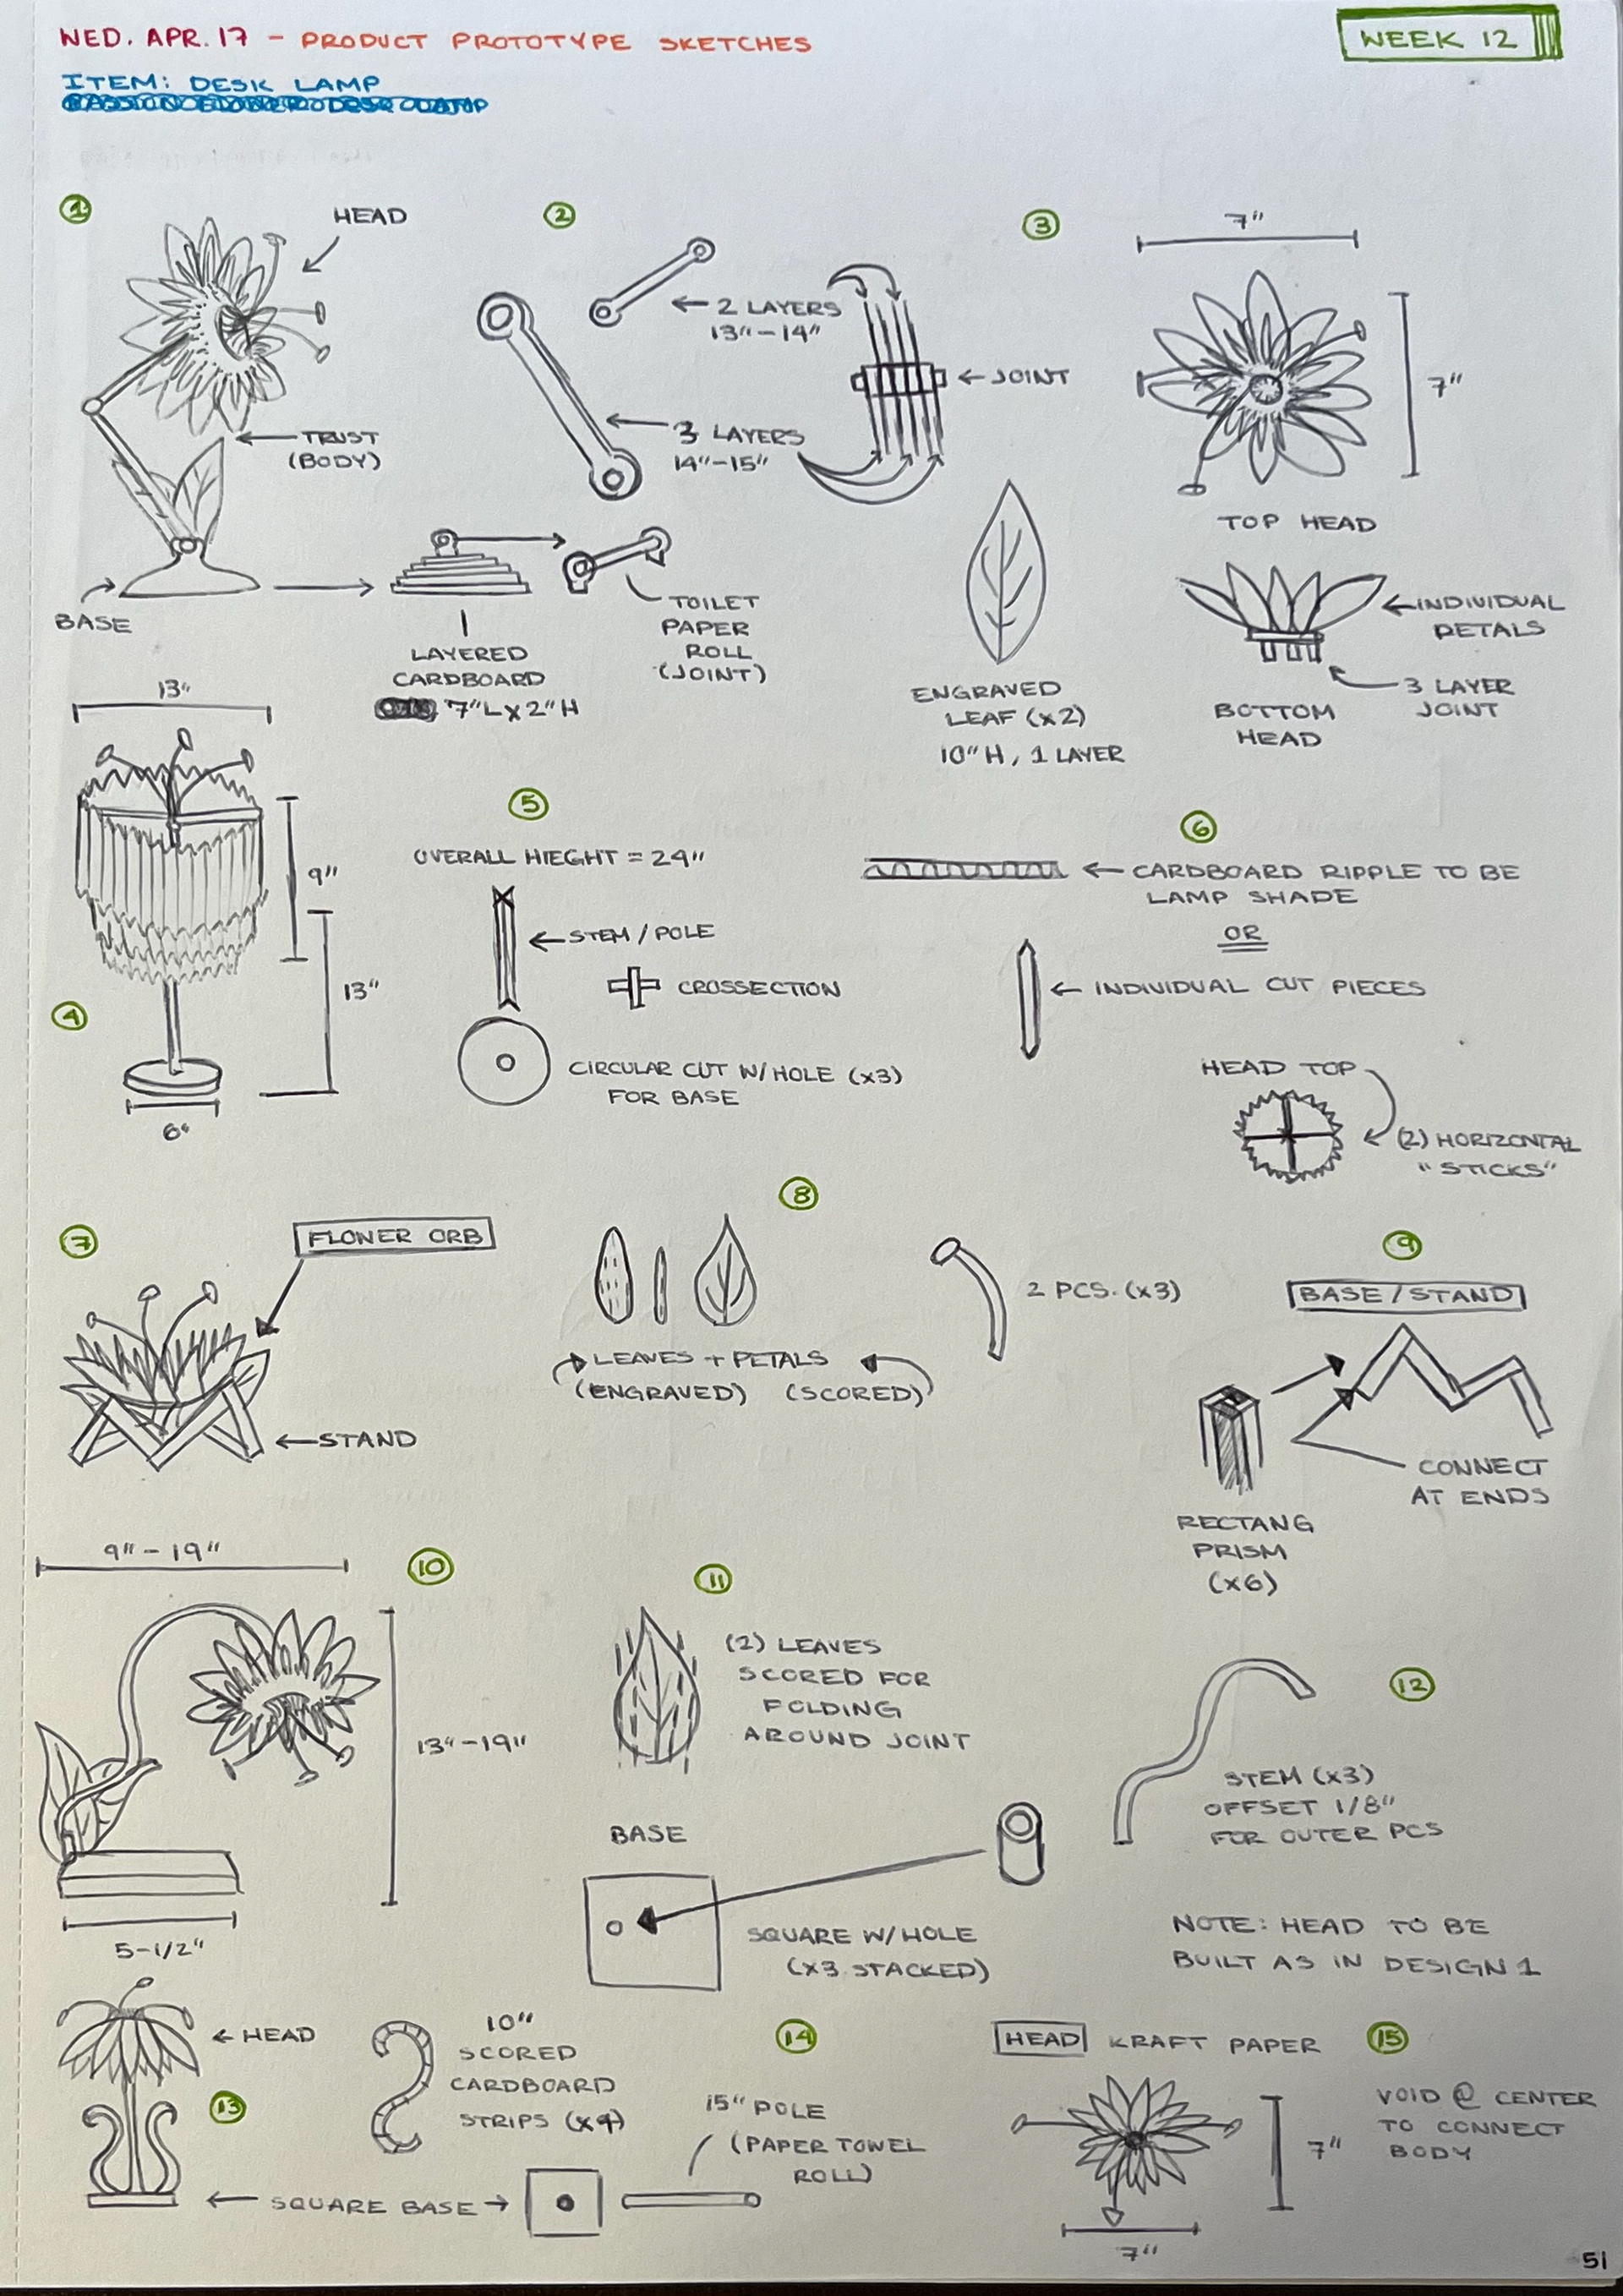
product Prototype
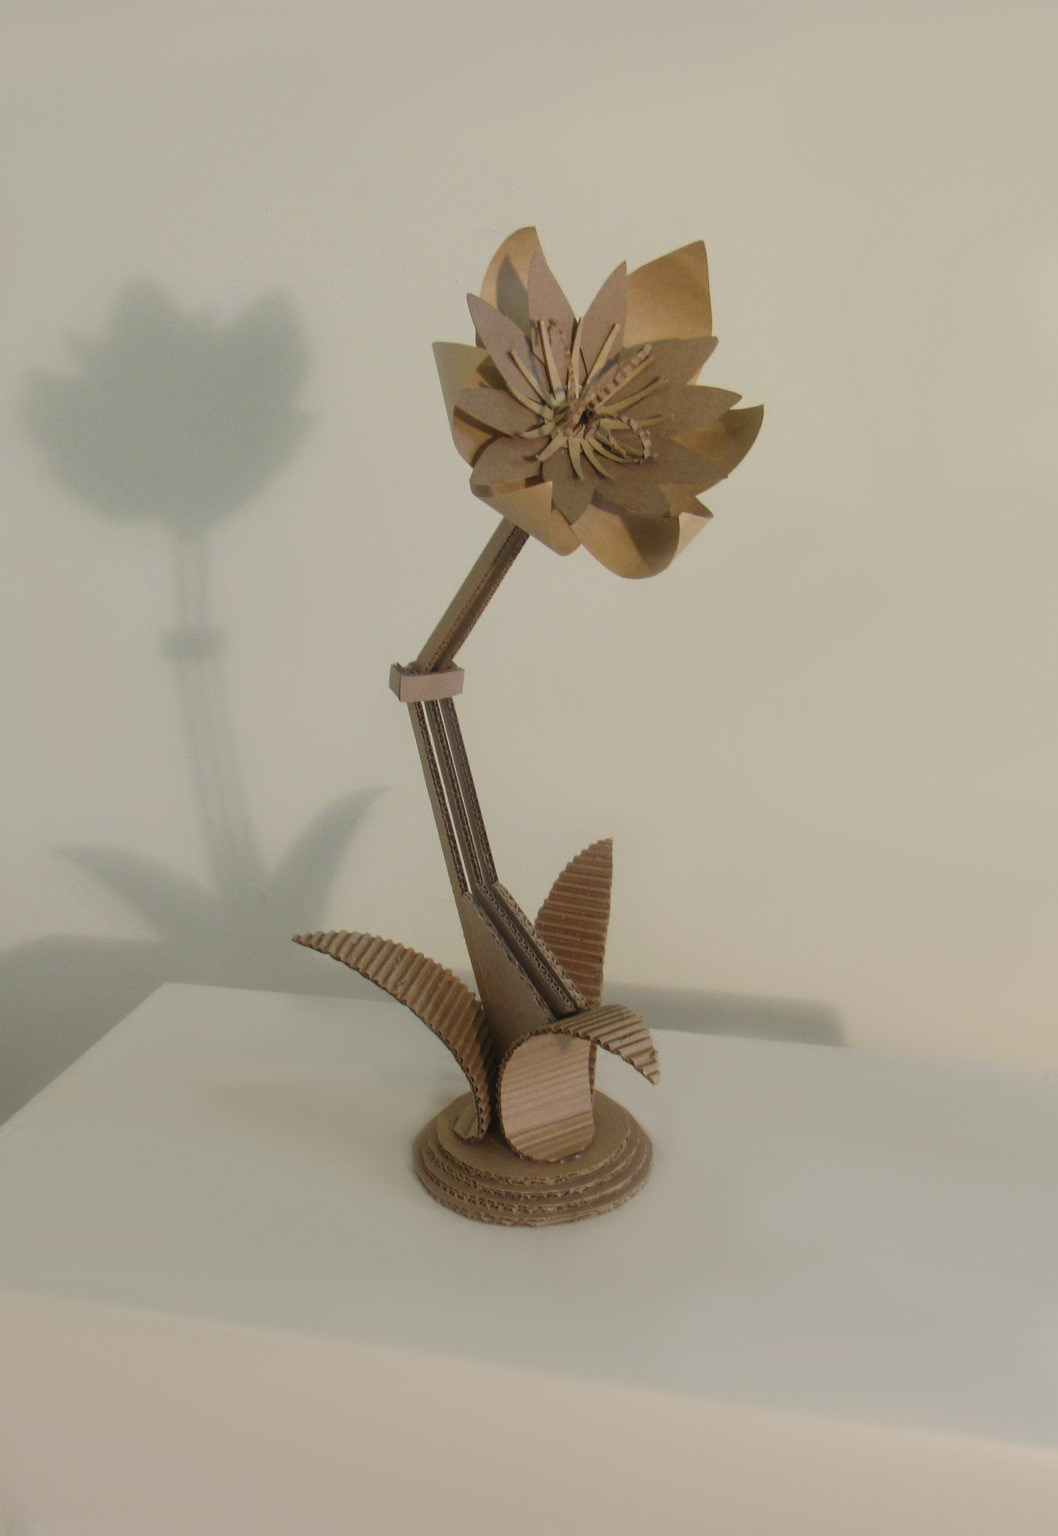
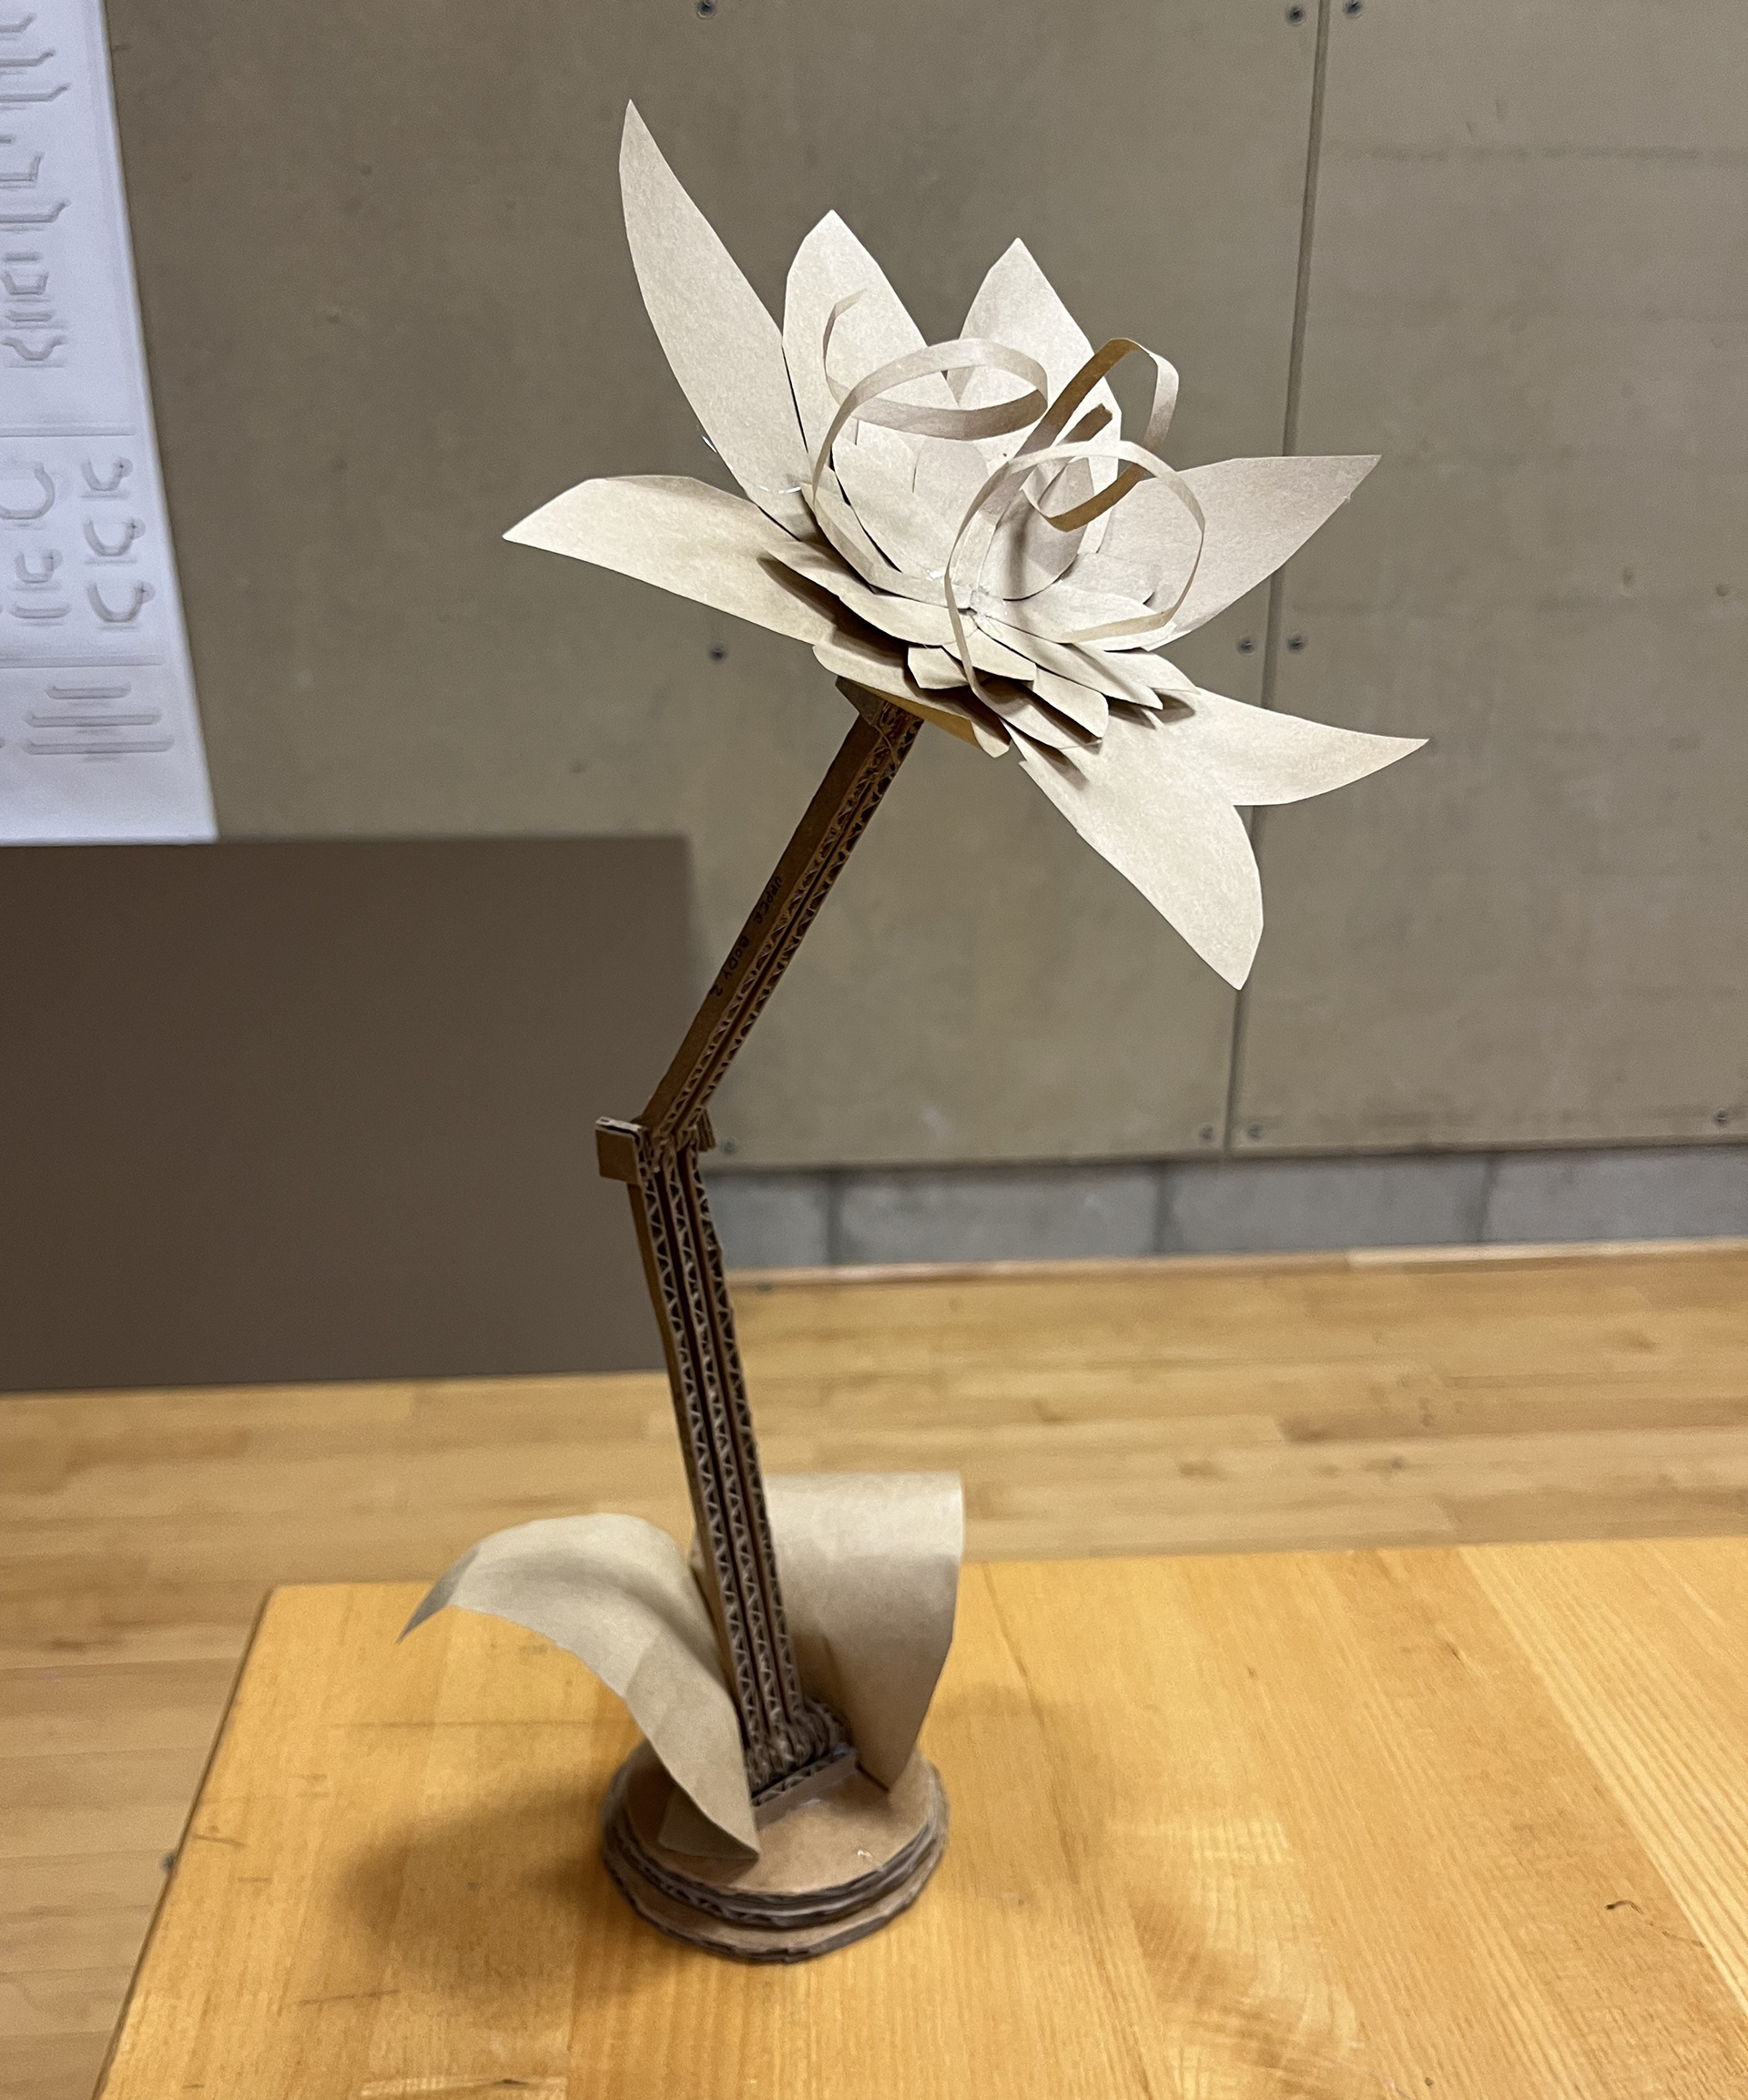
I selected ONE custom product (desk lamp) from the guestroom design to bring to a full-scale prototype. I started off drawing 15 free-hand sketches of the design, considering the joinery, size, and shape. I made four different models and chose to recreate the top option (see sketchbook). Then, I proceeded to create a "miniature" mock-up of the item to study the scale. This would help in determine the ideal cardboard thickness for my final product and make adjustments if need be. To ensure that my idea of the joinery and weight distribution worked, I made the mock-up at 1/2"=1'-0" scale. Lastly, I repeat the same process for the full-scale model documenting my work along the way.
MINI PROTOTYPE PROCESS
(1) I created a cardboard template of the item at 1/2"=1'-0" scale.
(2) I drilled holes through the joints to allow room for a rolled-up piece of craft paper.
(3) I cut the template using a box cutter and glued the base with hot glue.
(4) I assembled the joints using a rolled-up piece of craft paper, cutting off any excess.
(5) I attached the body to the base and head of the lamp, hiding seams with cardboard scraps.
(6) I cut flower details out of craft paper and glued them to the mock-up where necessary.
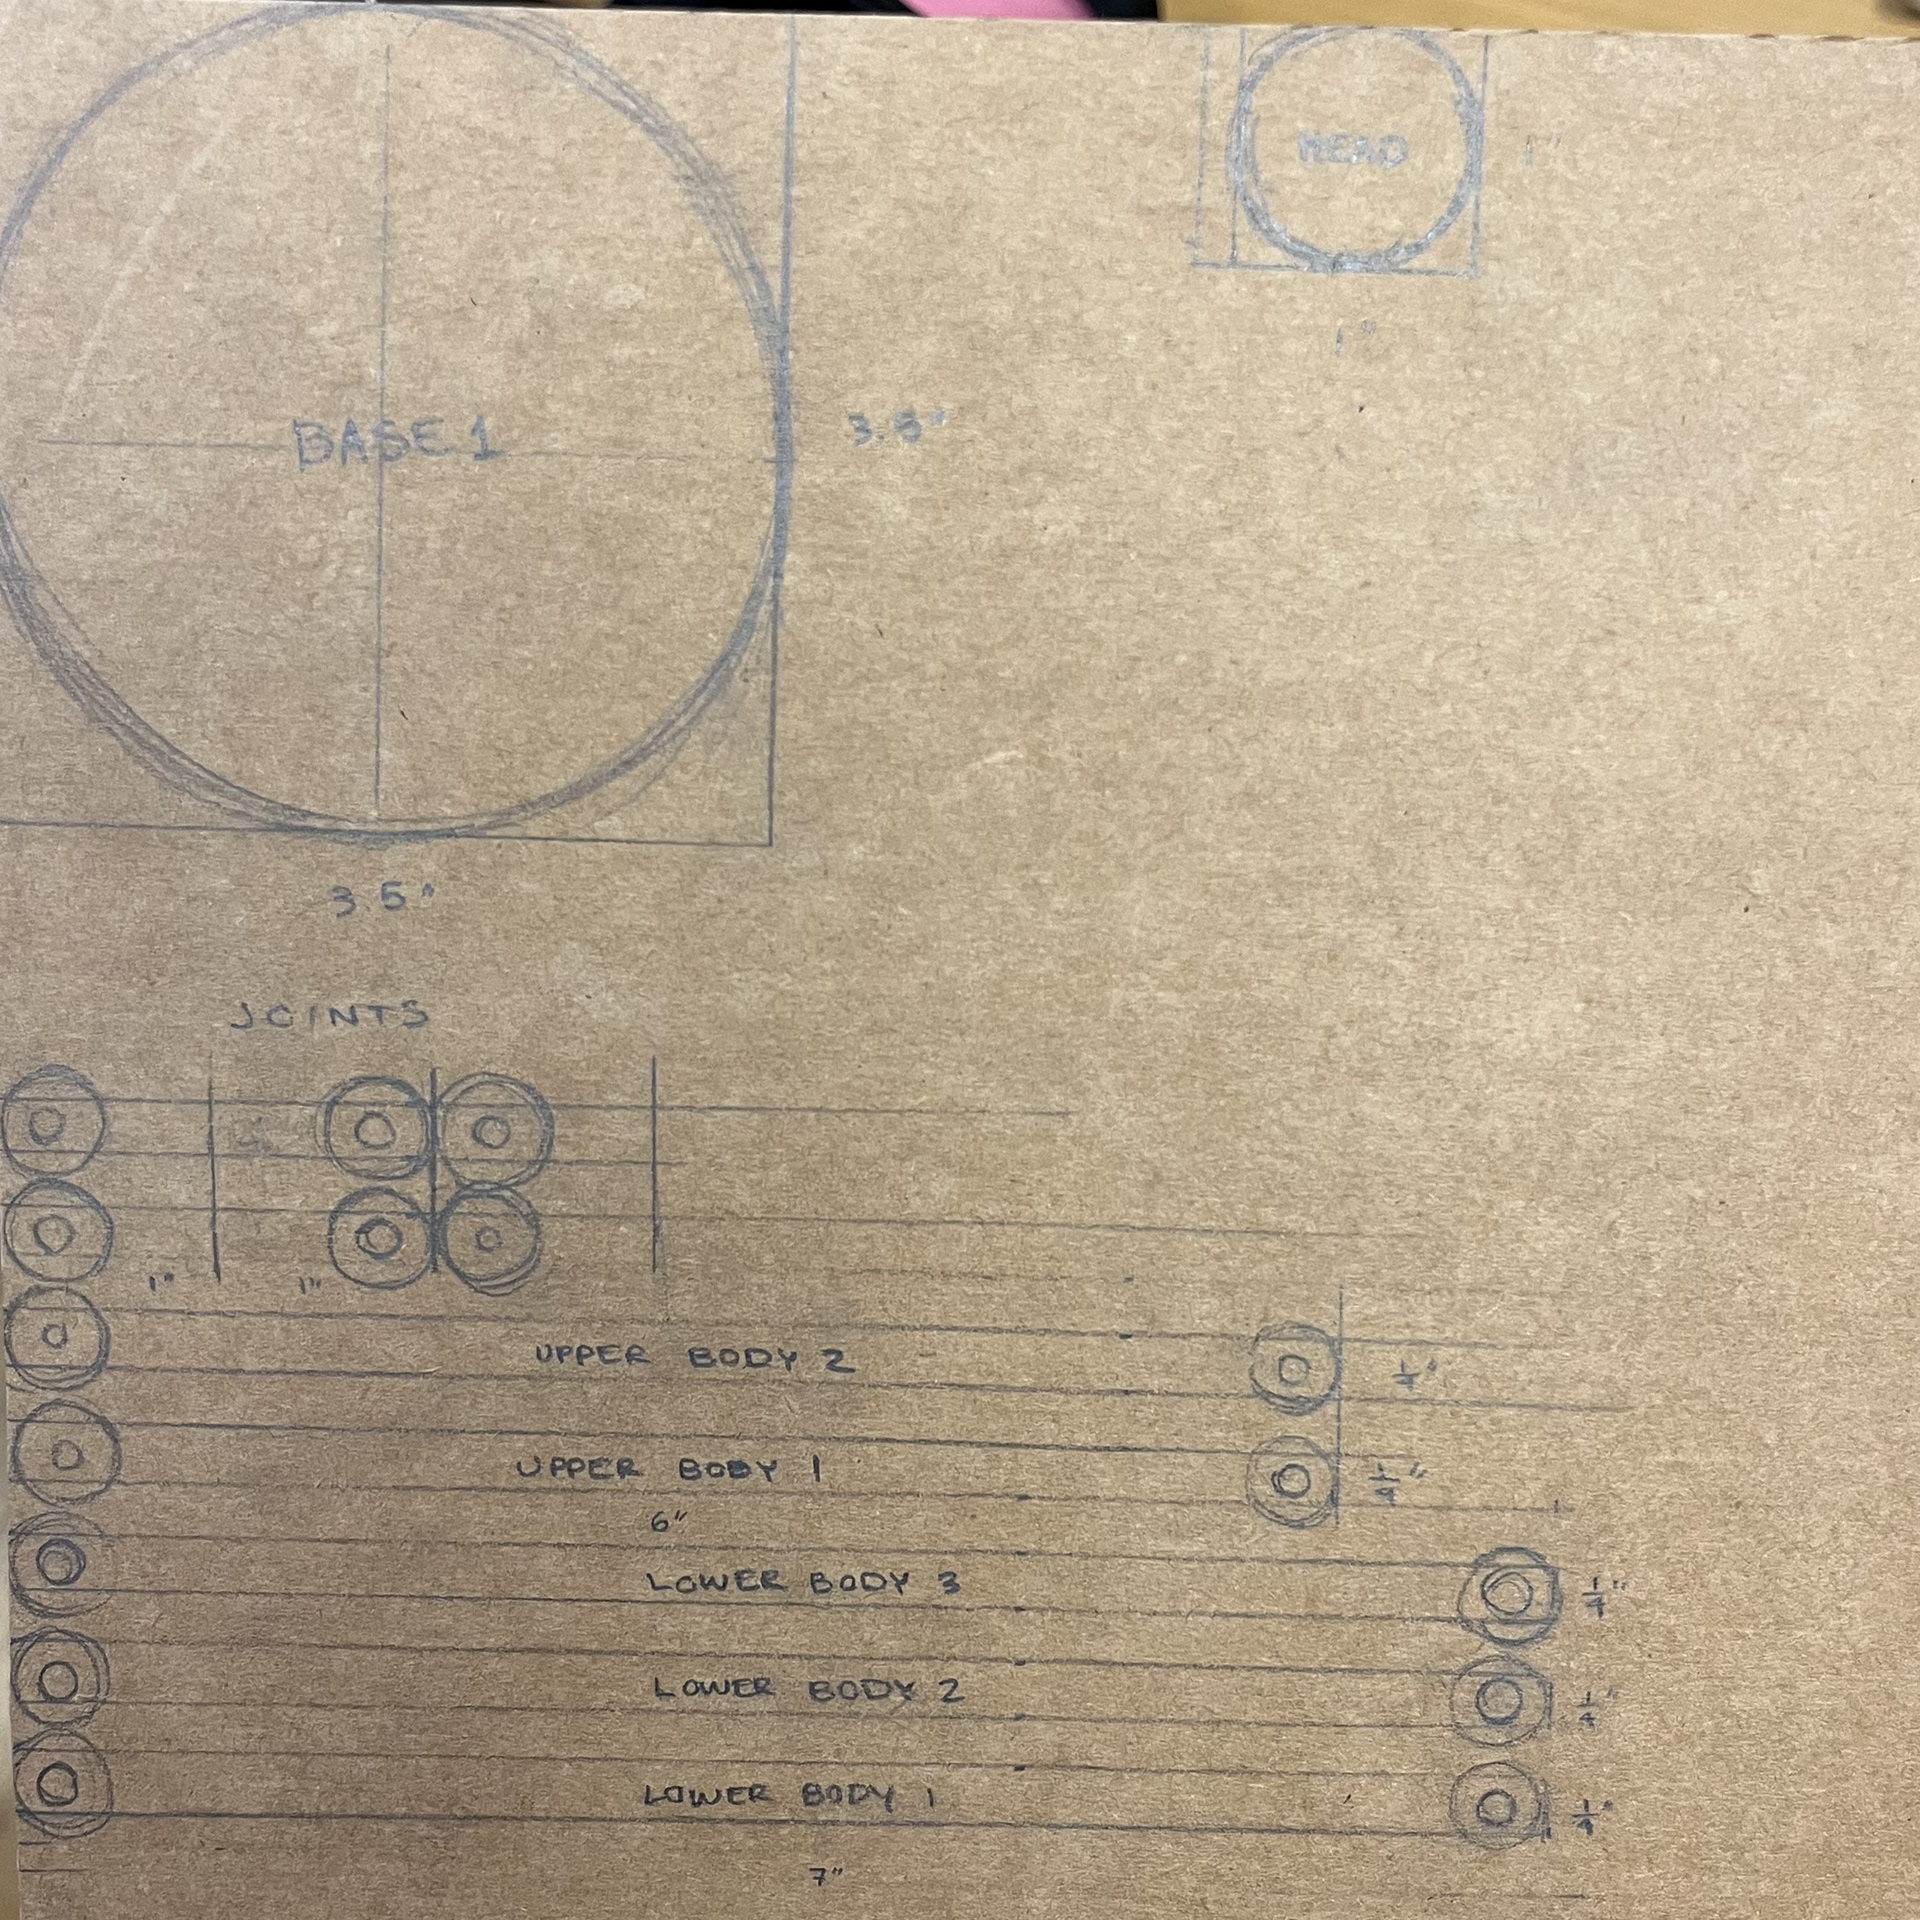
Cardboard Template at 1/2"=1'-0" scale
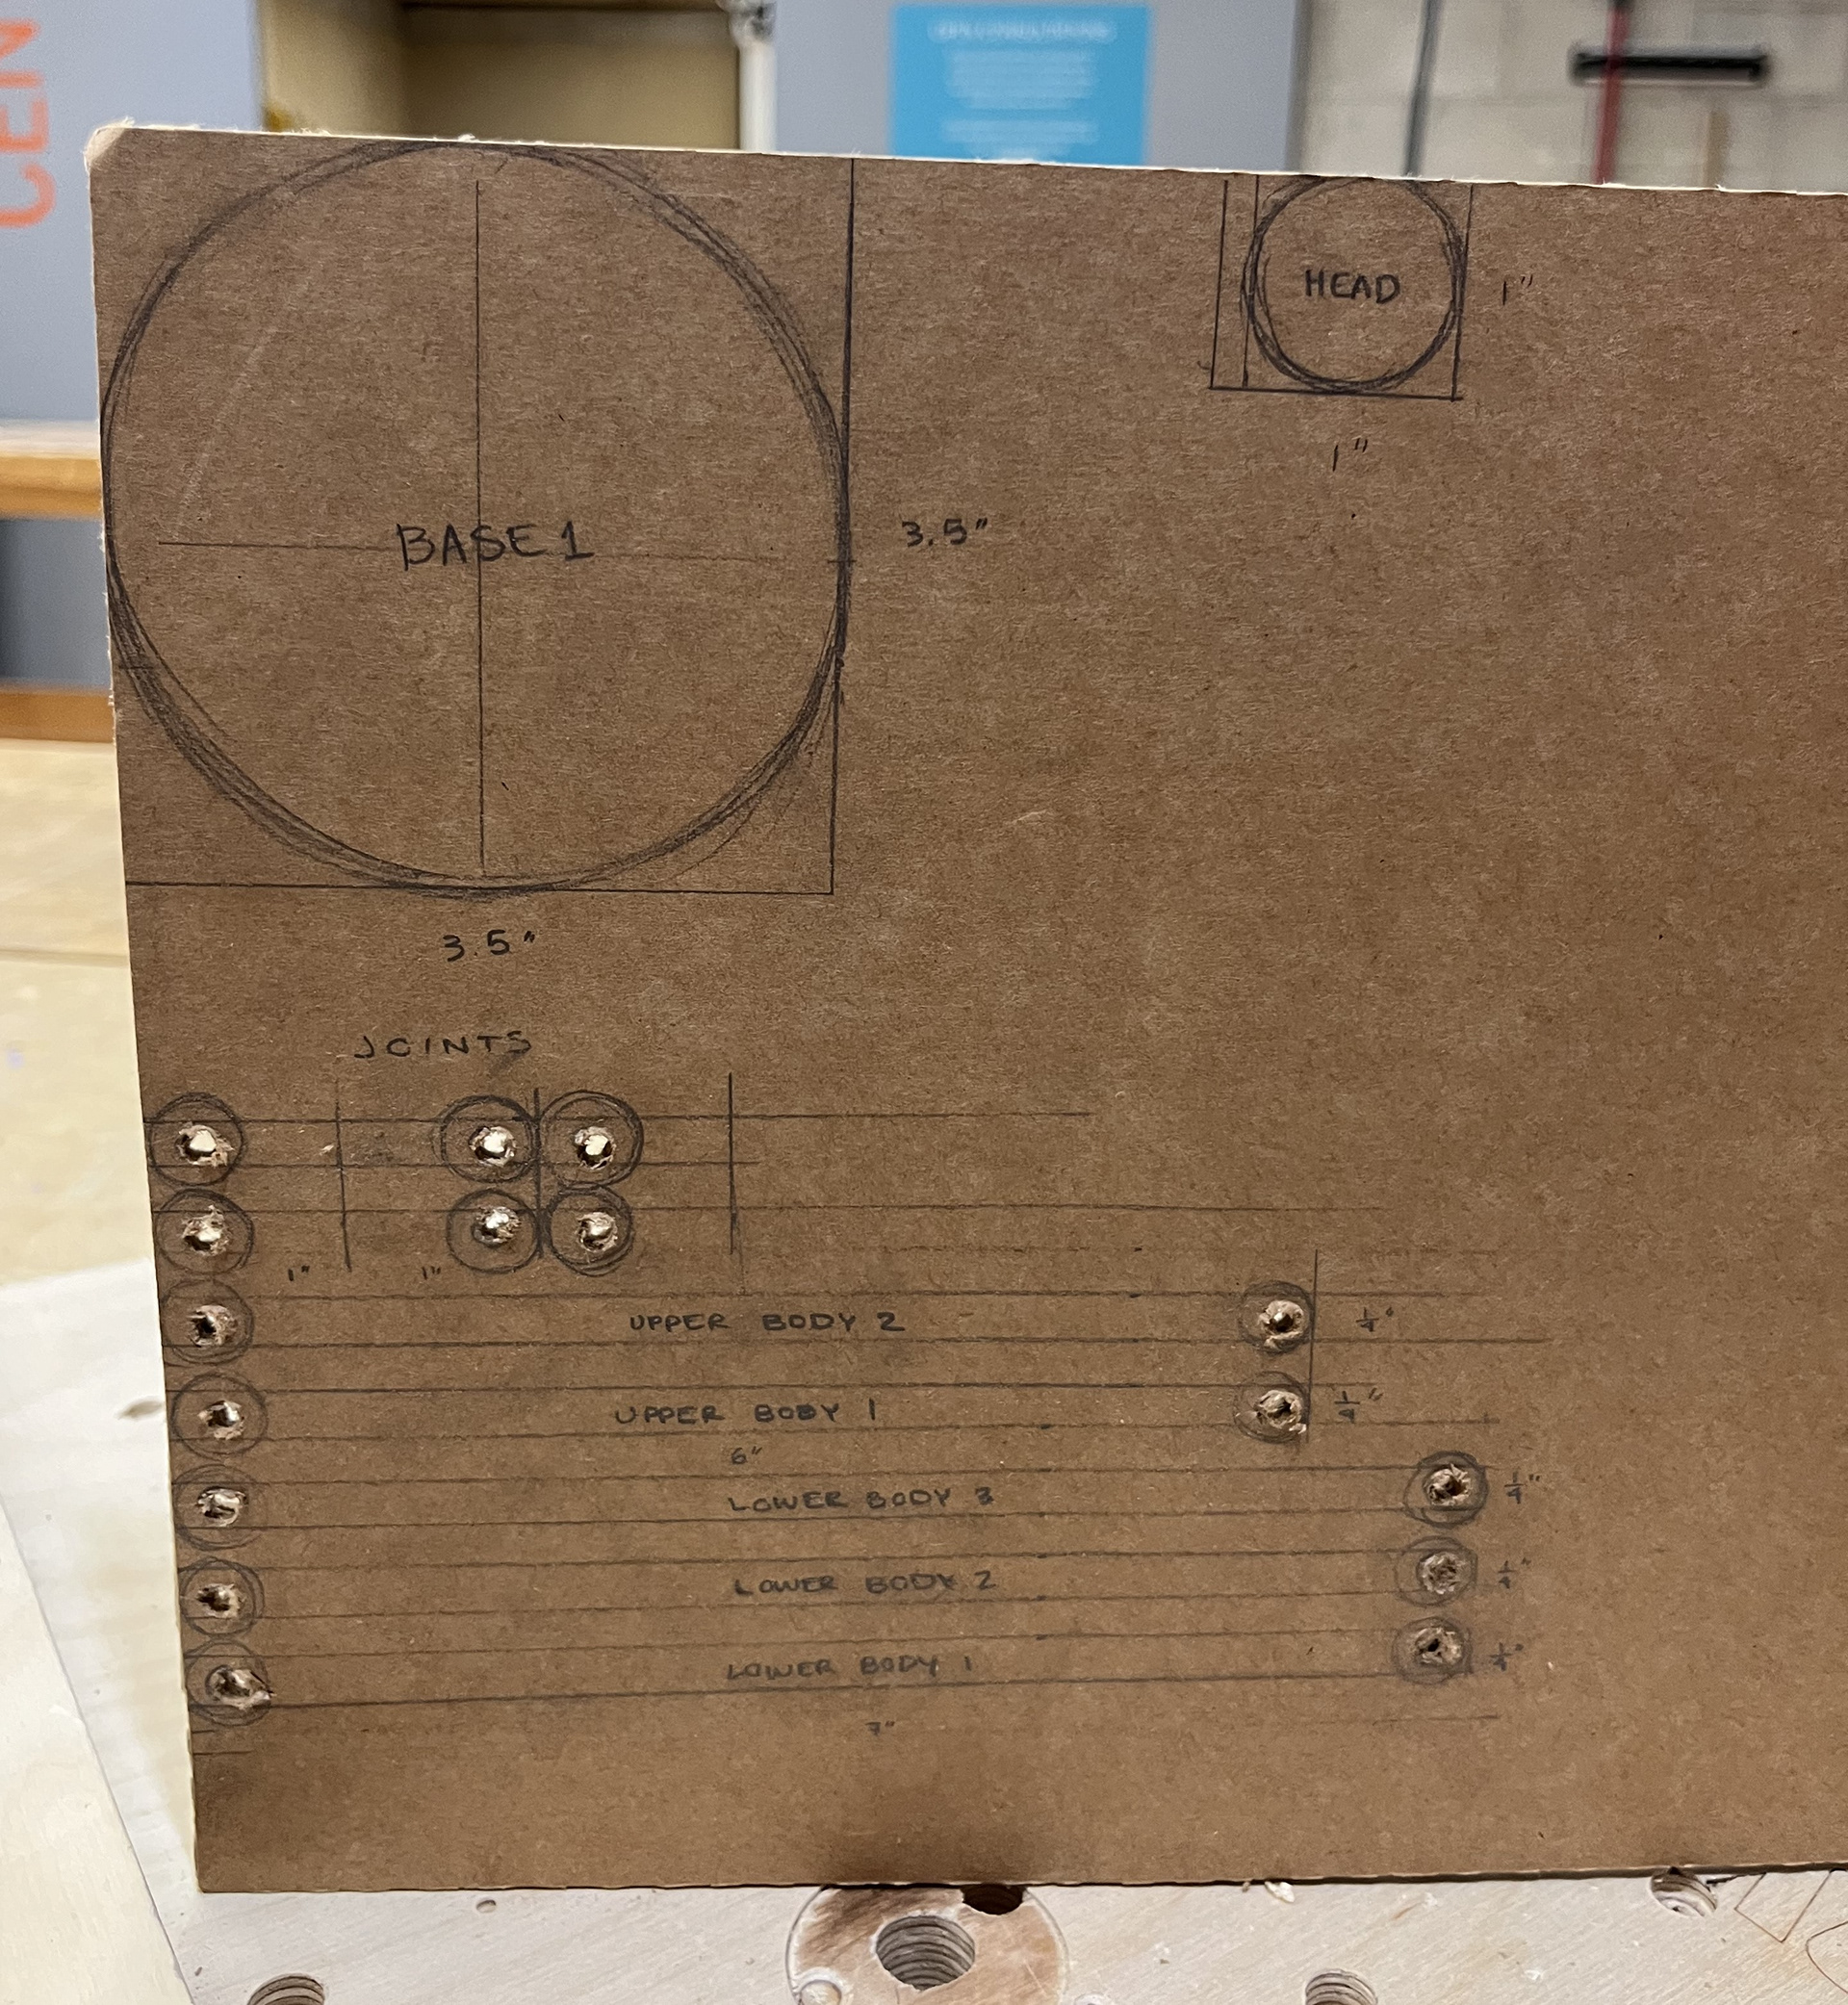
drilled holes to make joints
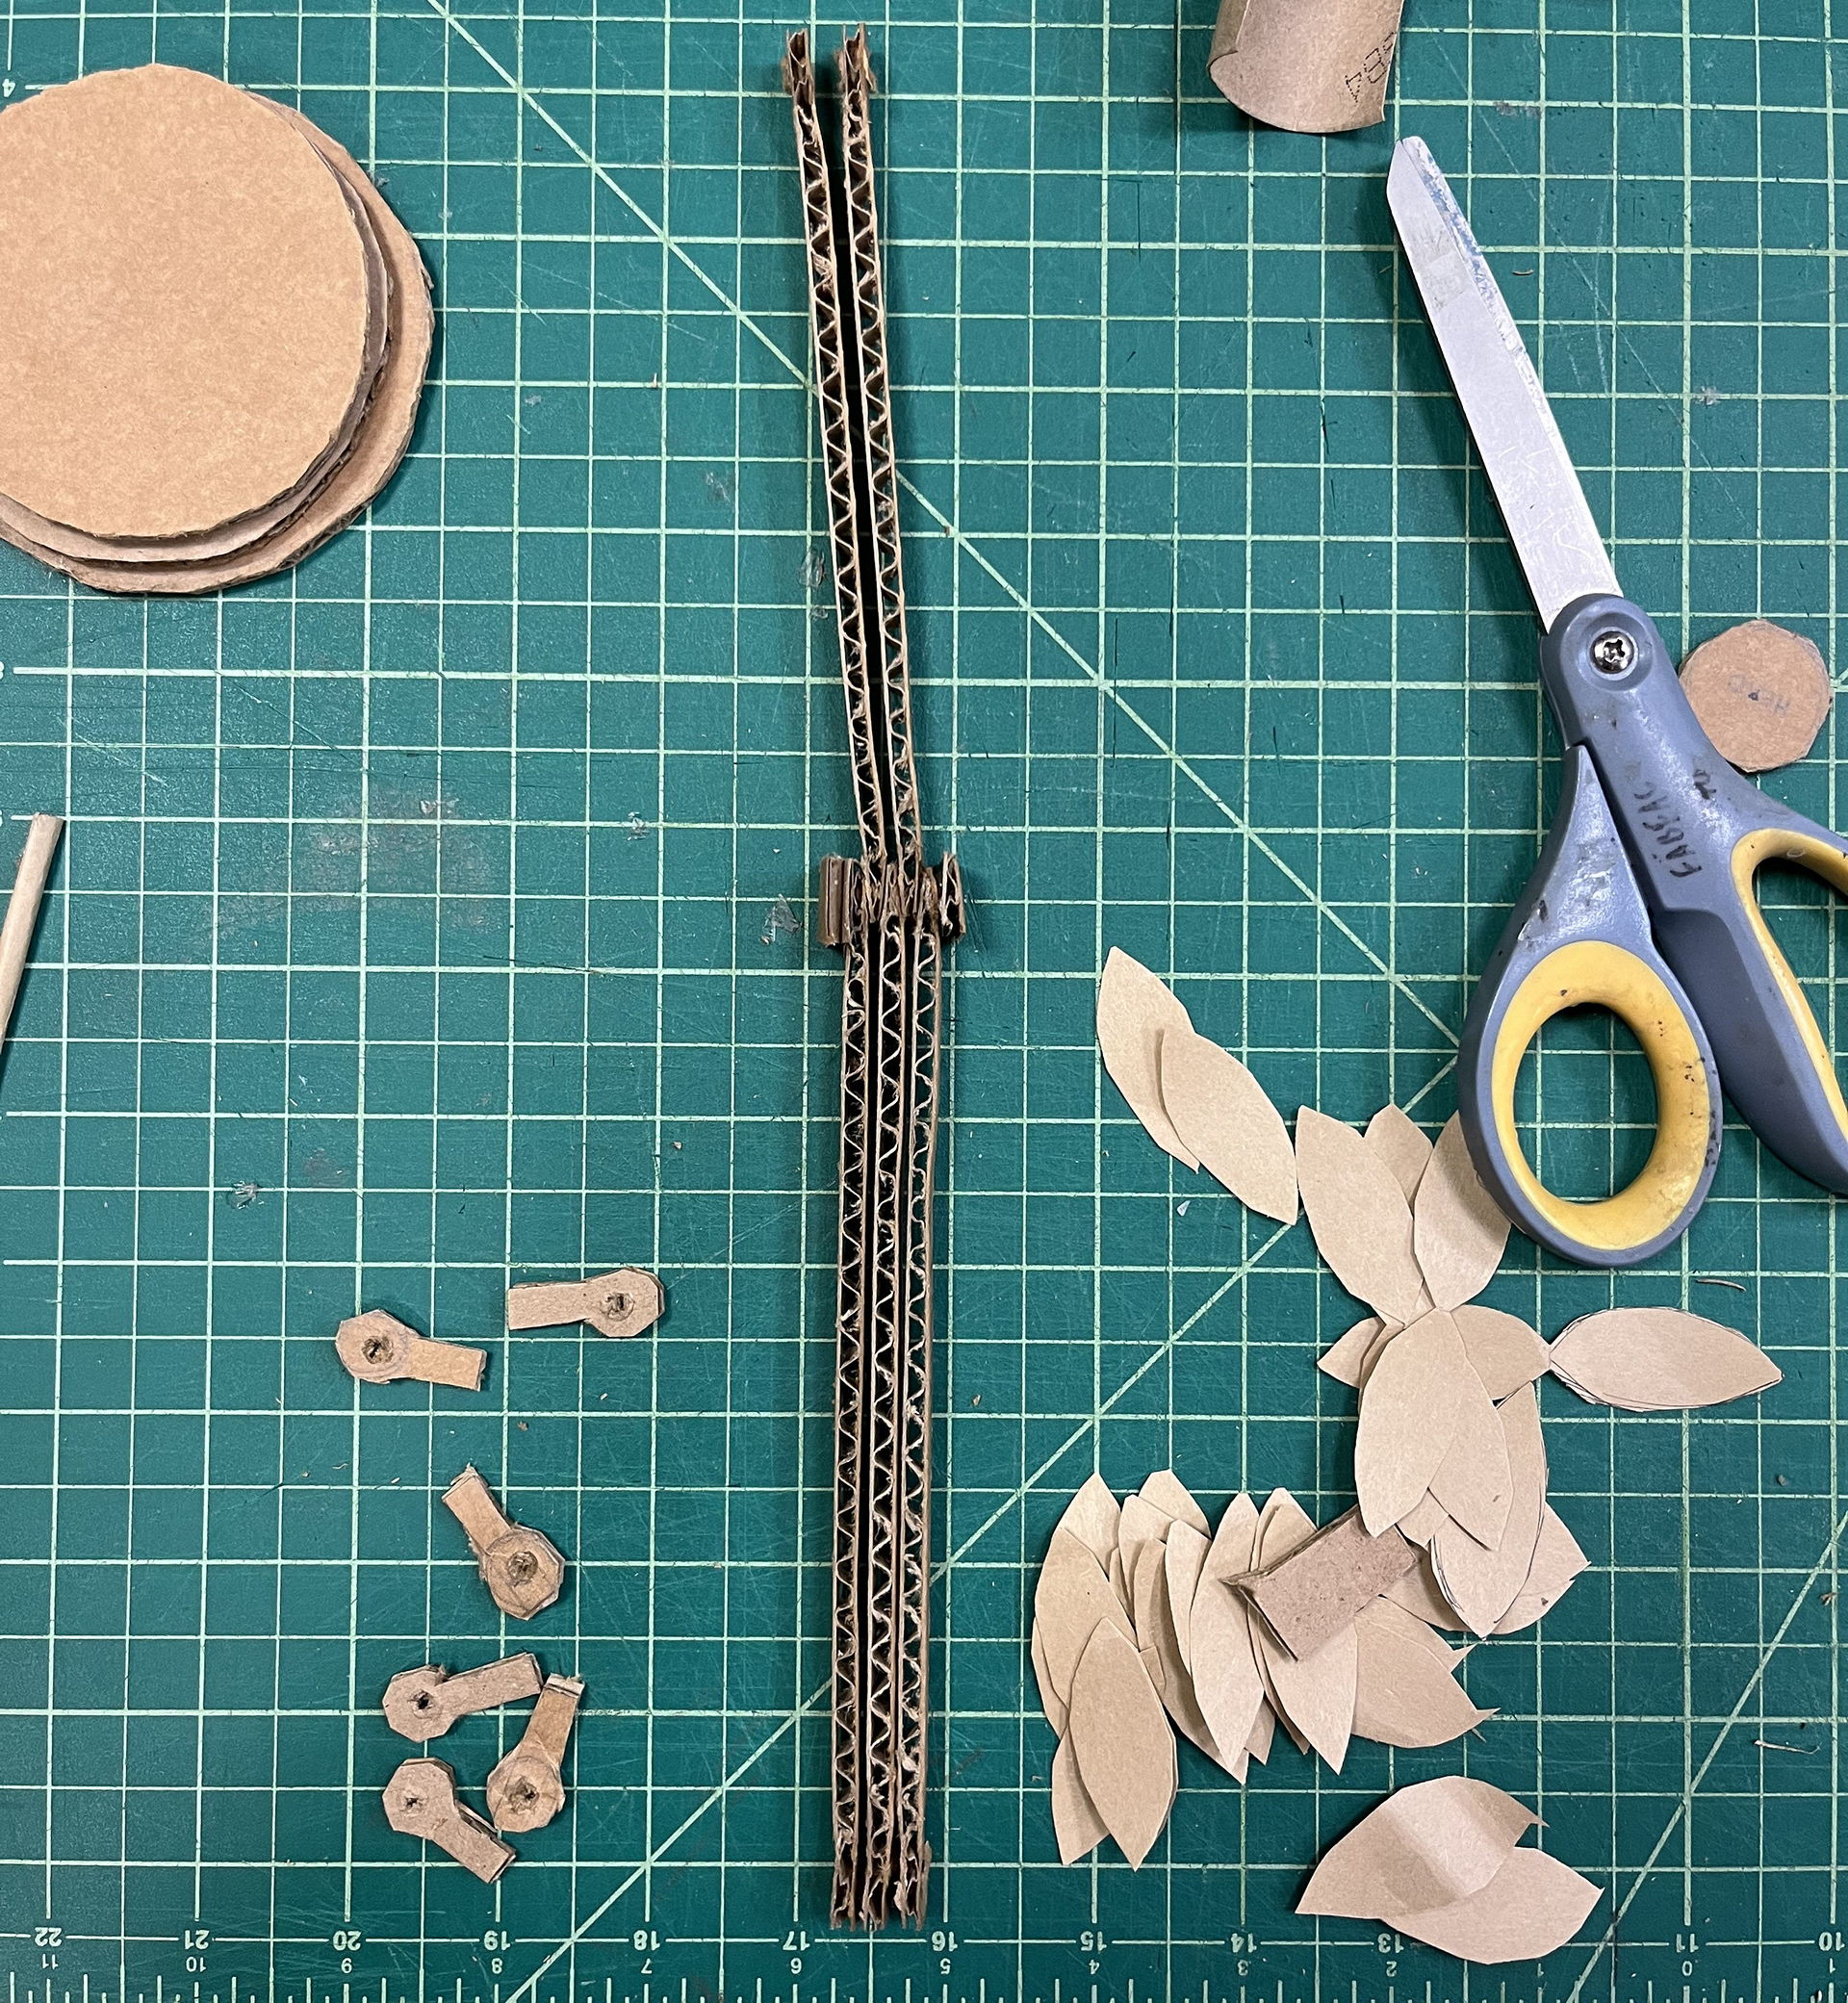
Front profile of attached body
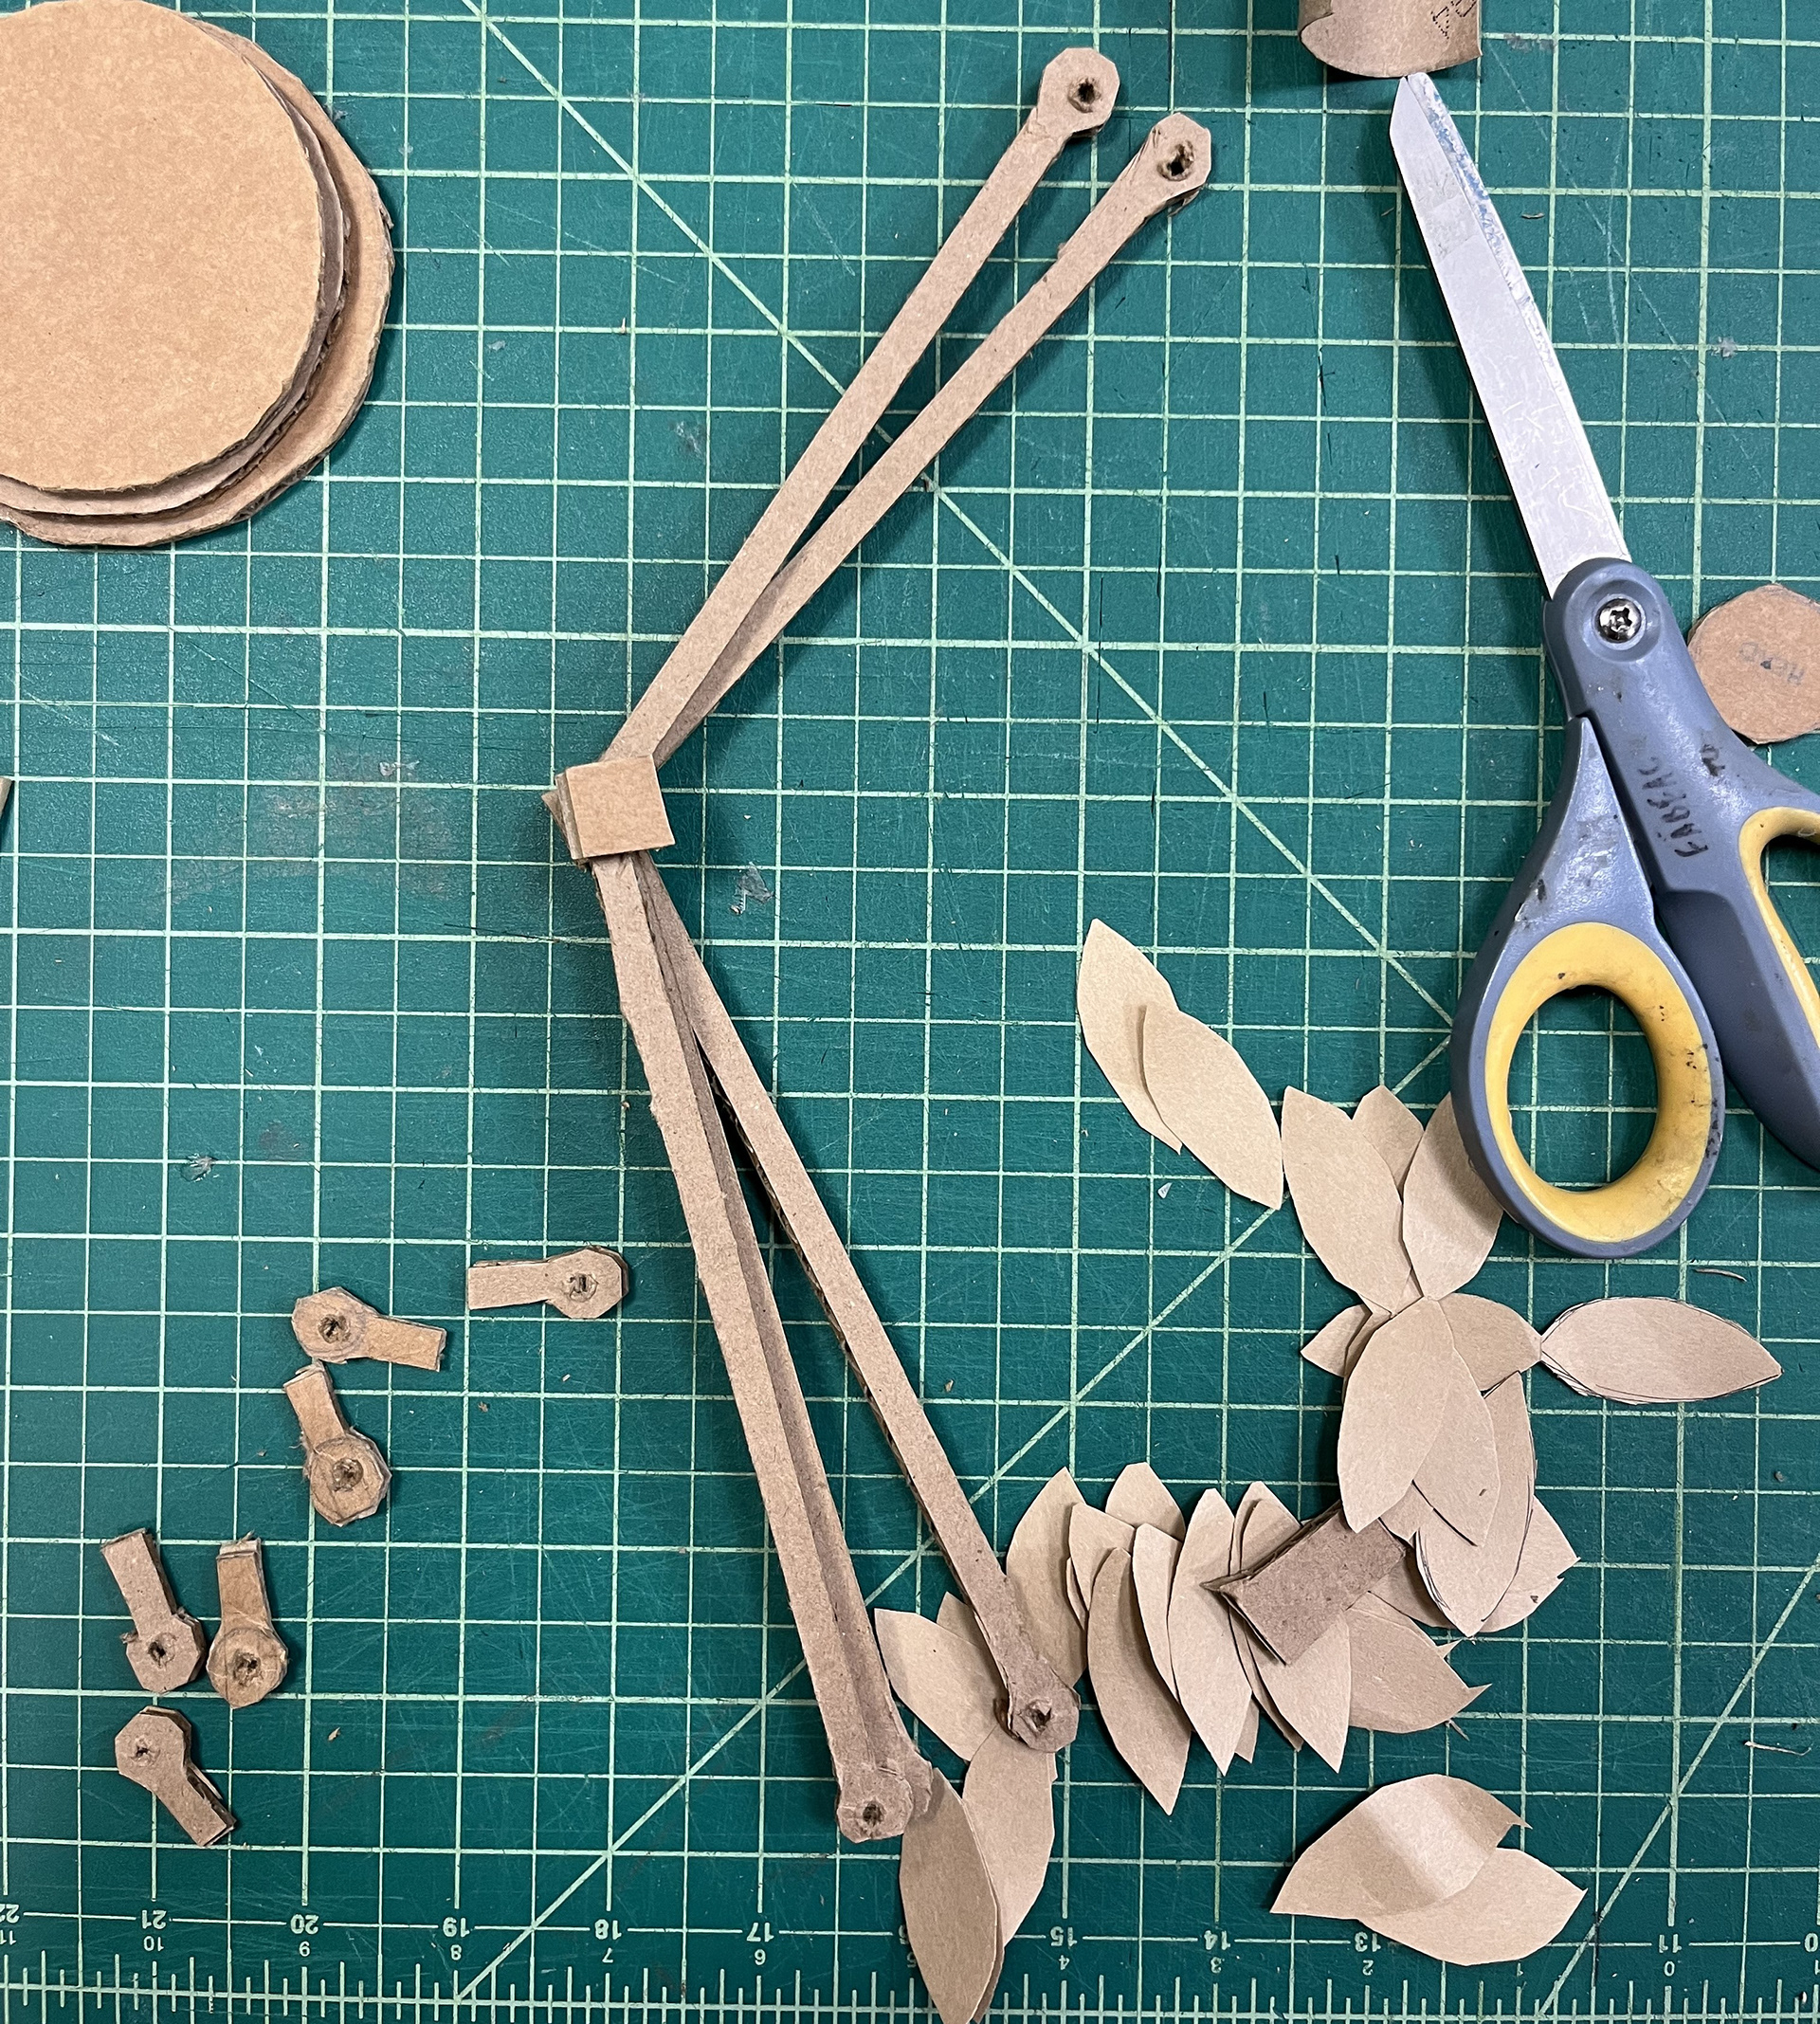
Side profile of attatched body
Base of desk lamp
Base of desk lamp with leaves attatched
Center Joint of desk lamp
Top joint where the flower head will be attatched

Top joint with attached flower head
Full View of Mini Prototype
FULL-SCALE DESK LAMP PROCESS
(1) I created a cardboard template of the item using the dimensions written in my sketchbook.
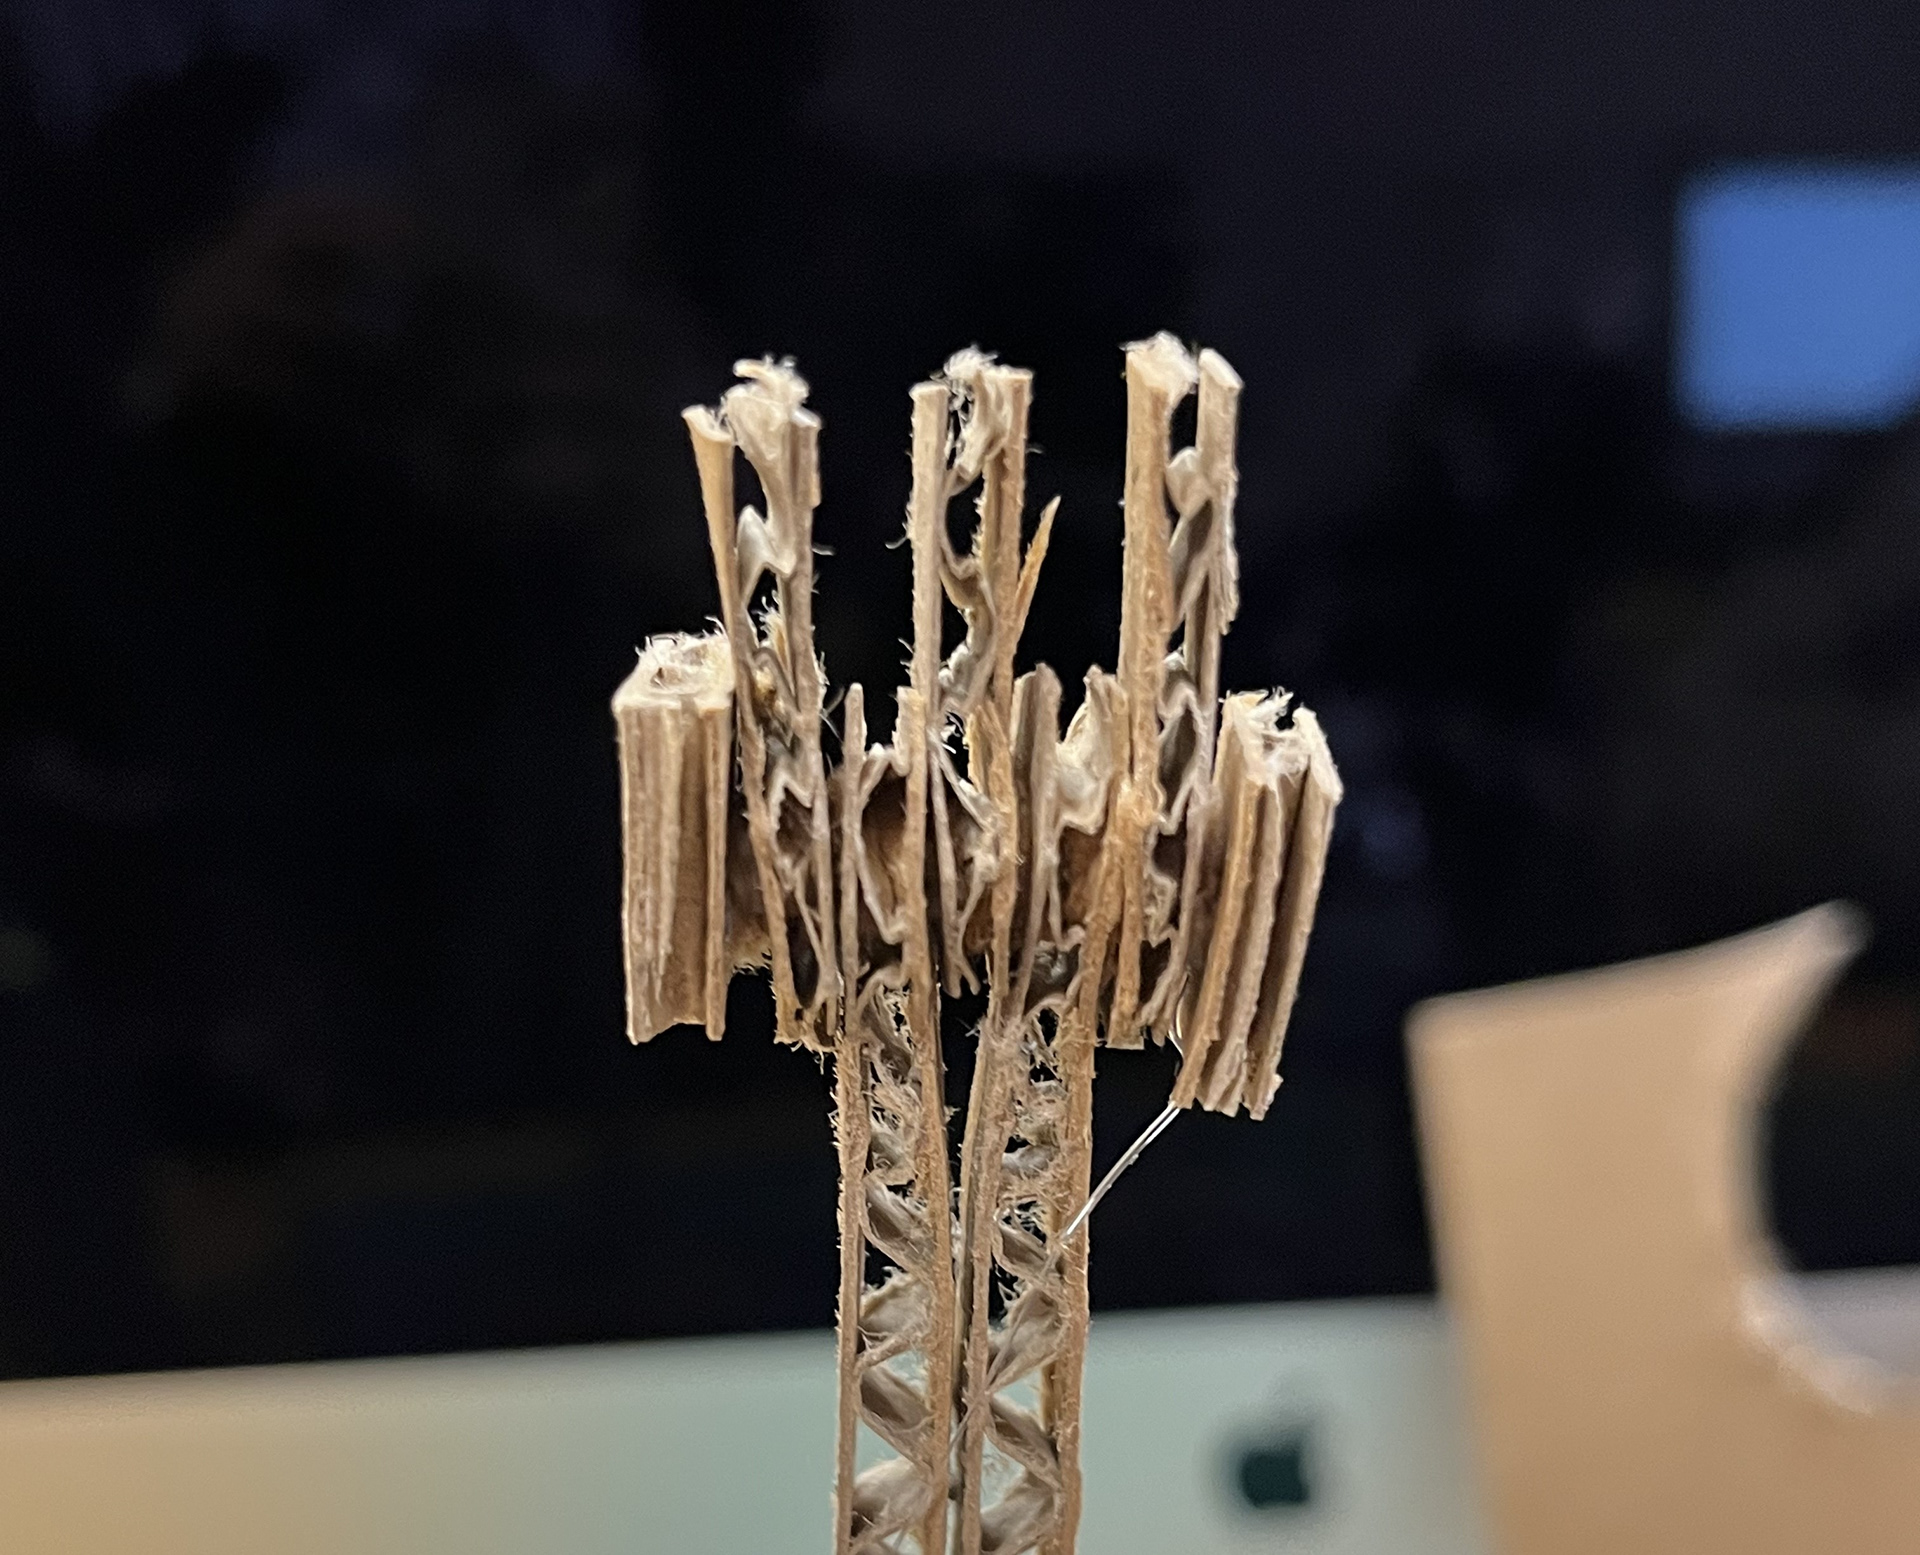
(2) I drilled larger holes through the joints to allow room for a craft-paper dowel rod.
(3) I cut the template using a box cutter and ruler for precision.
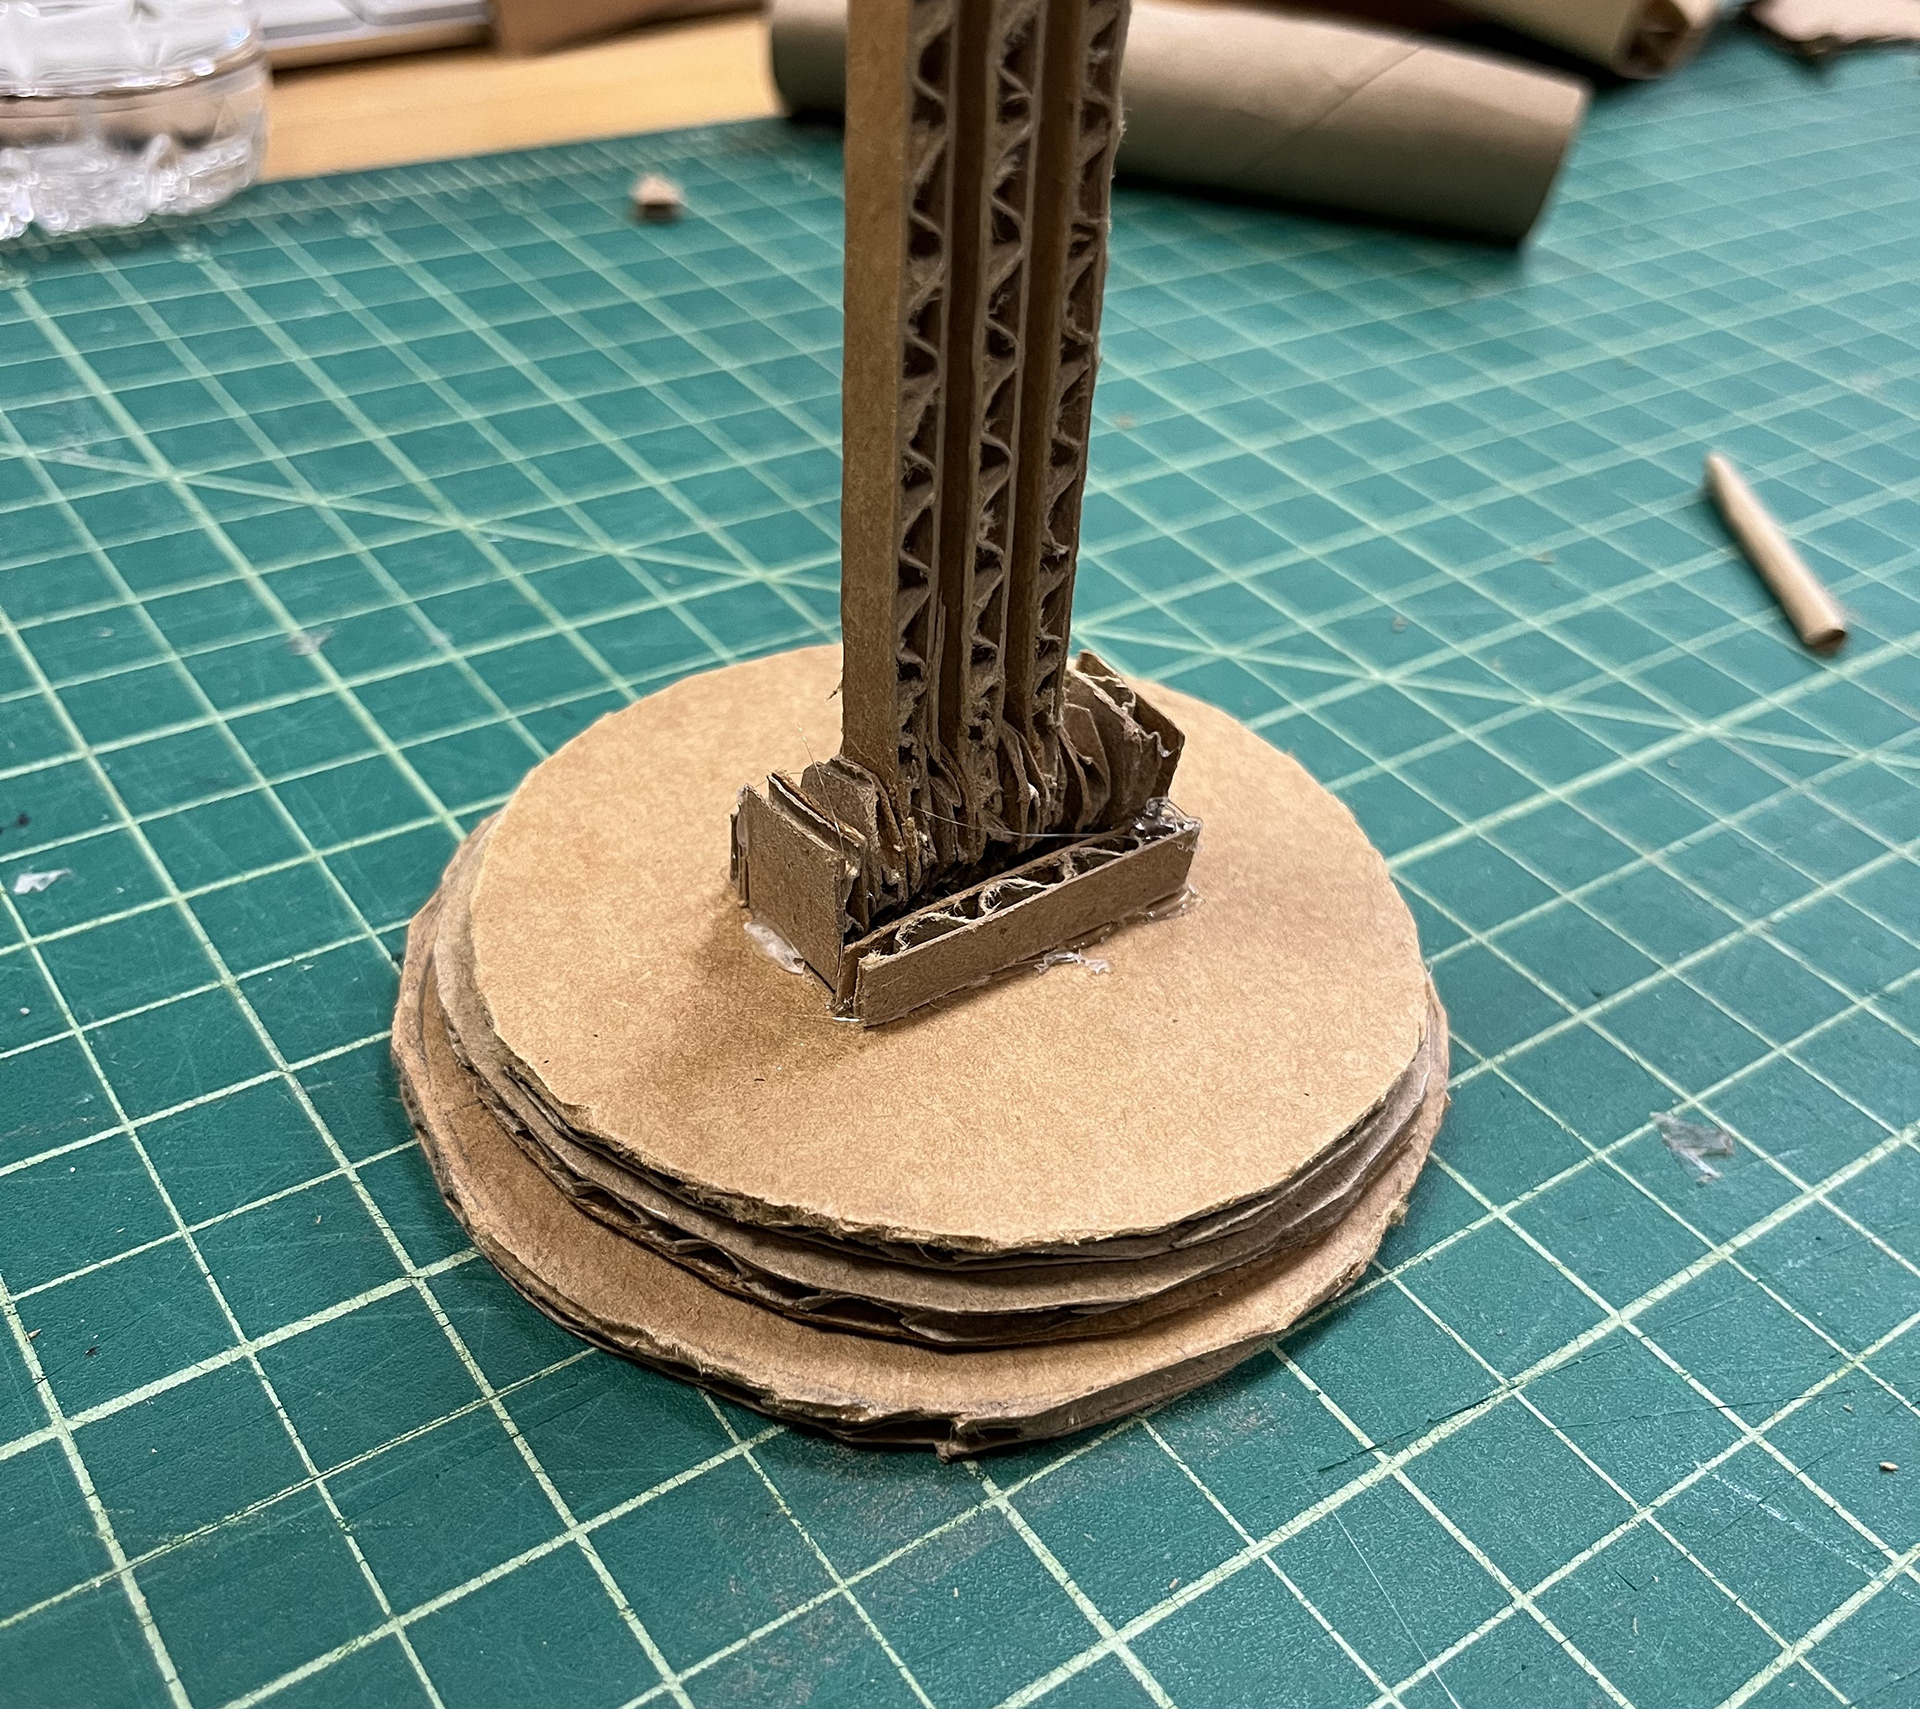
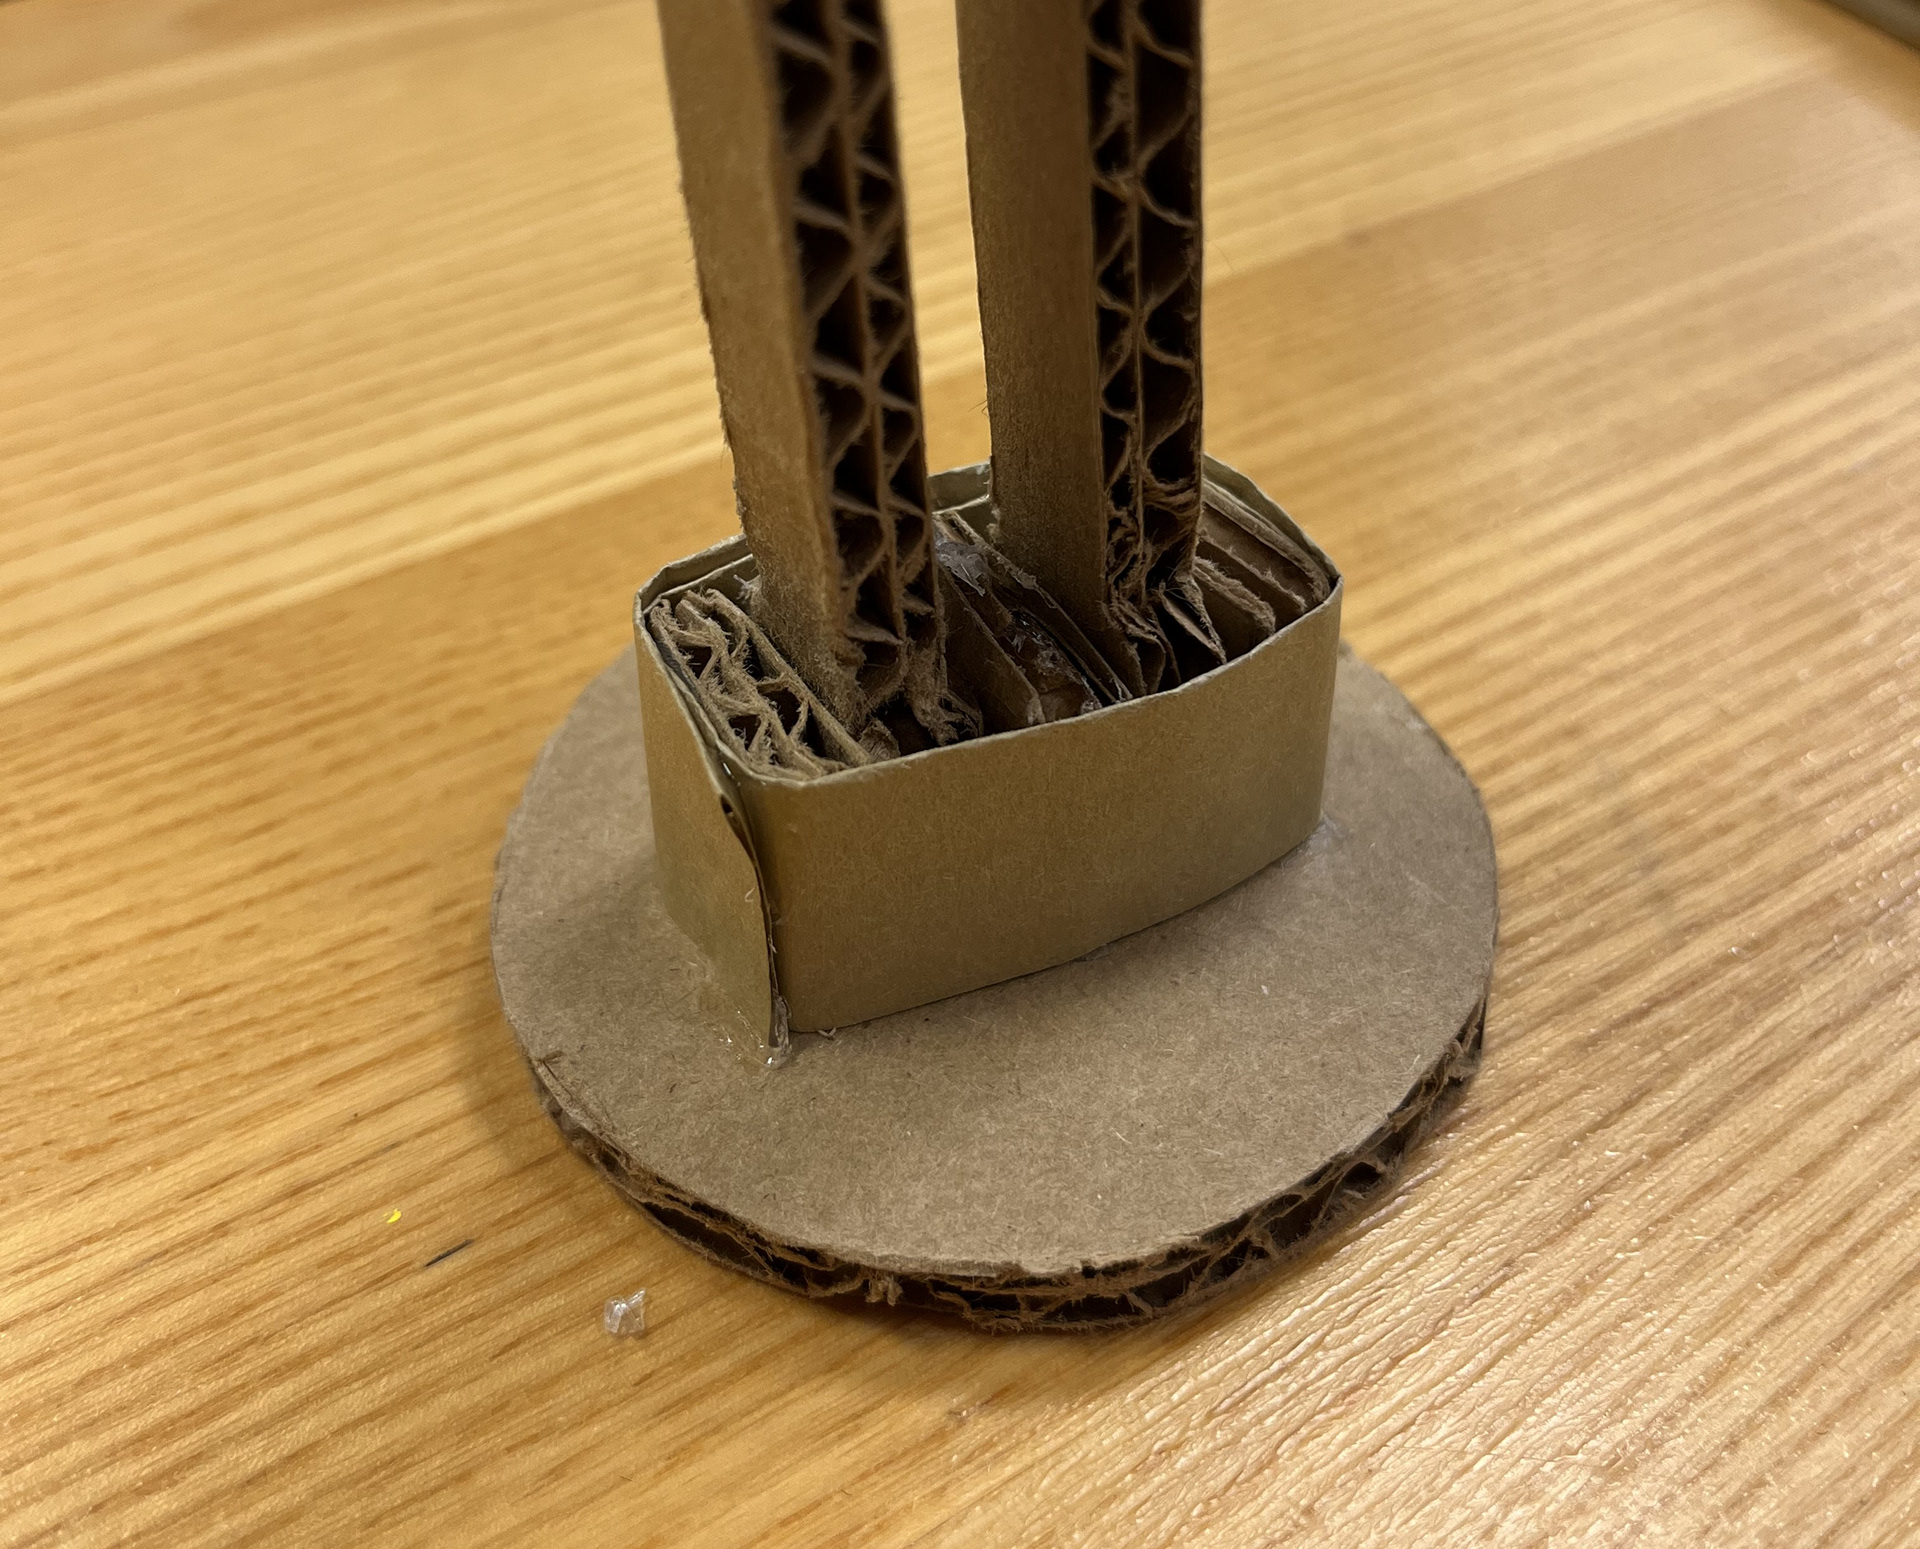
(4) I glued the base with hot glue.
(5) I rolled a long strip of craft paper to create a dowel/rod and secured it with glue. Then, I divided them into
three equal lengths. One for each of the three joints: base, trust, and head.
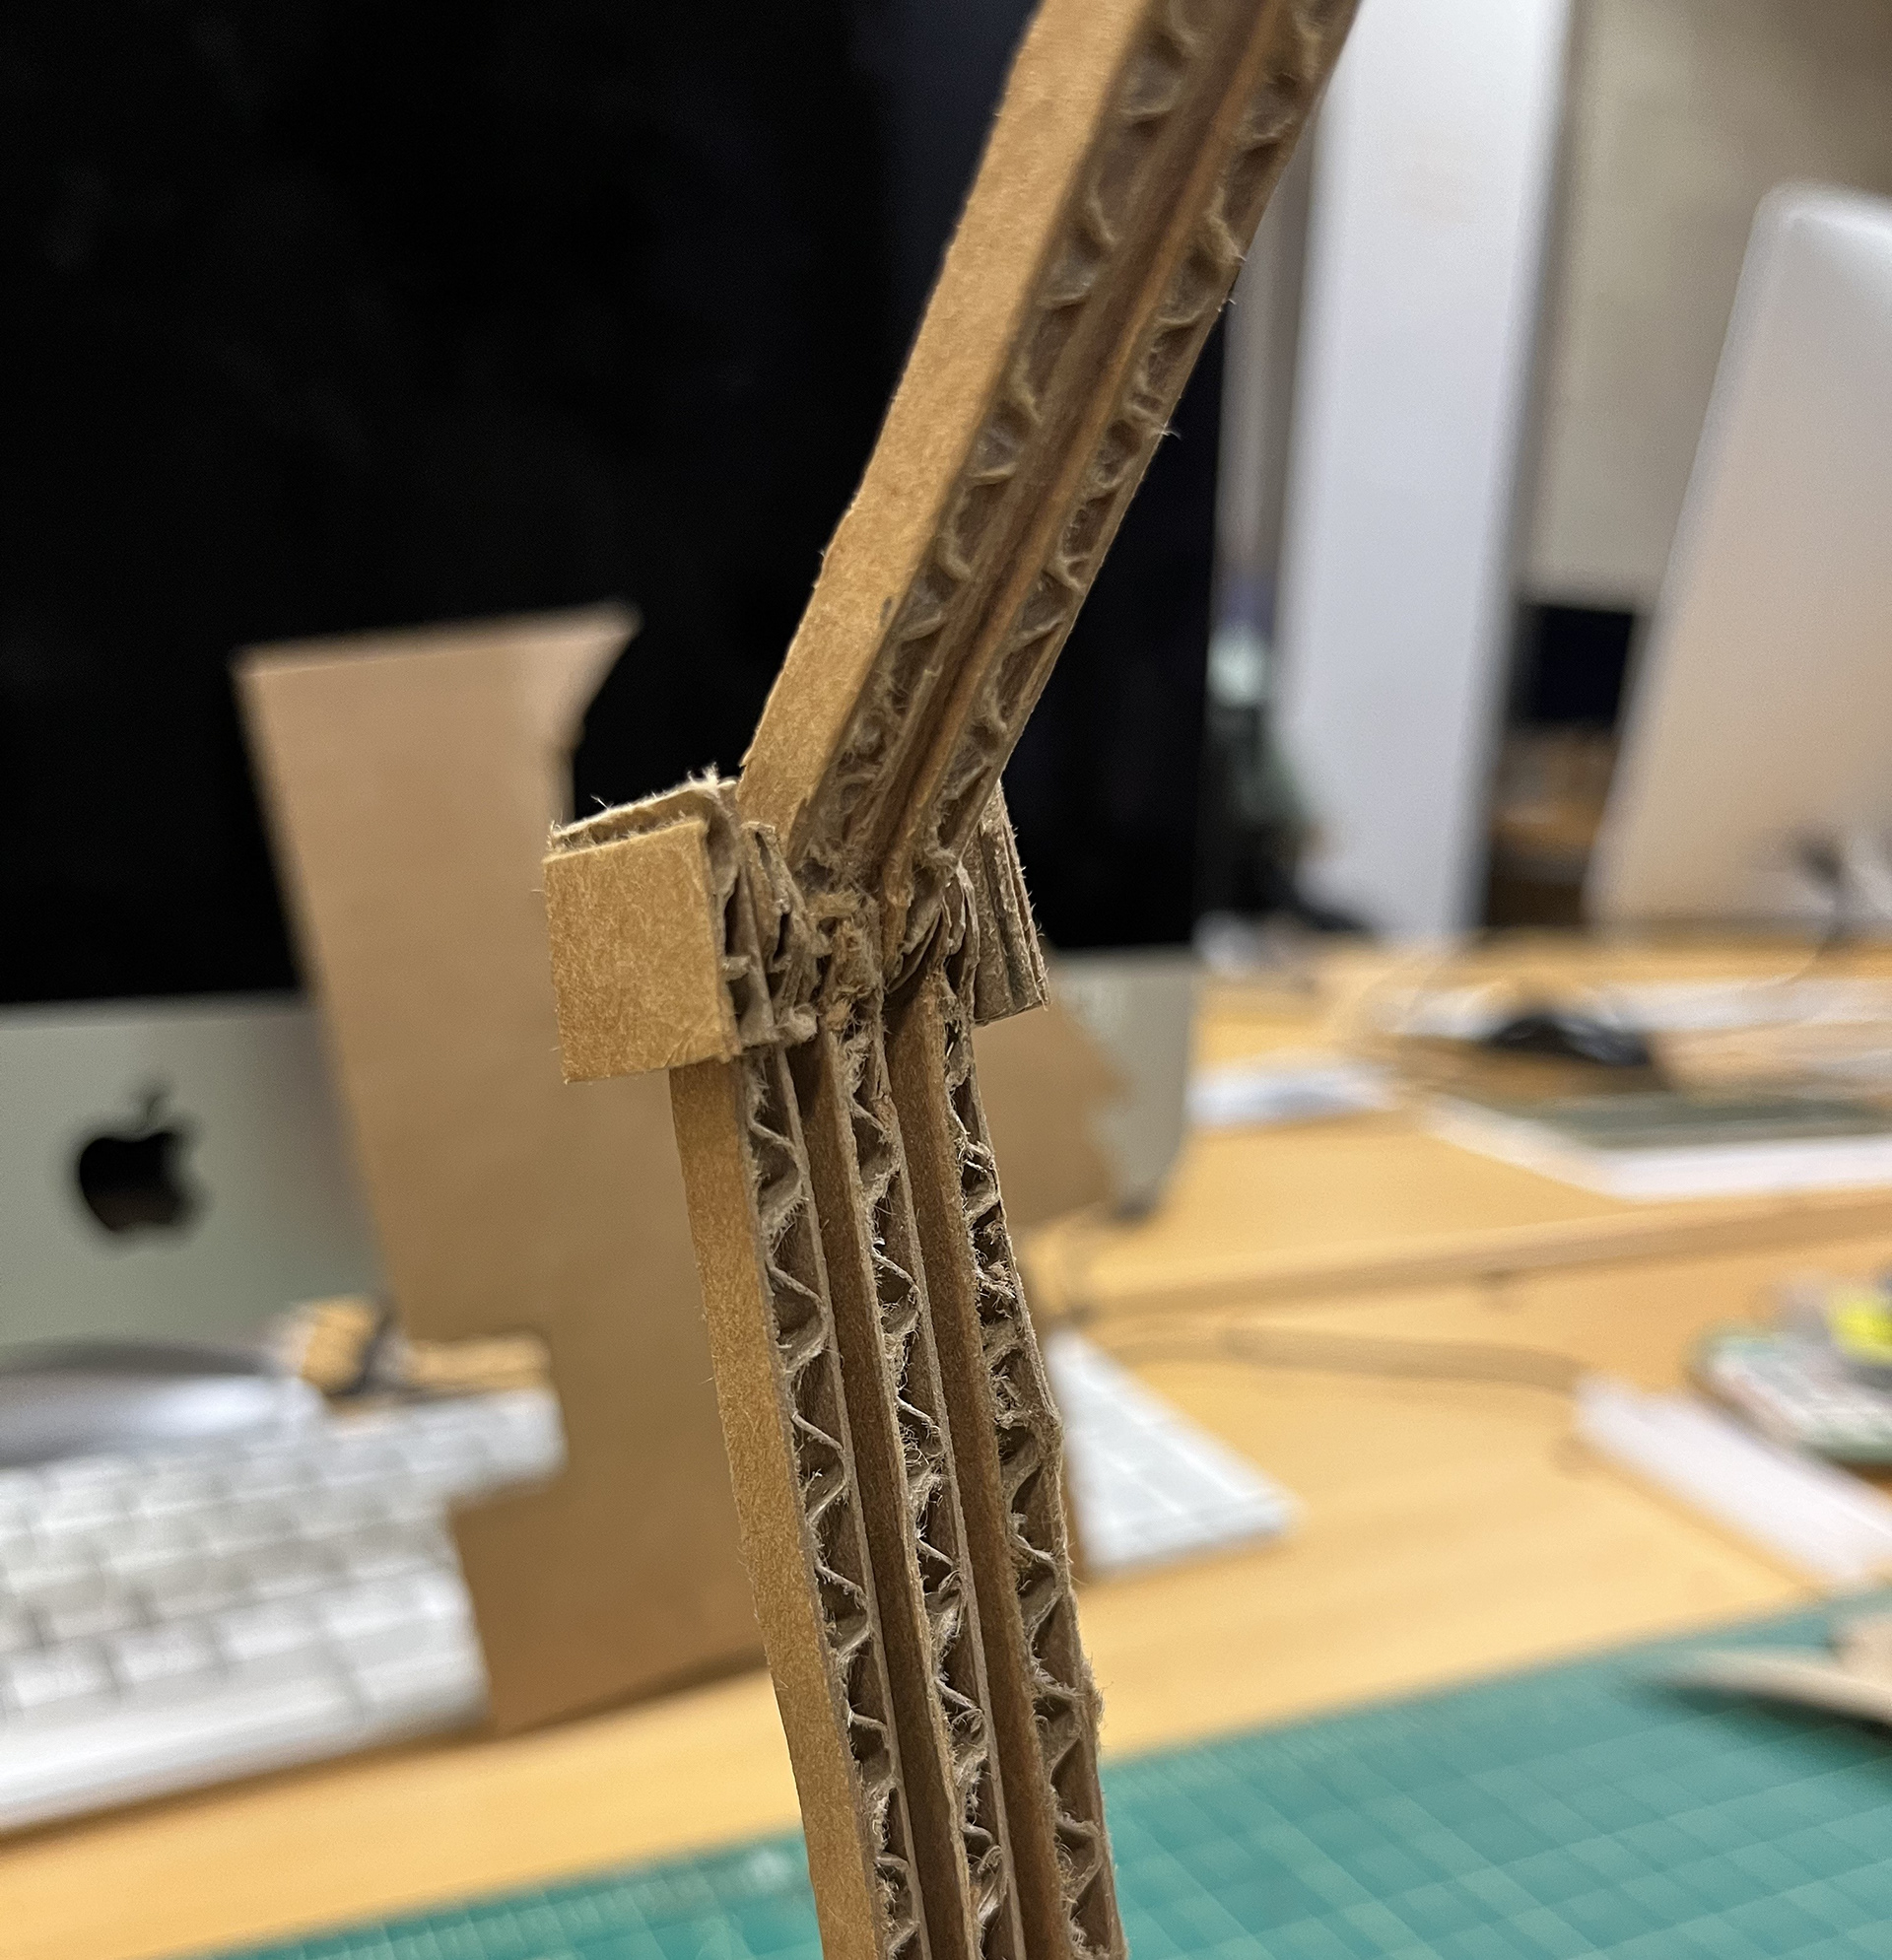
(6) I assembled the joints using the dowel/rod, cutting off any excess.
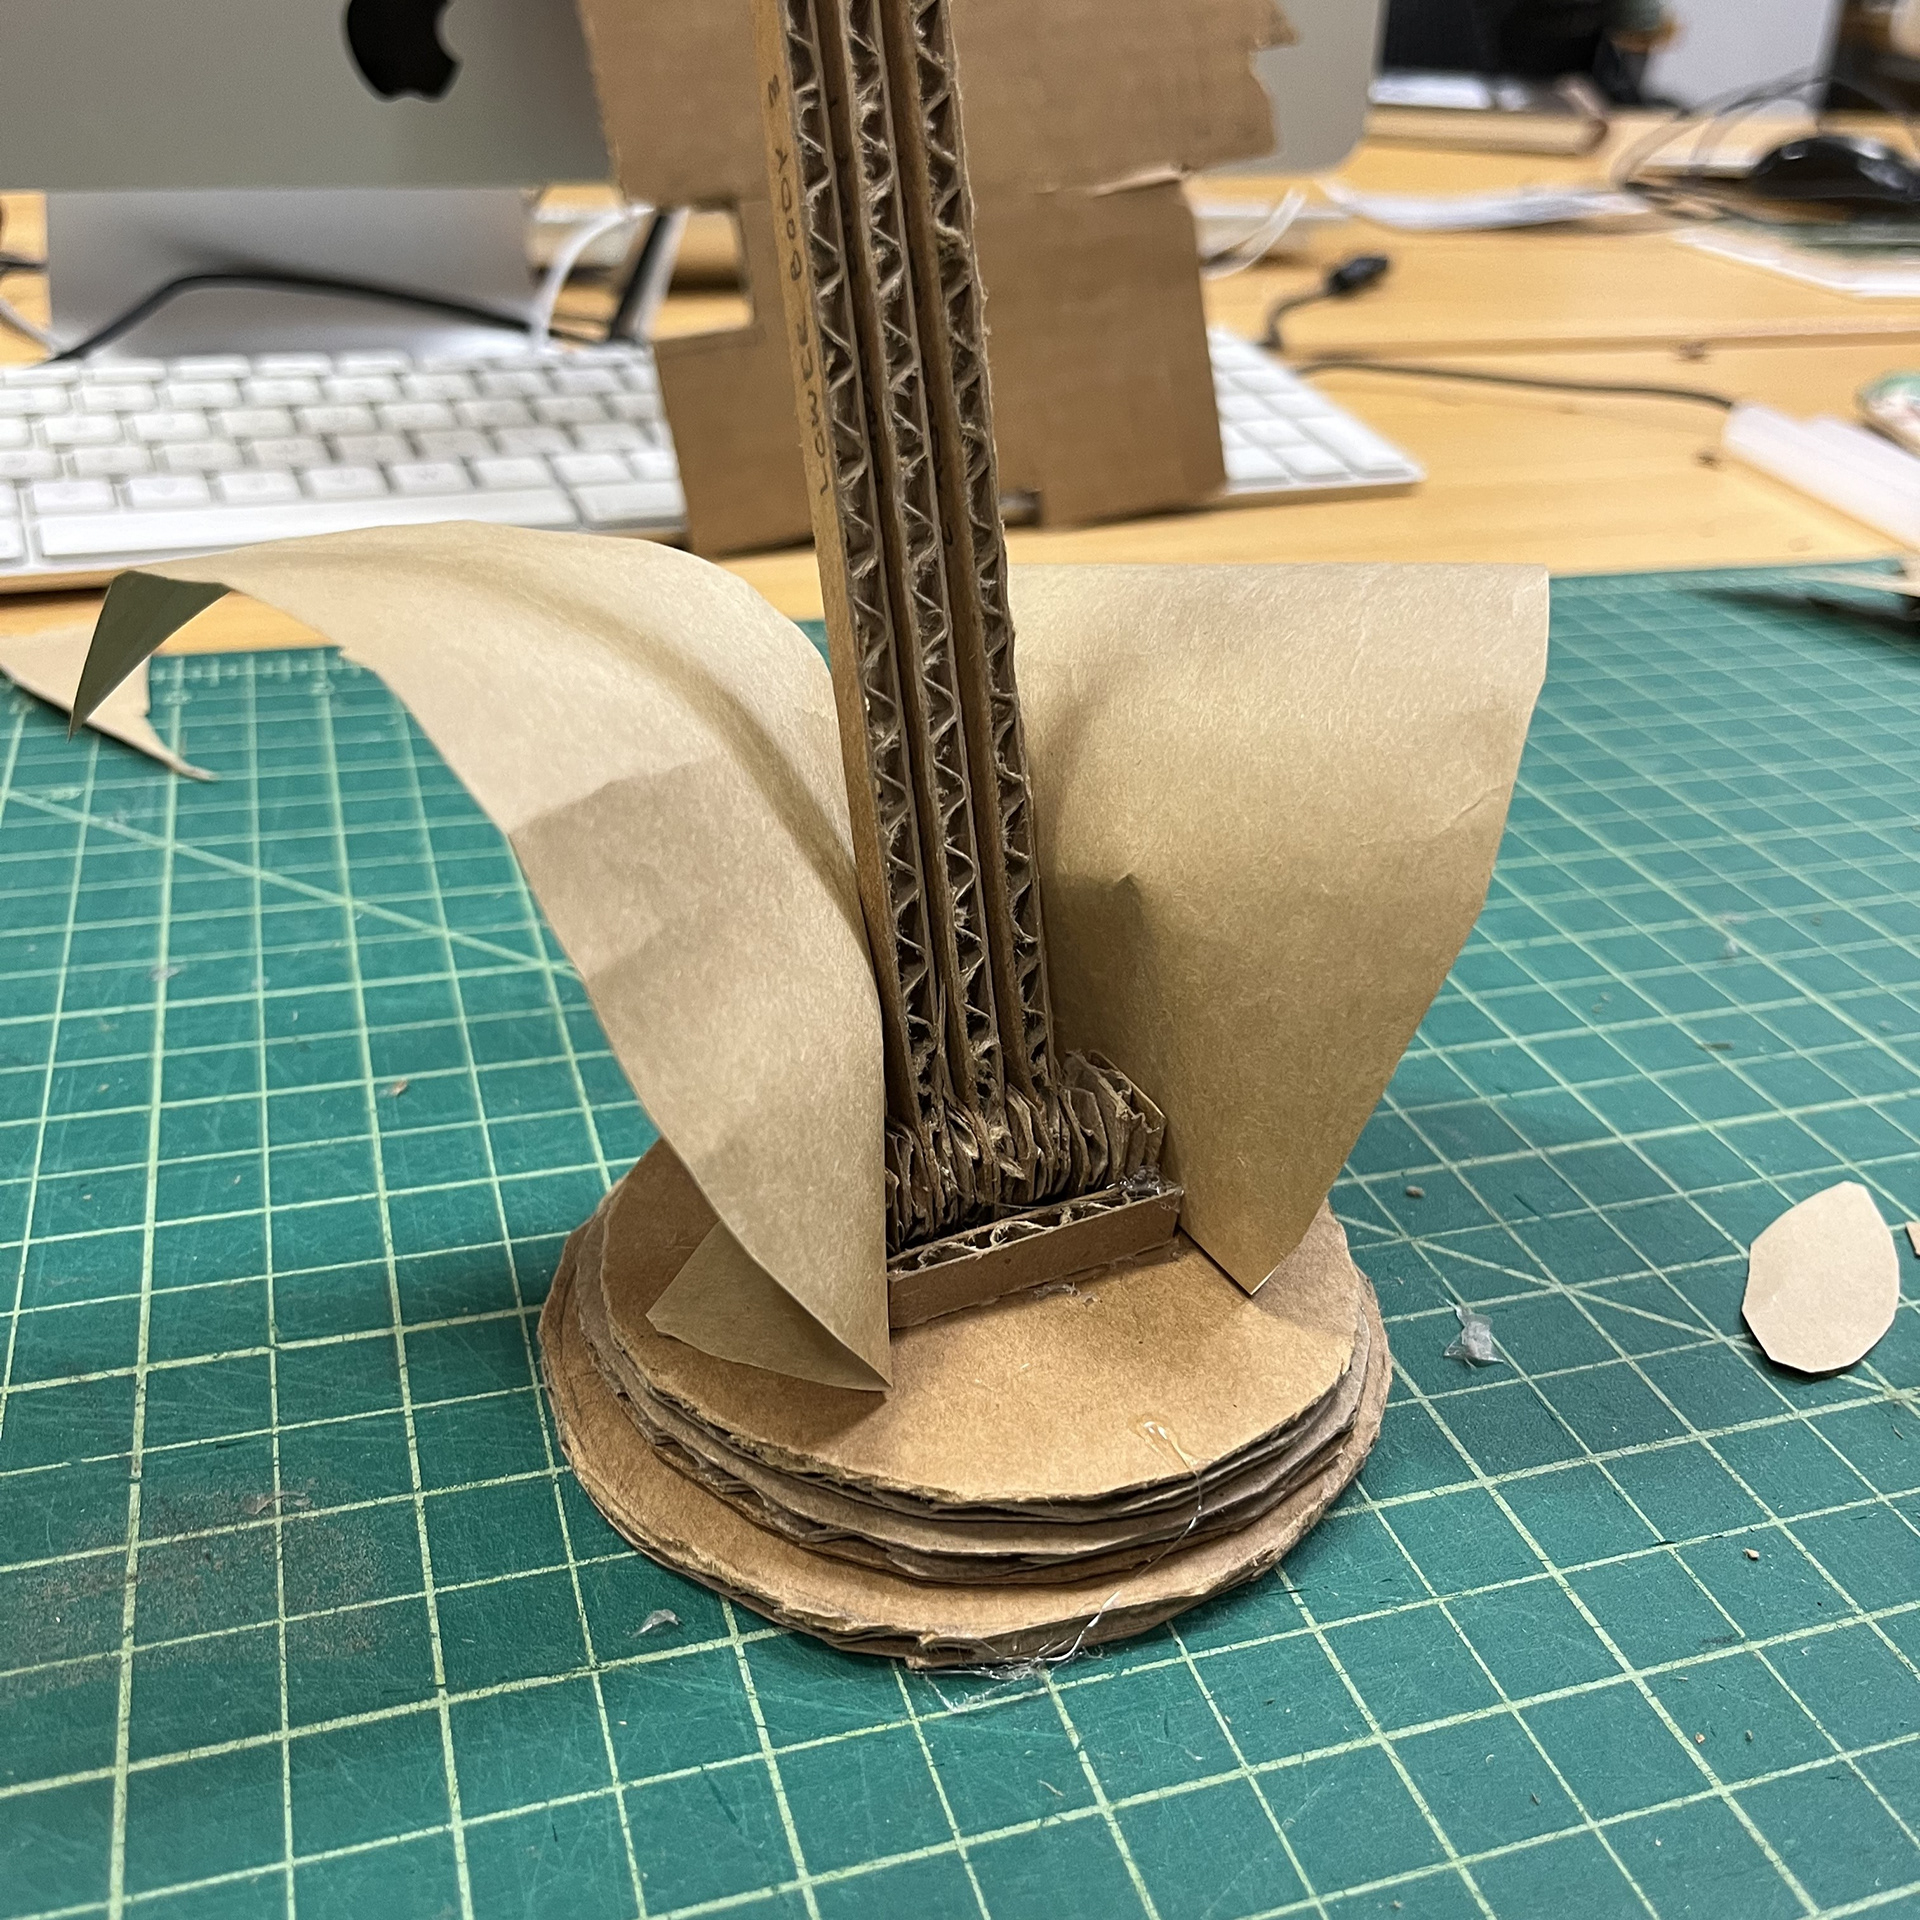
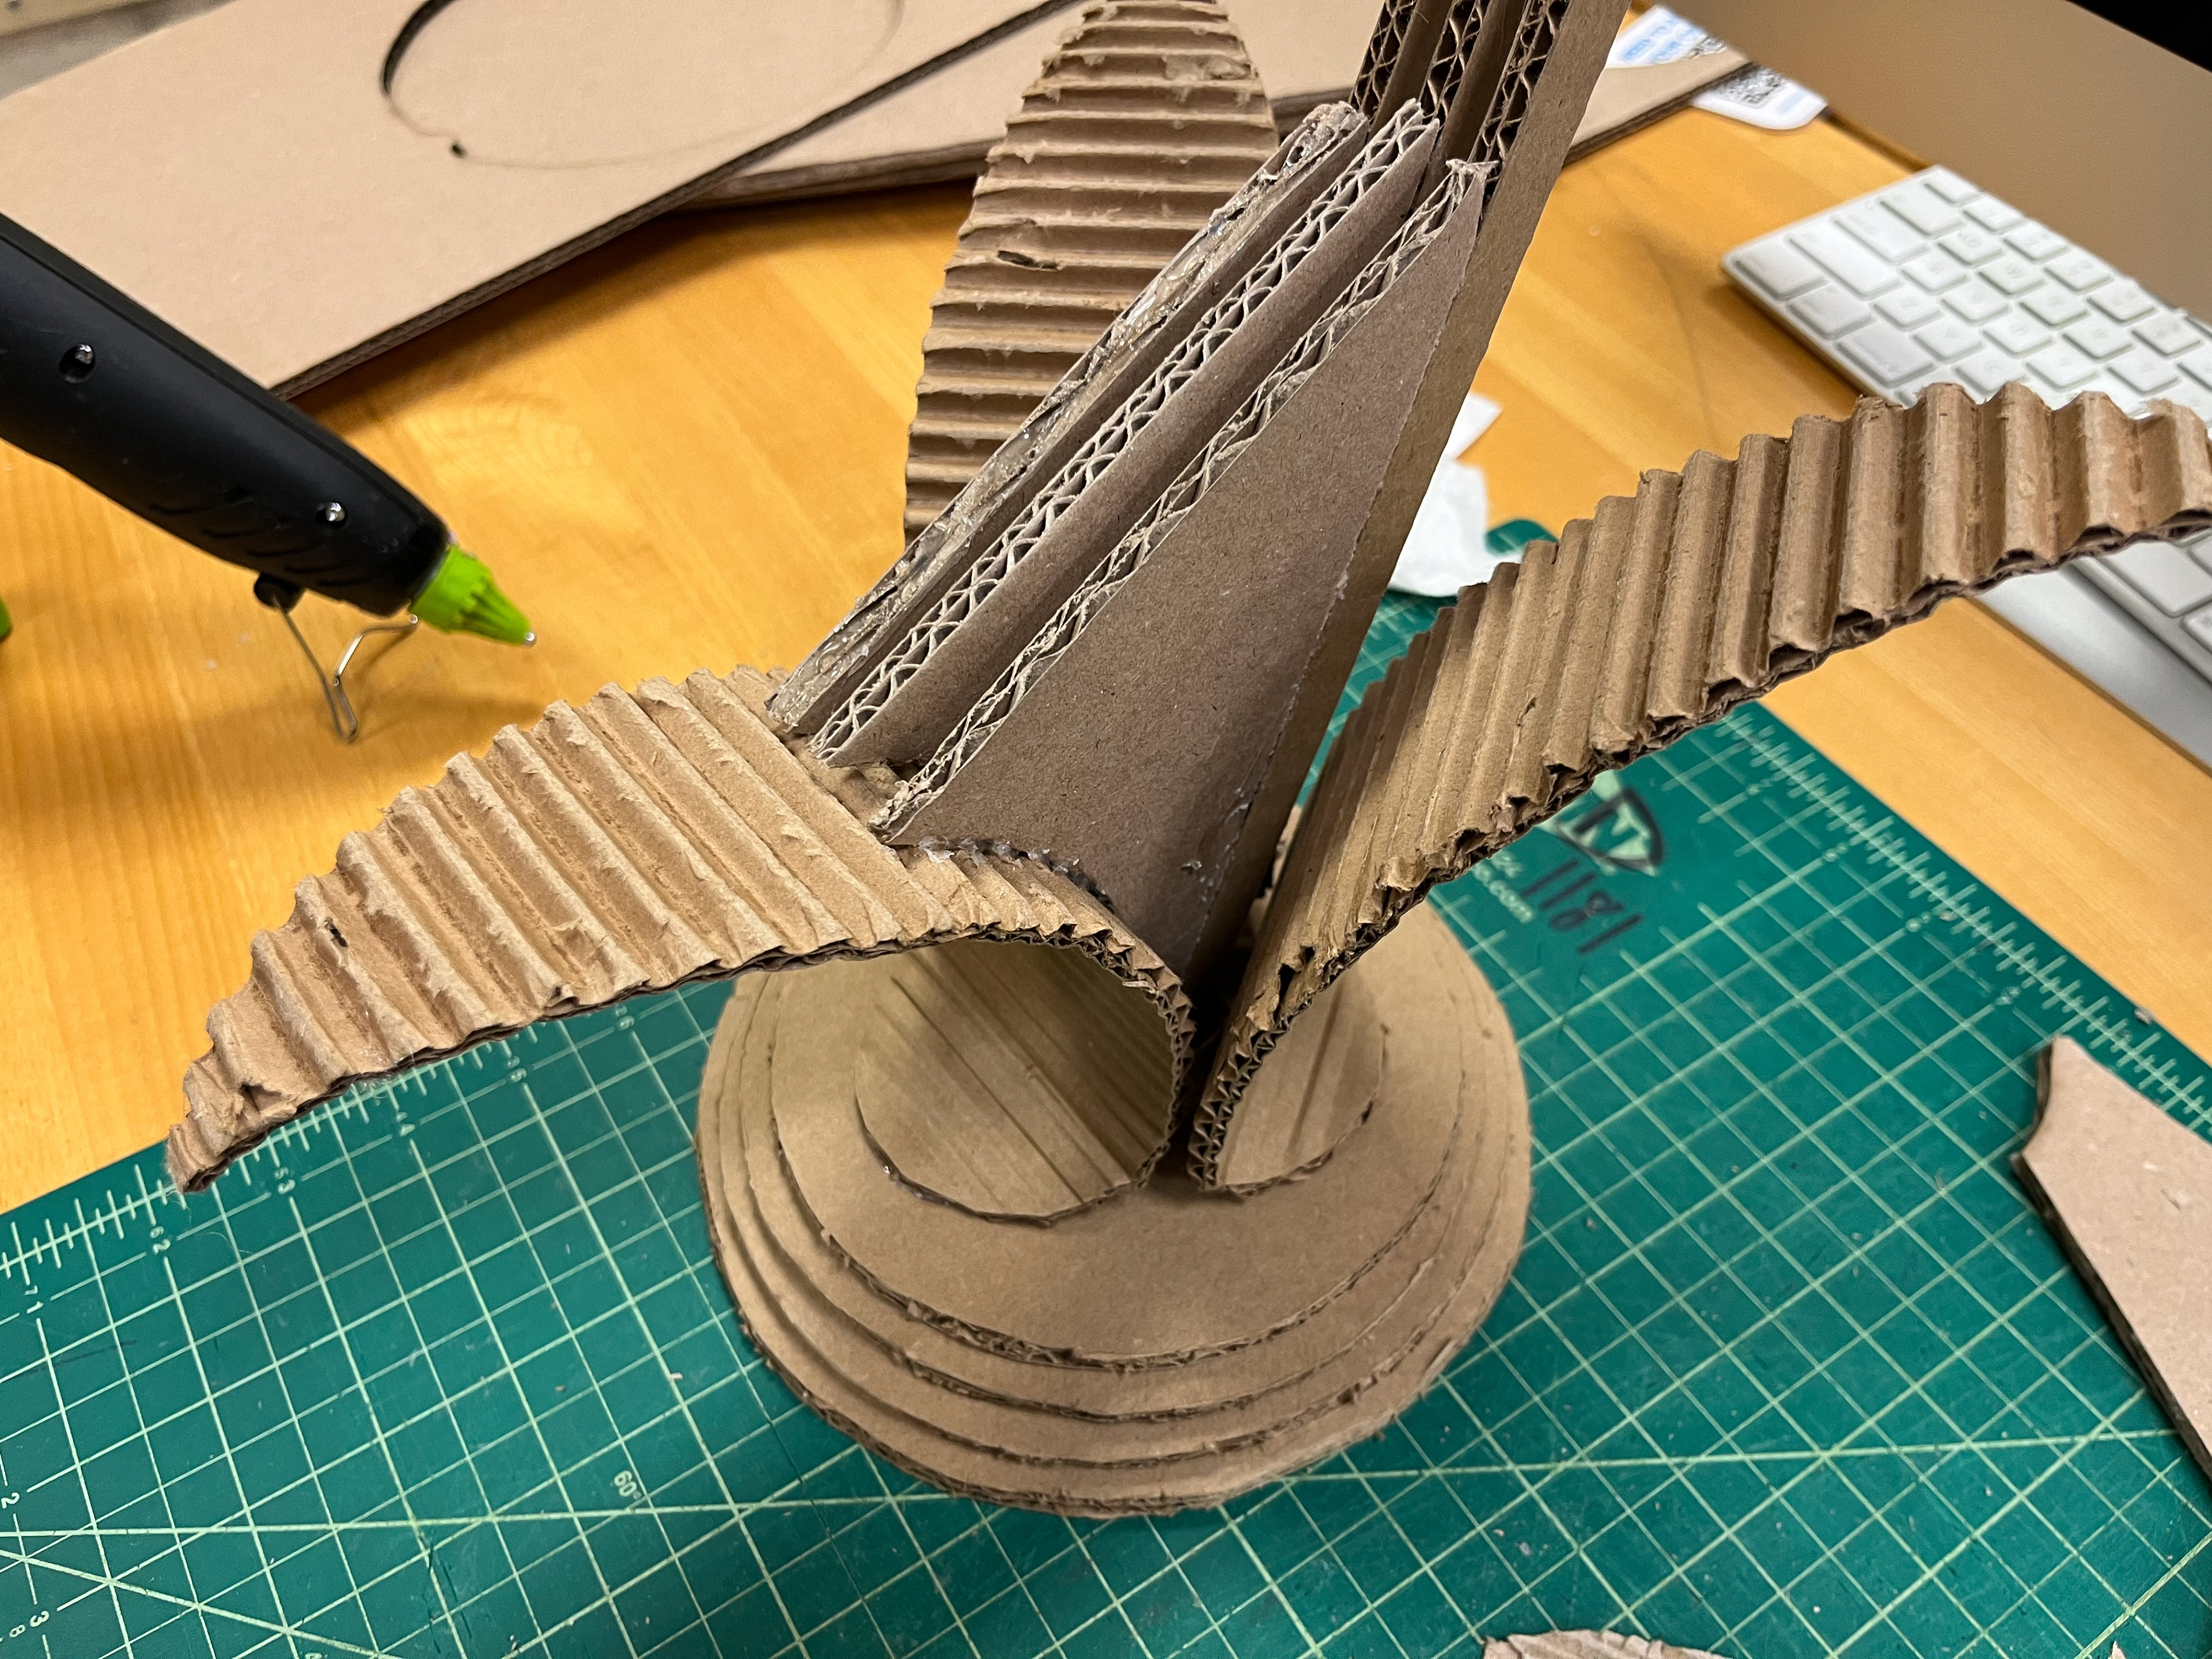
(7) I attached the body to the base and head of the lamp, hiding seams with strips of craft paper.
(8) I rolled the leaves to add curvature and attached them to the base.
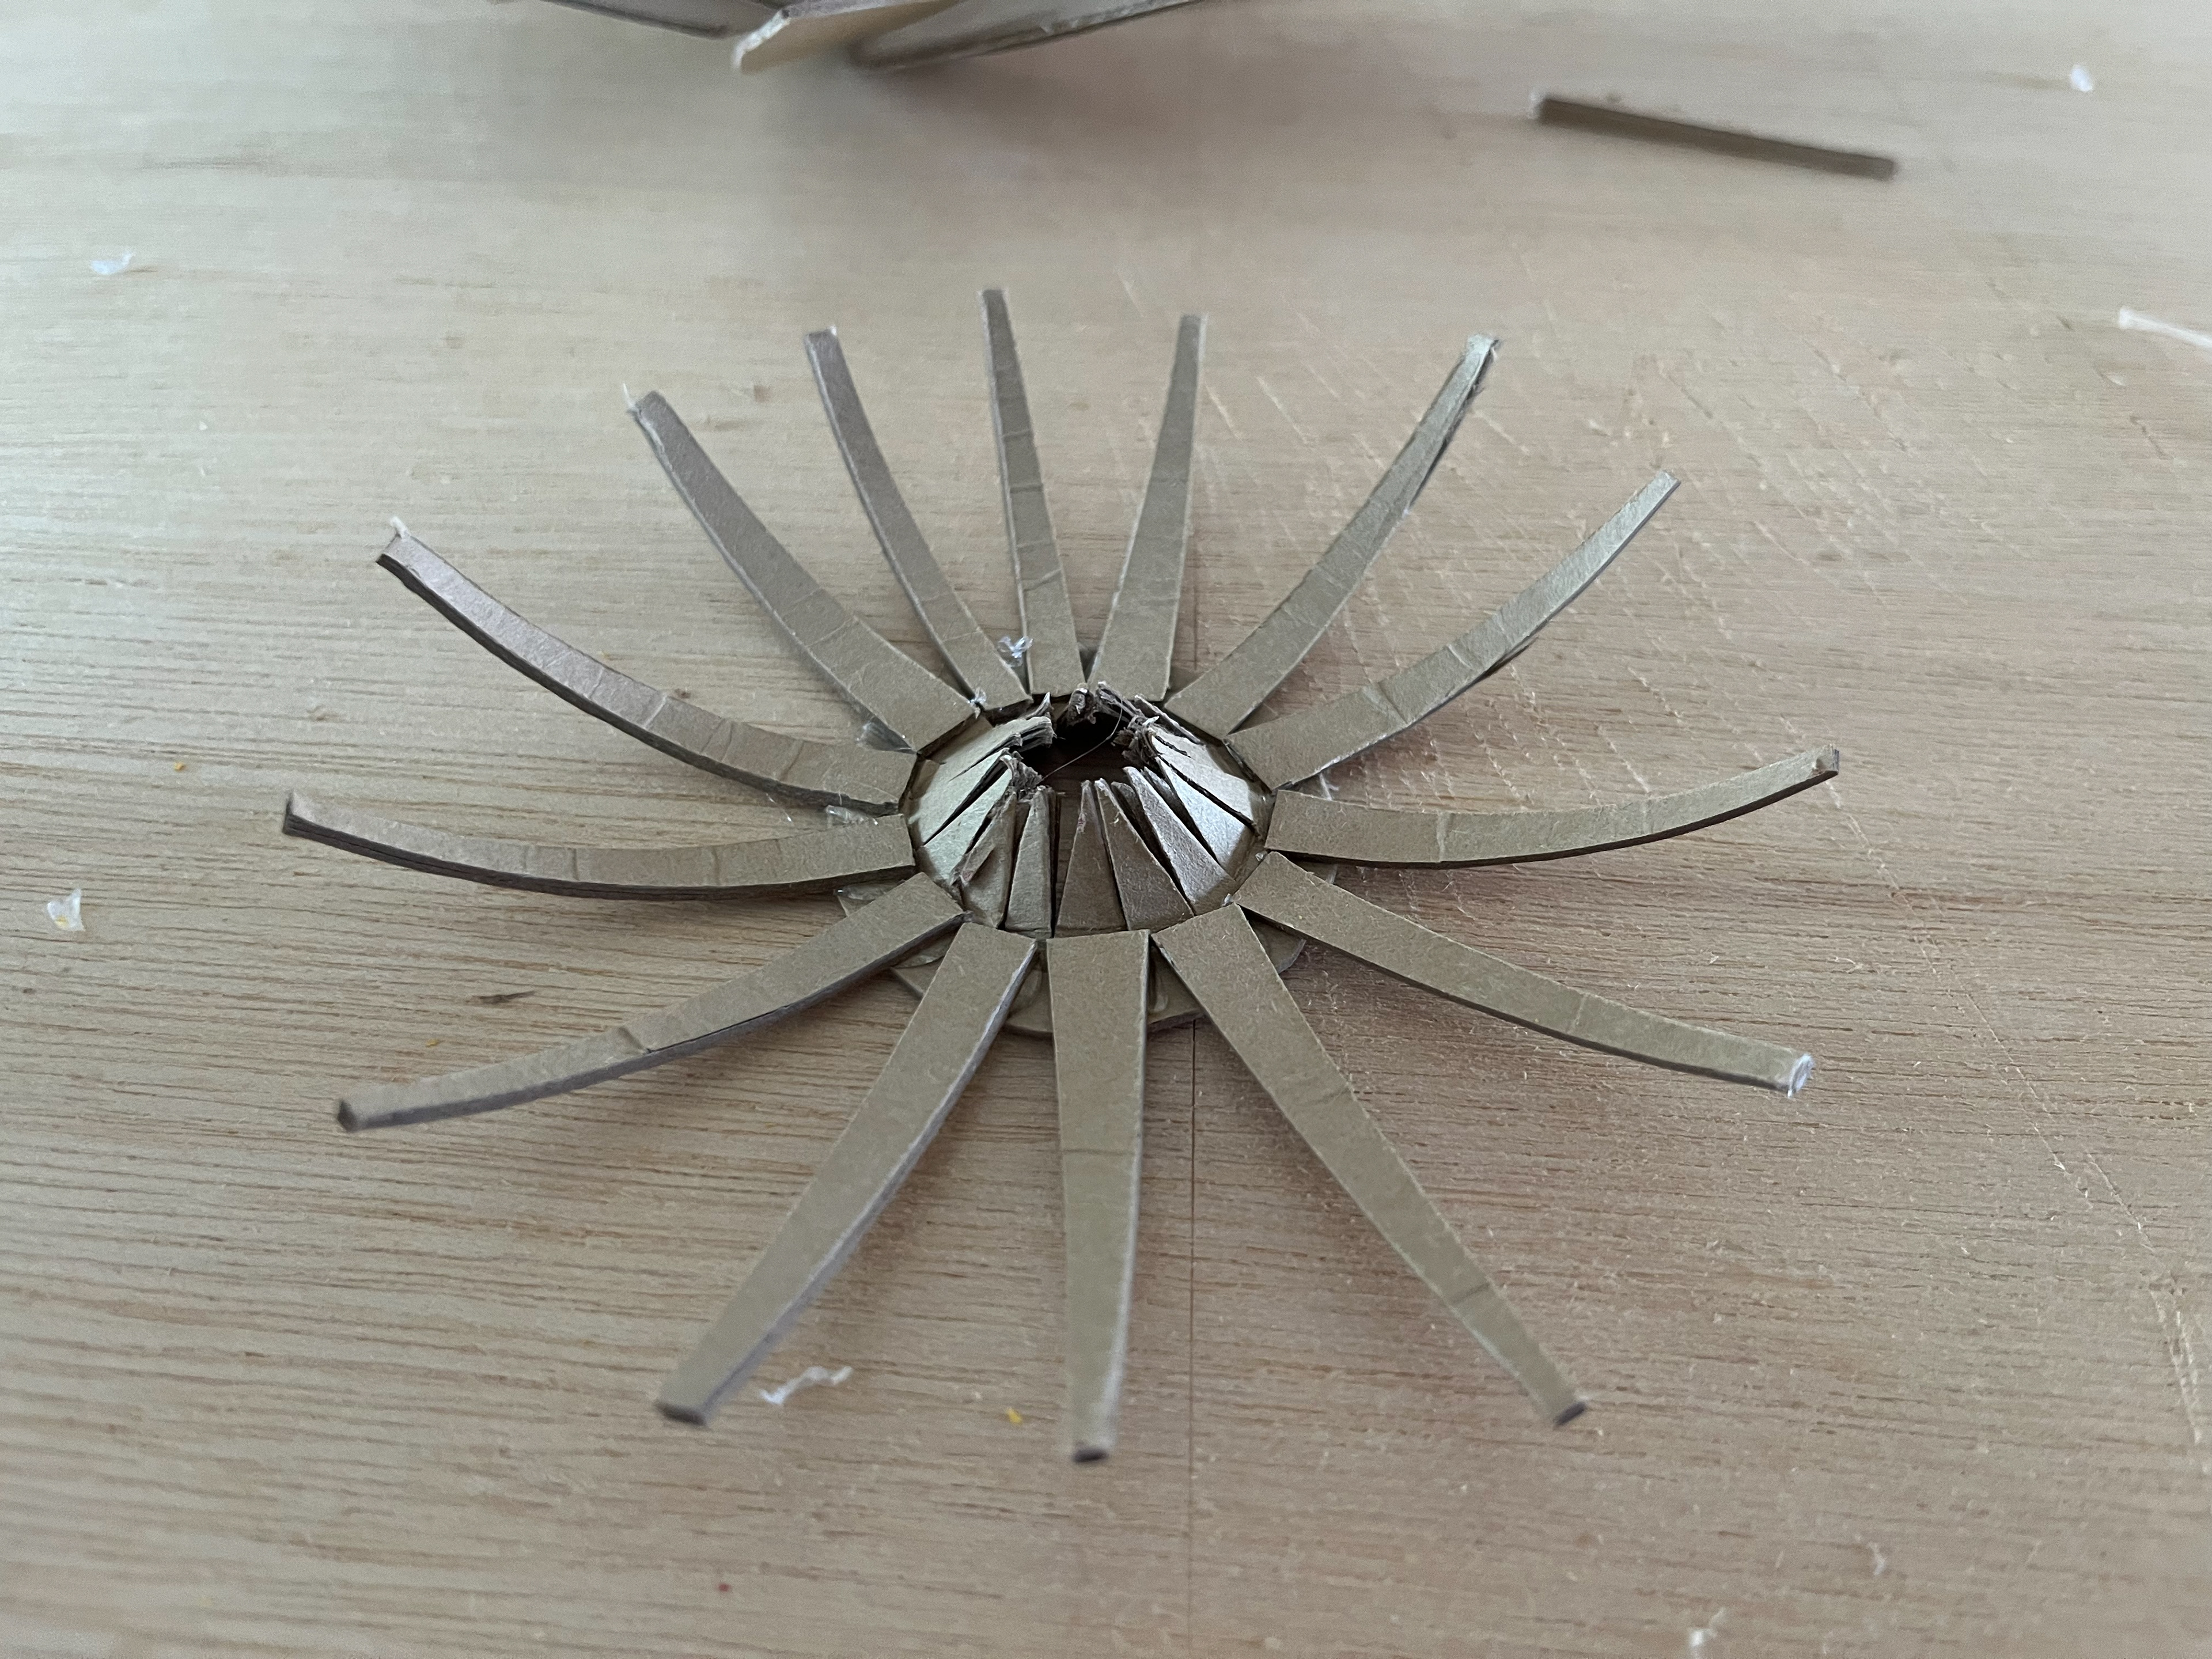
(9) Using a cereal box, I cut flower details and glued them to assemble the head.
(10) I attached the head to the body of the lamp adding craft-paper petals for proportion.
(11) To stabilize the weight of the lamp, I cut triangular supports to fit the center of the base.
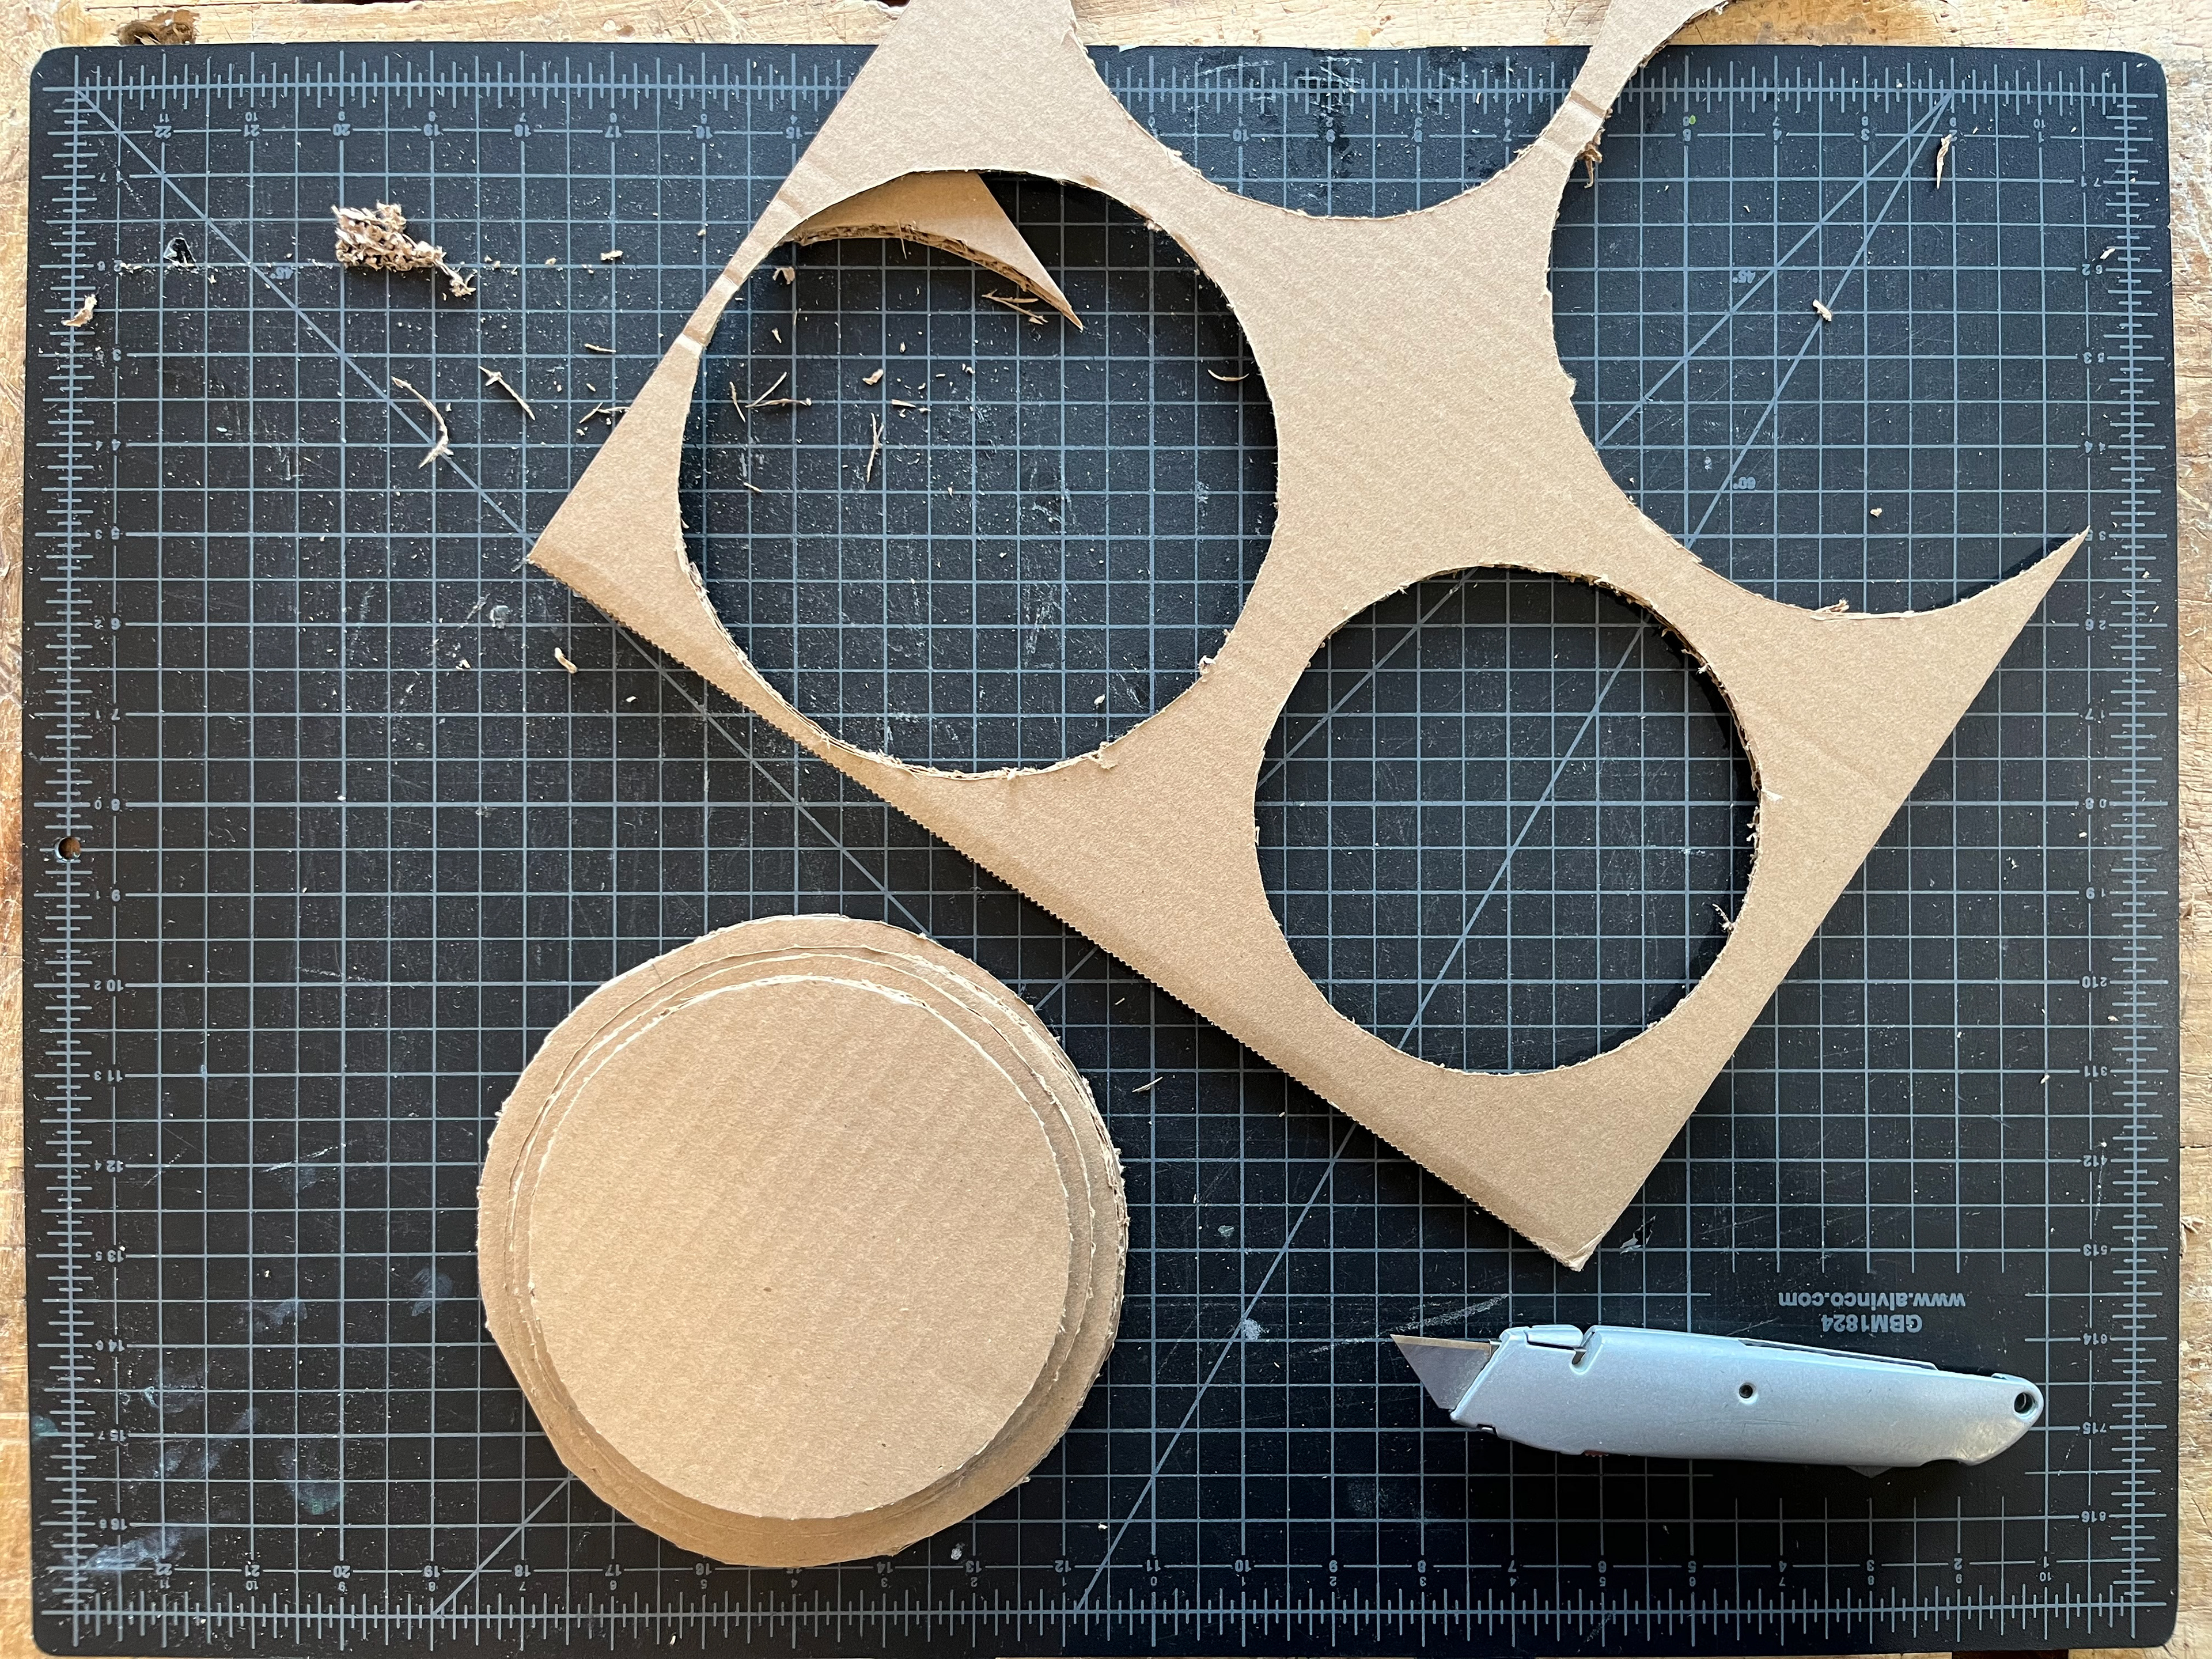
Base cutout
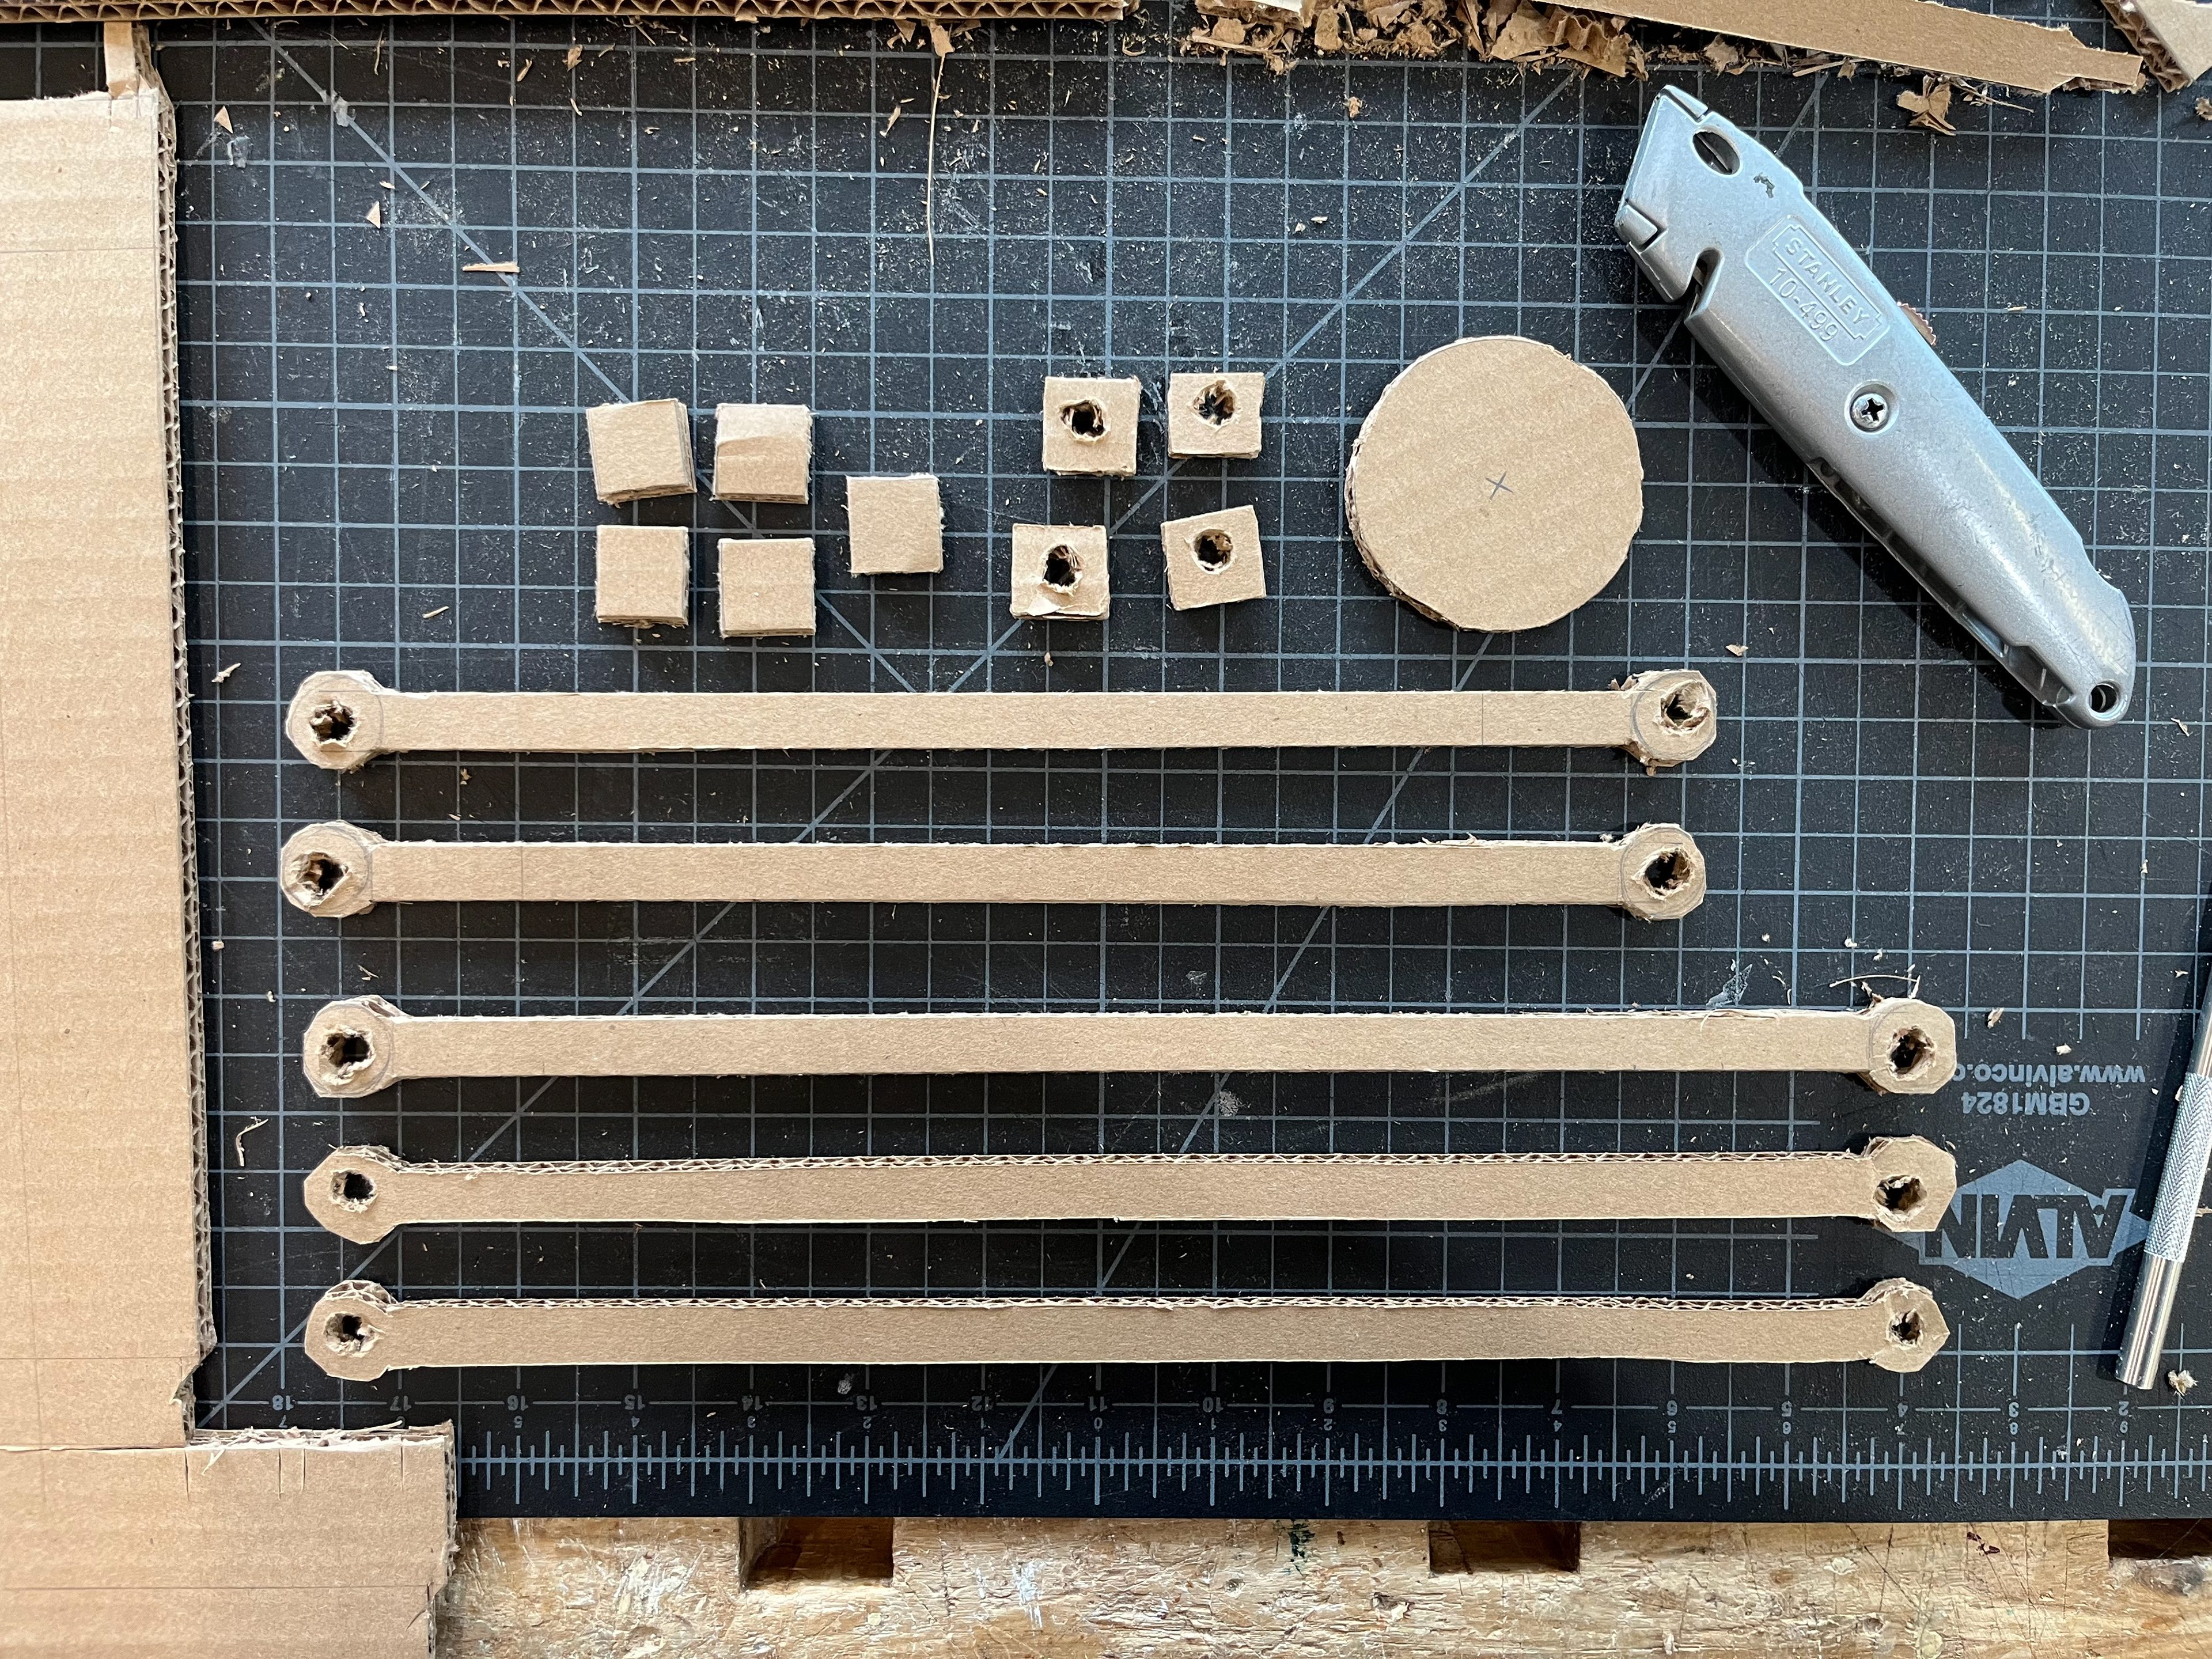
Body and joint cutout
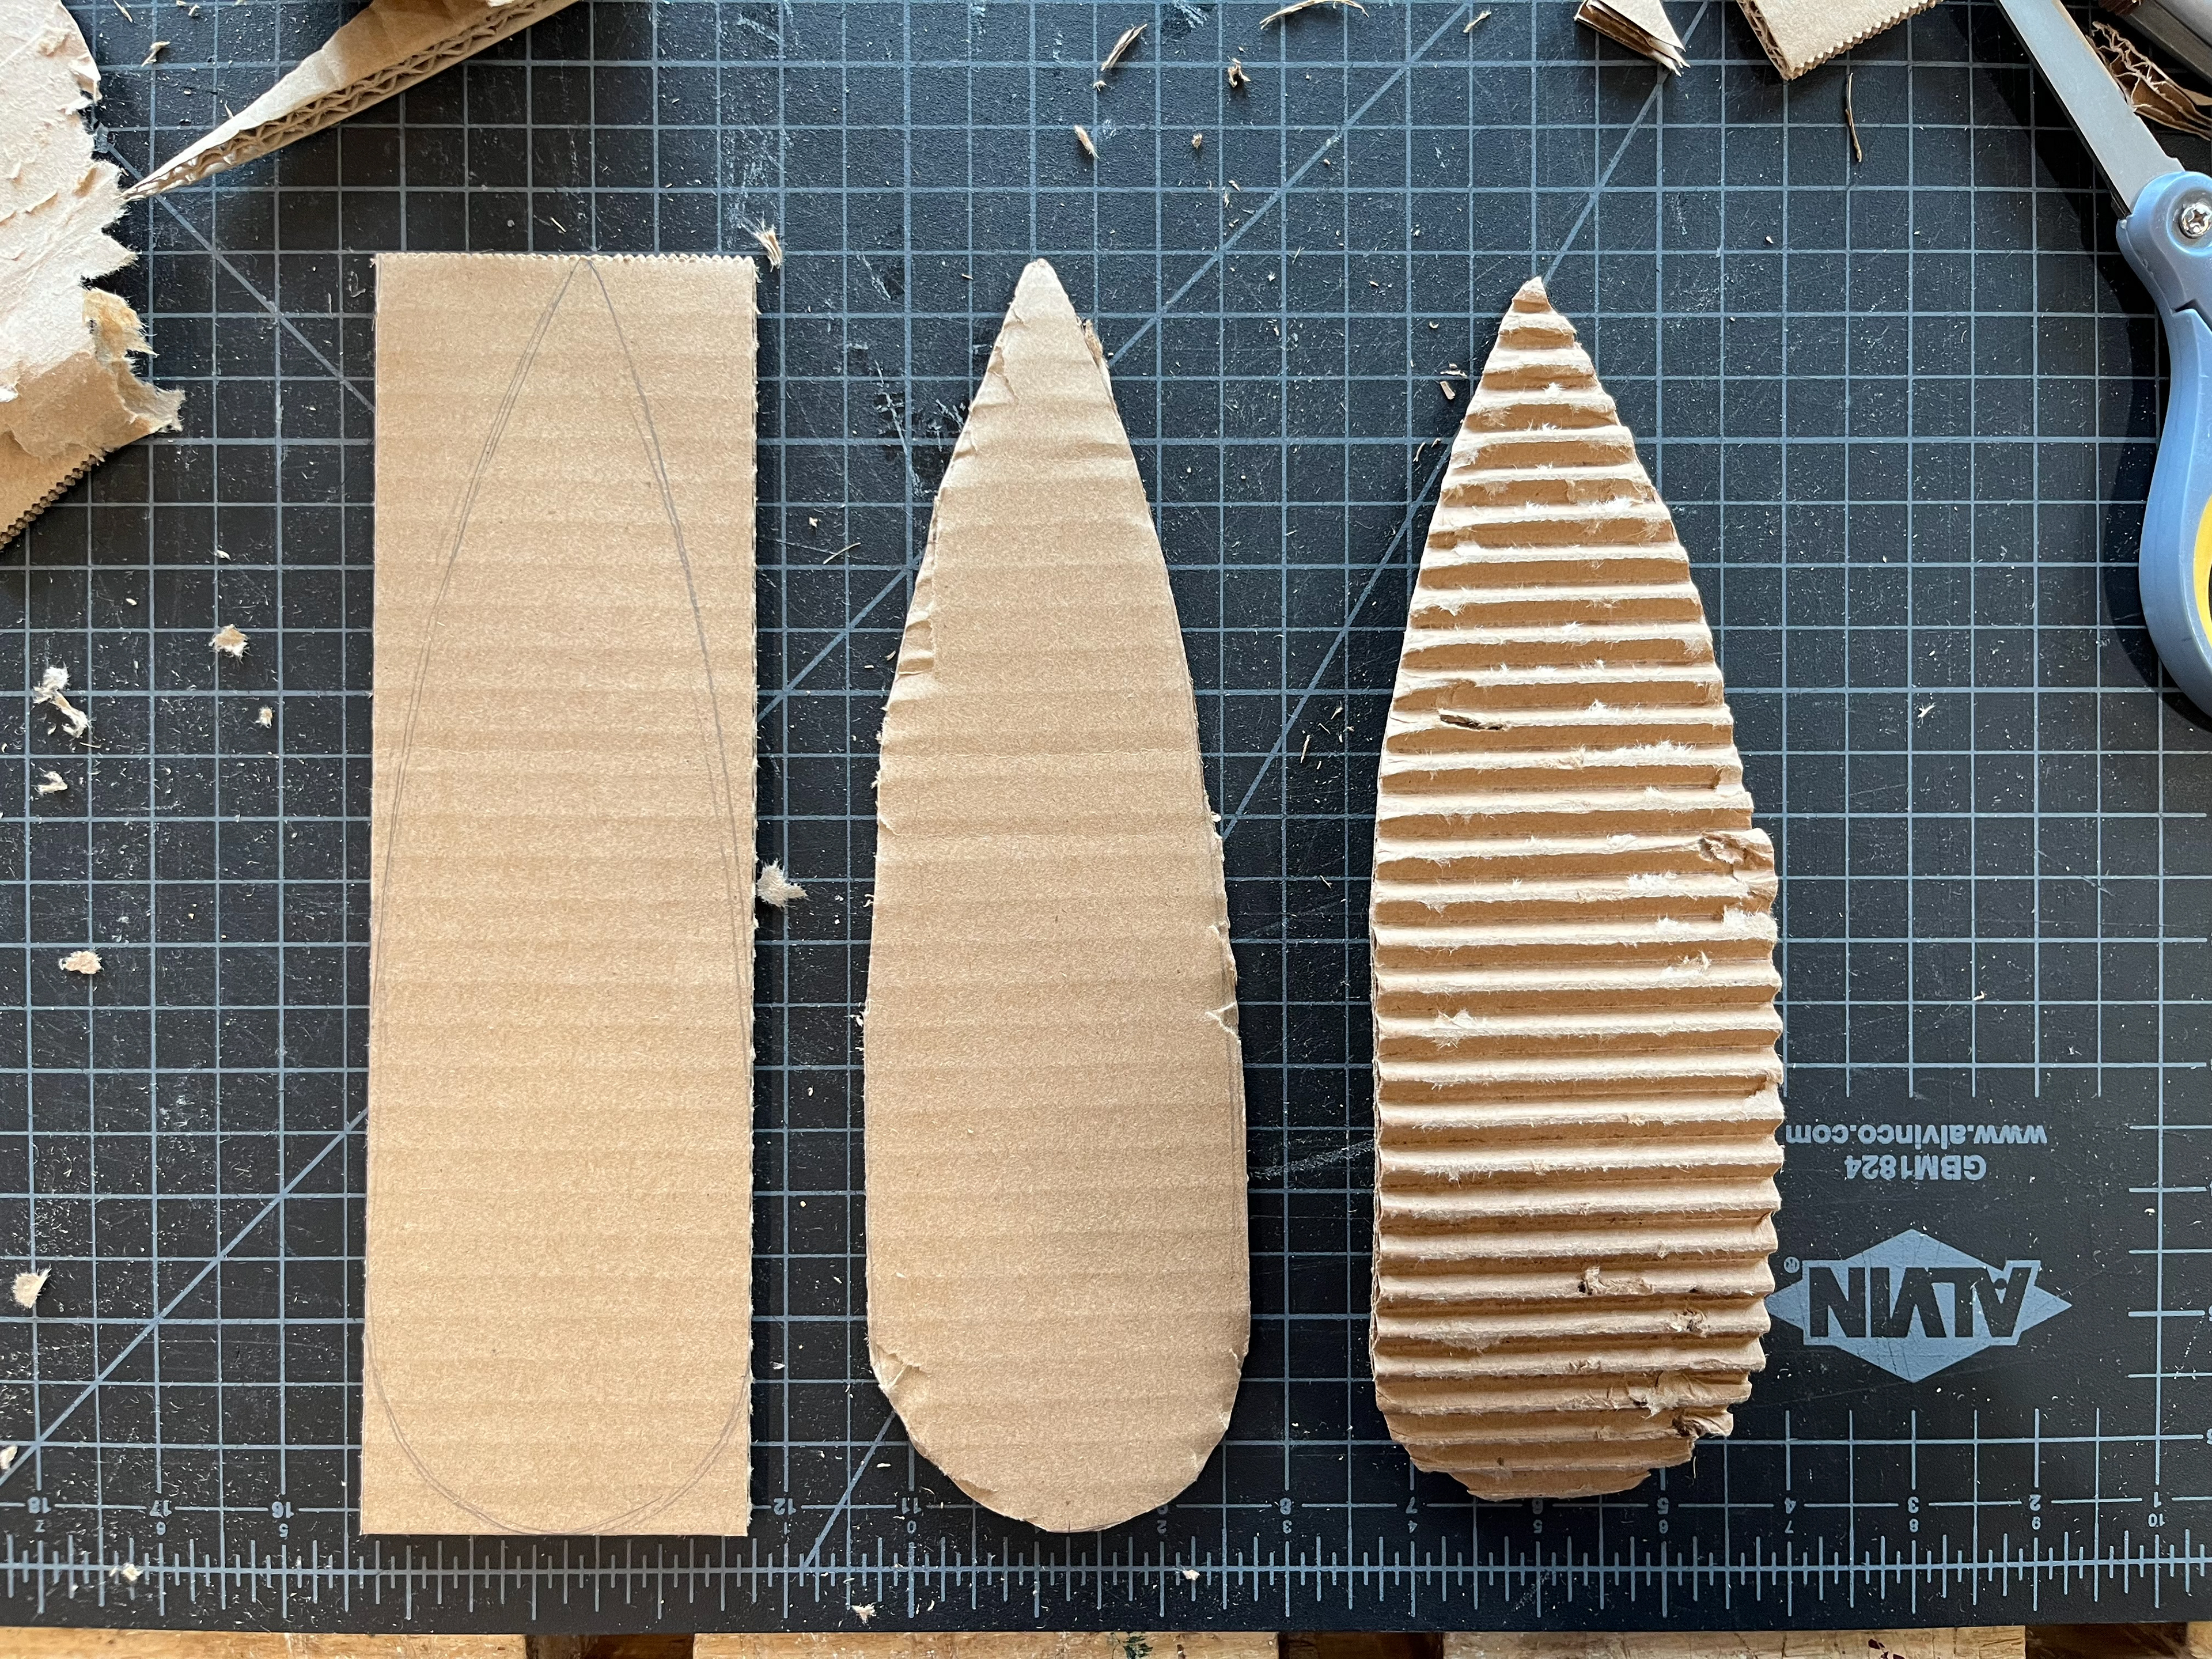
Leaf cutout
Attached base
Assembled joint (Base)
Assembled joint (Center)
Assembled joint (Top)
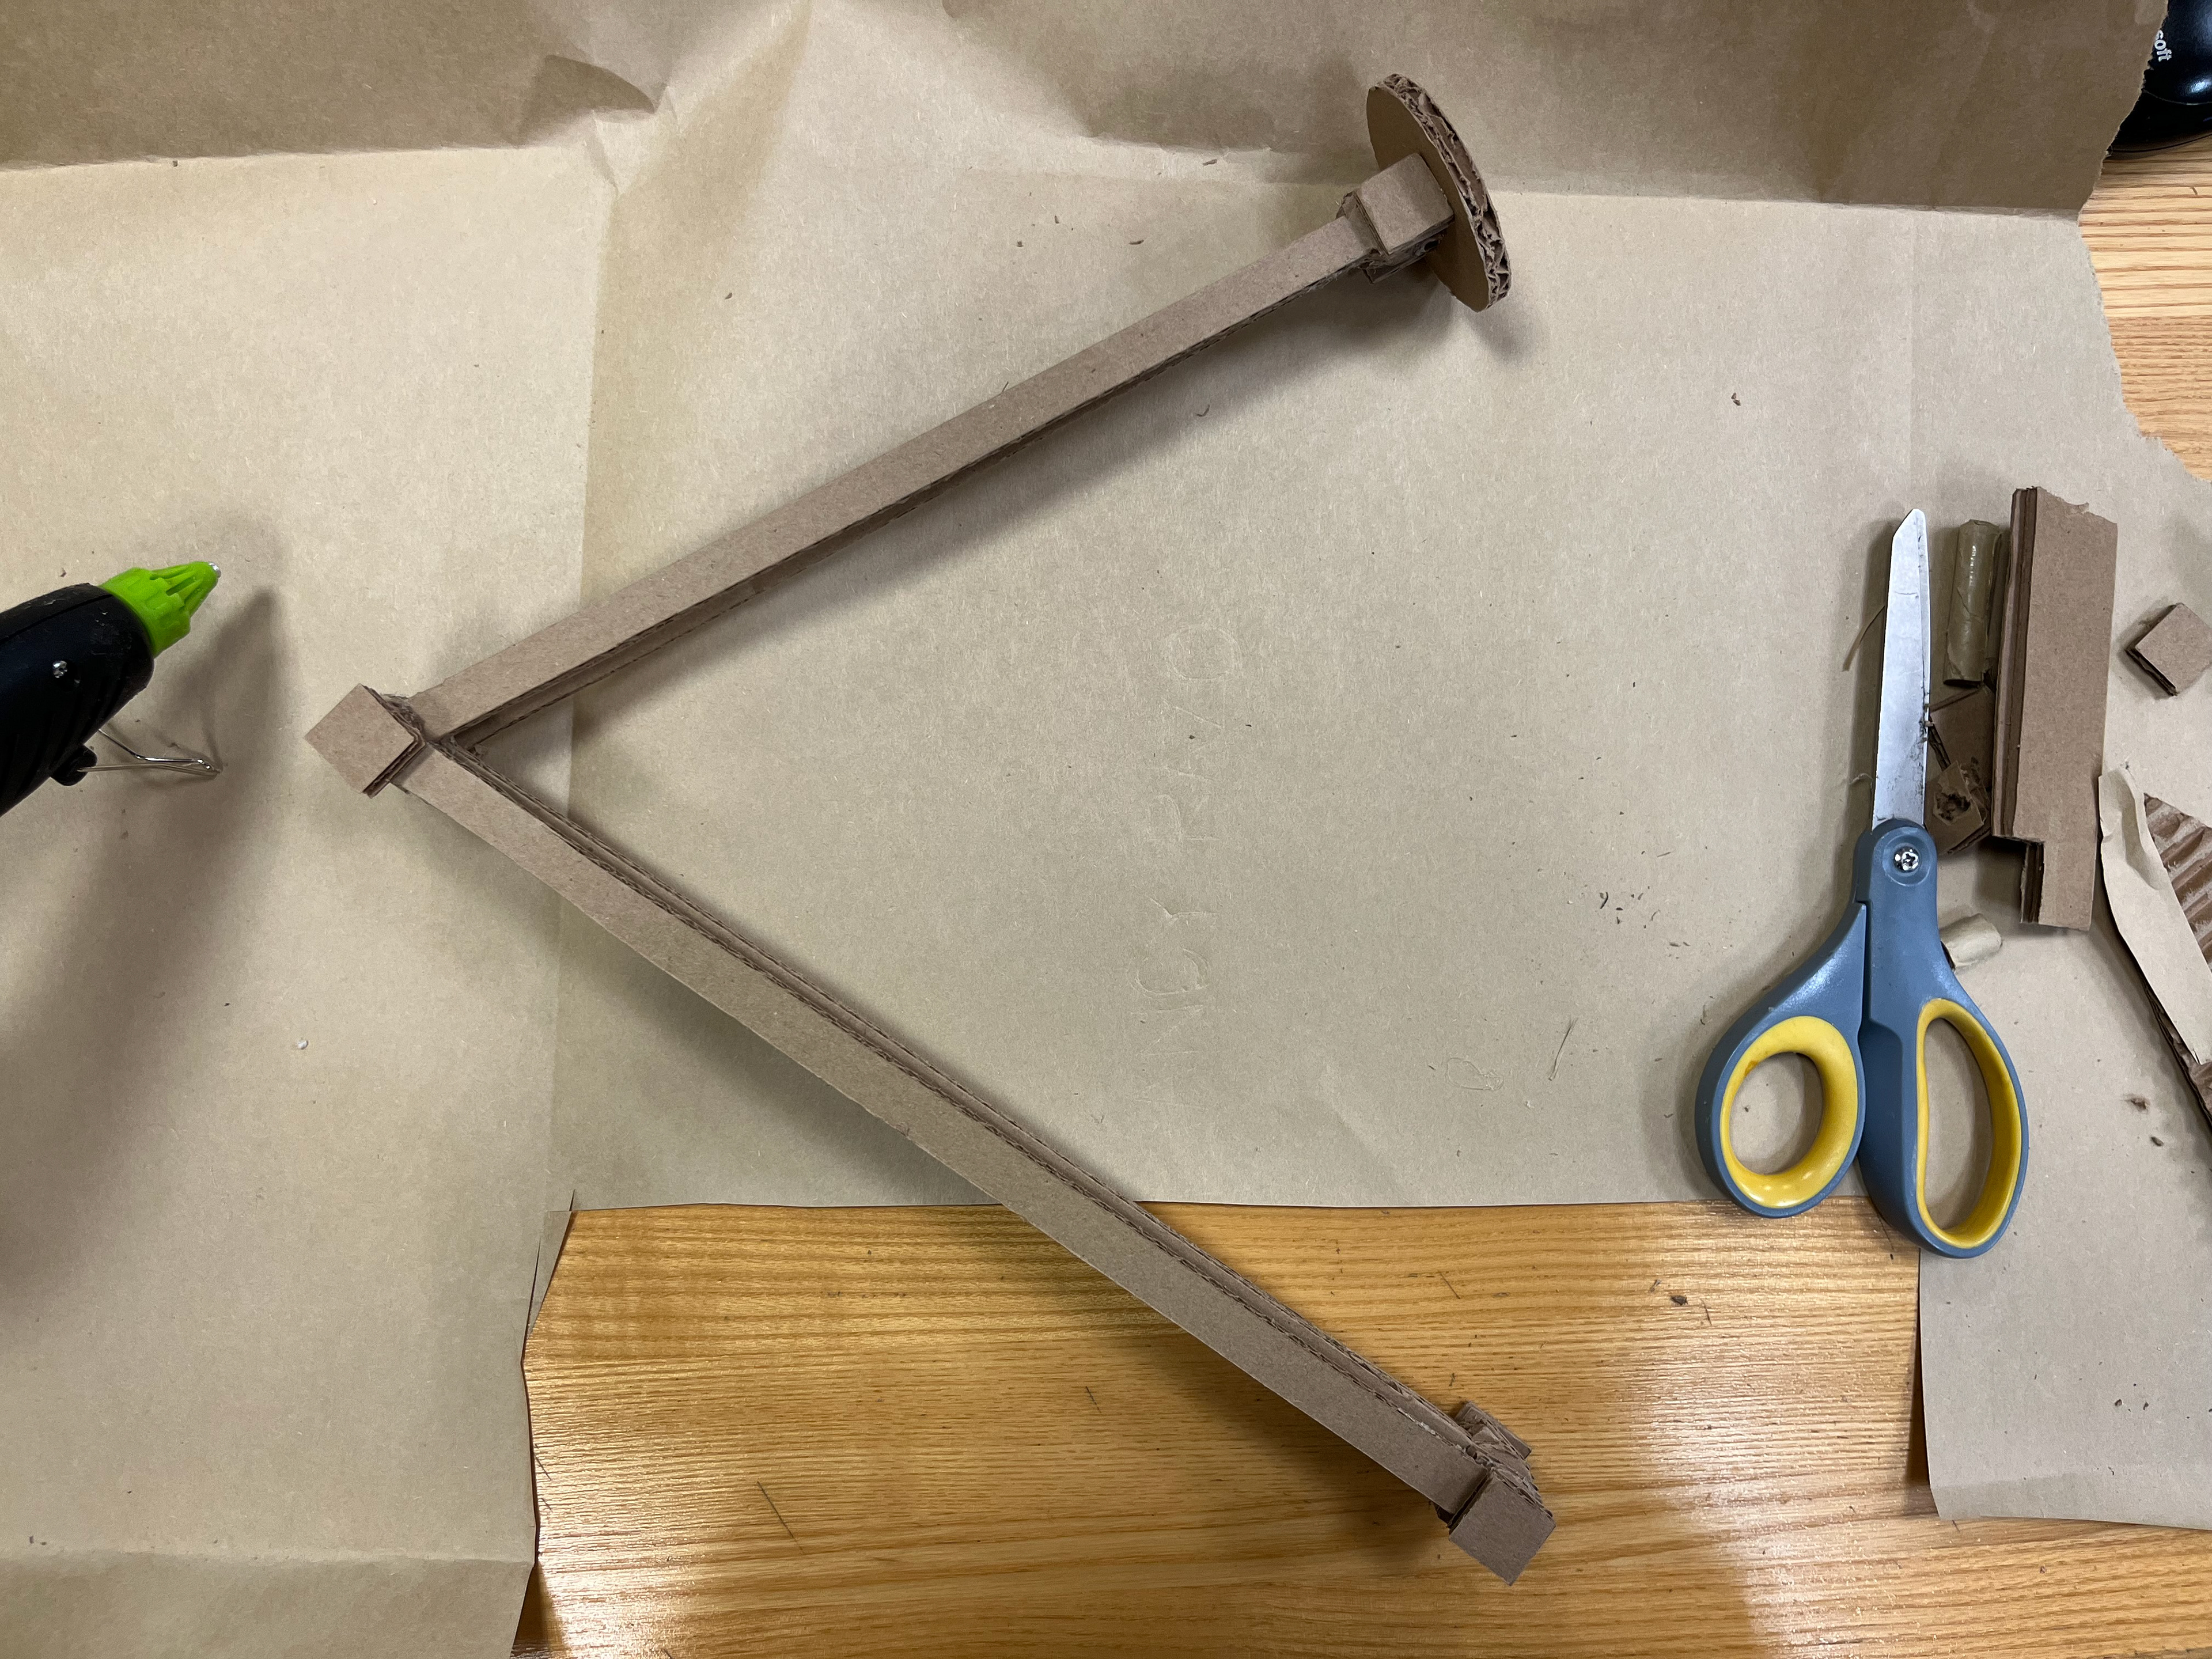
Full view of assembled body
Close-up of top joint
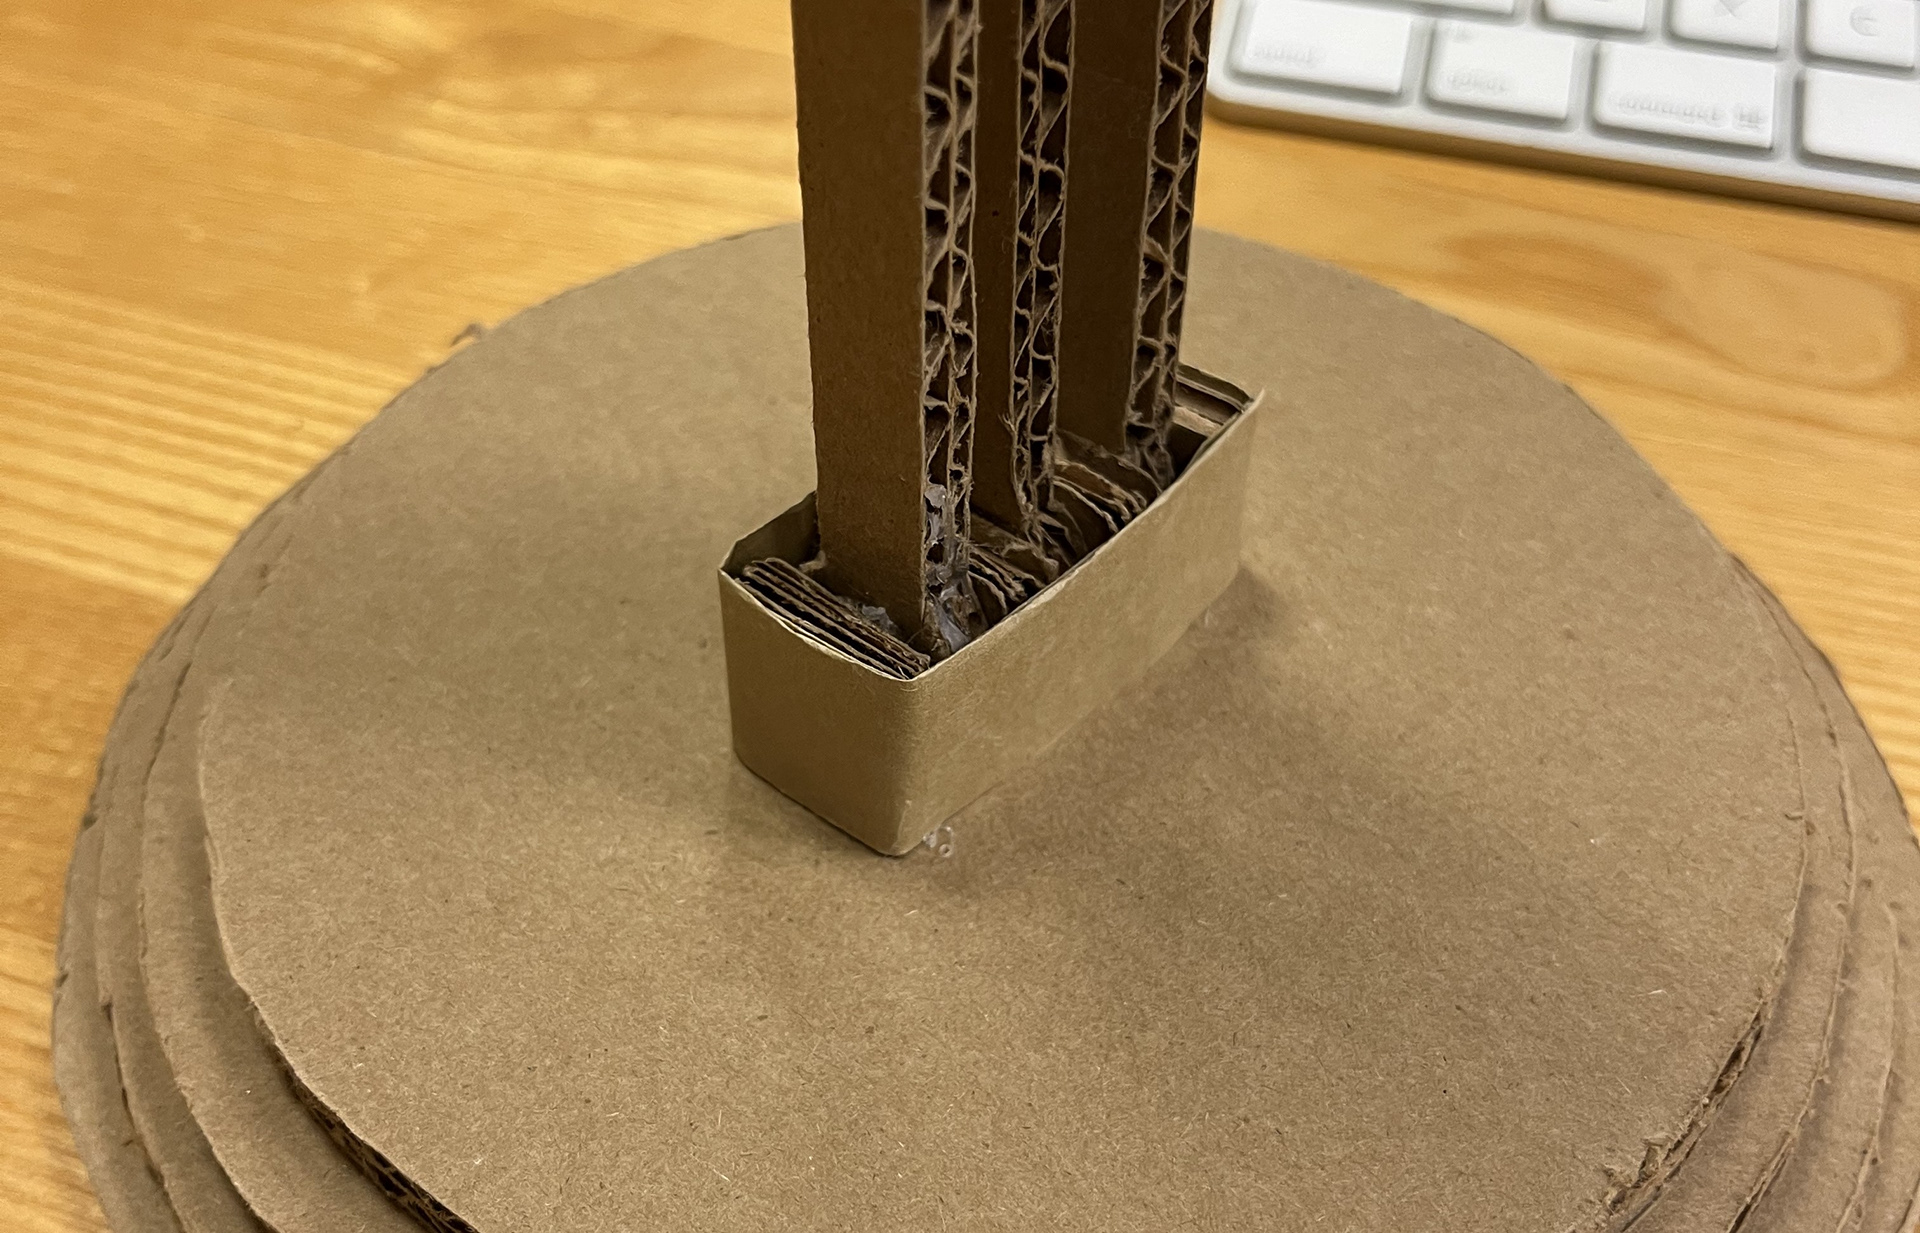
Close-up of base joint
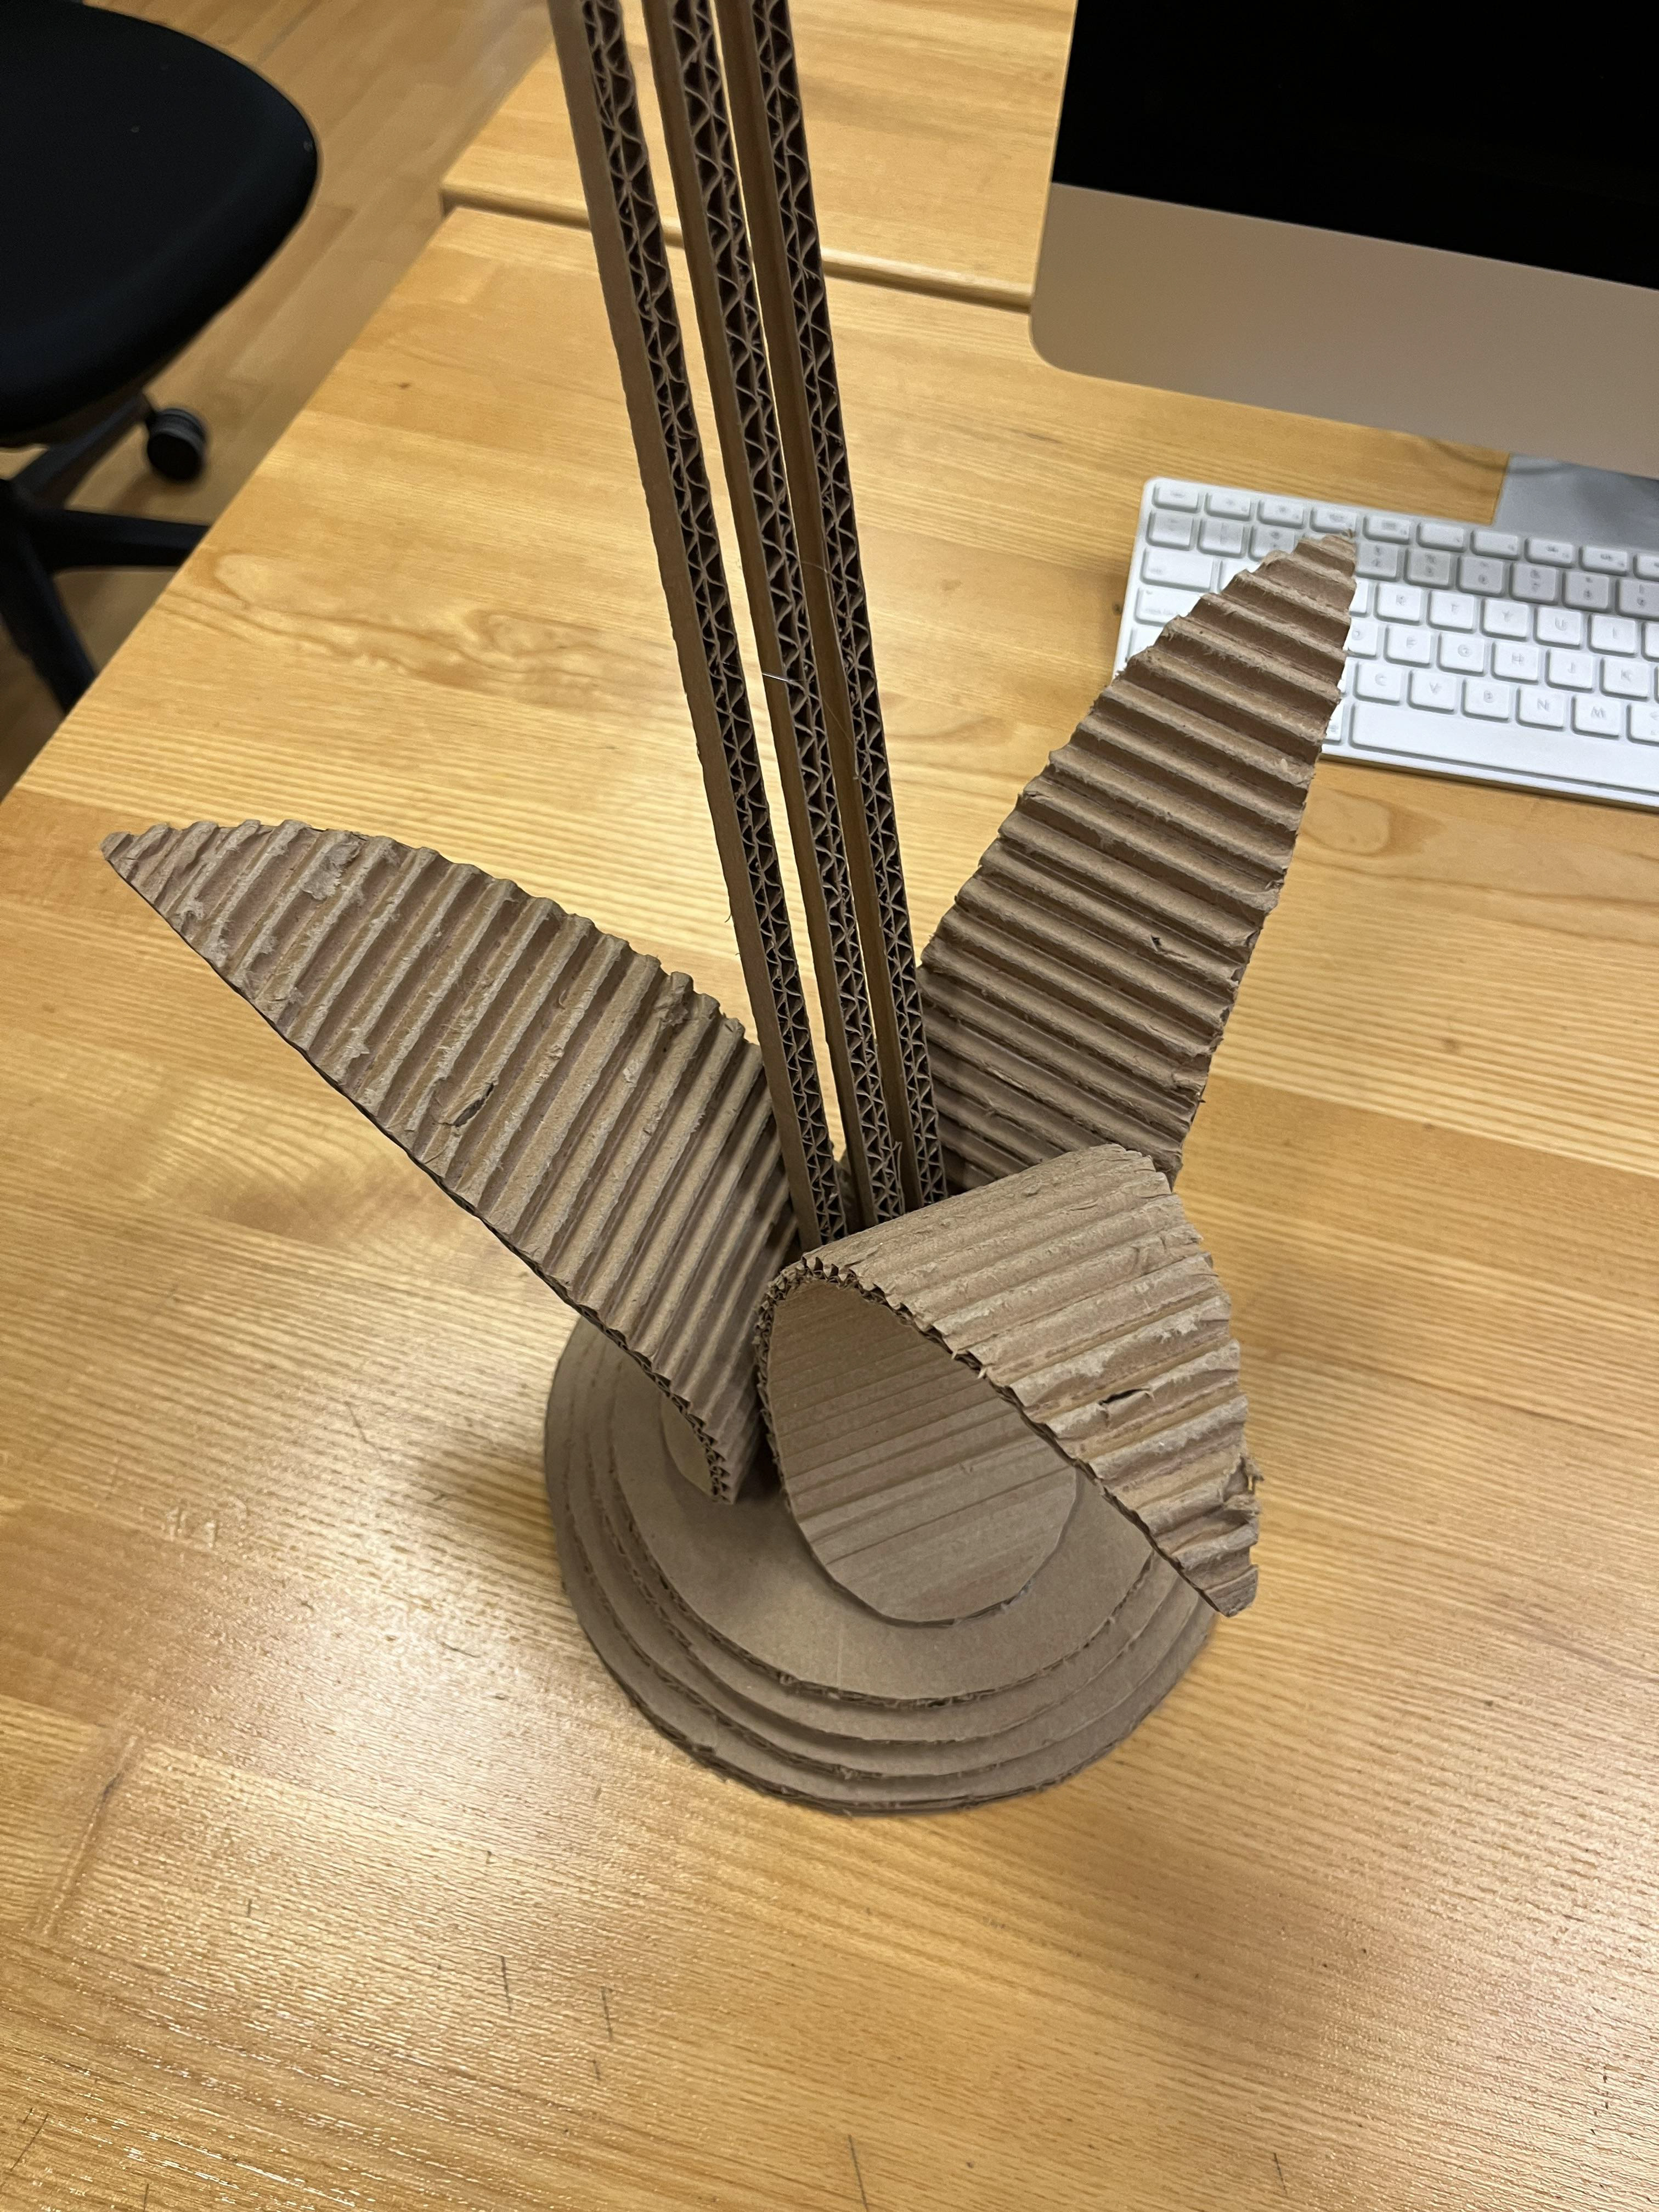
Base with attached leaves
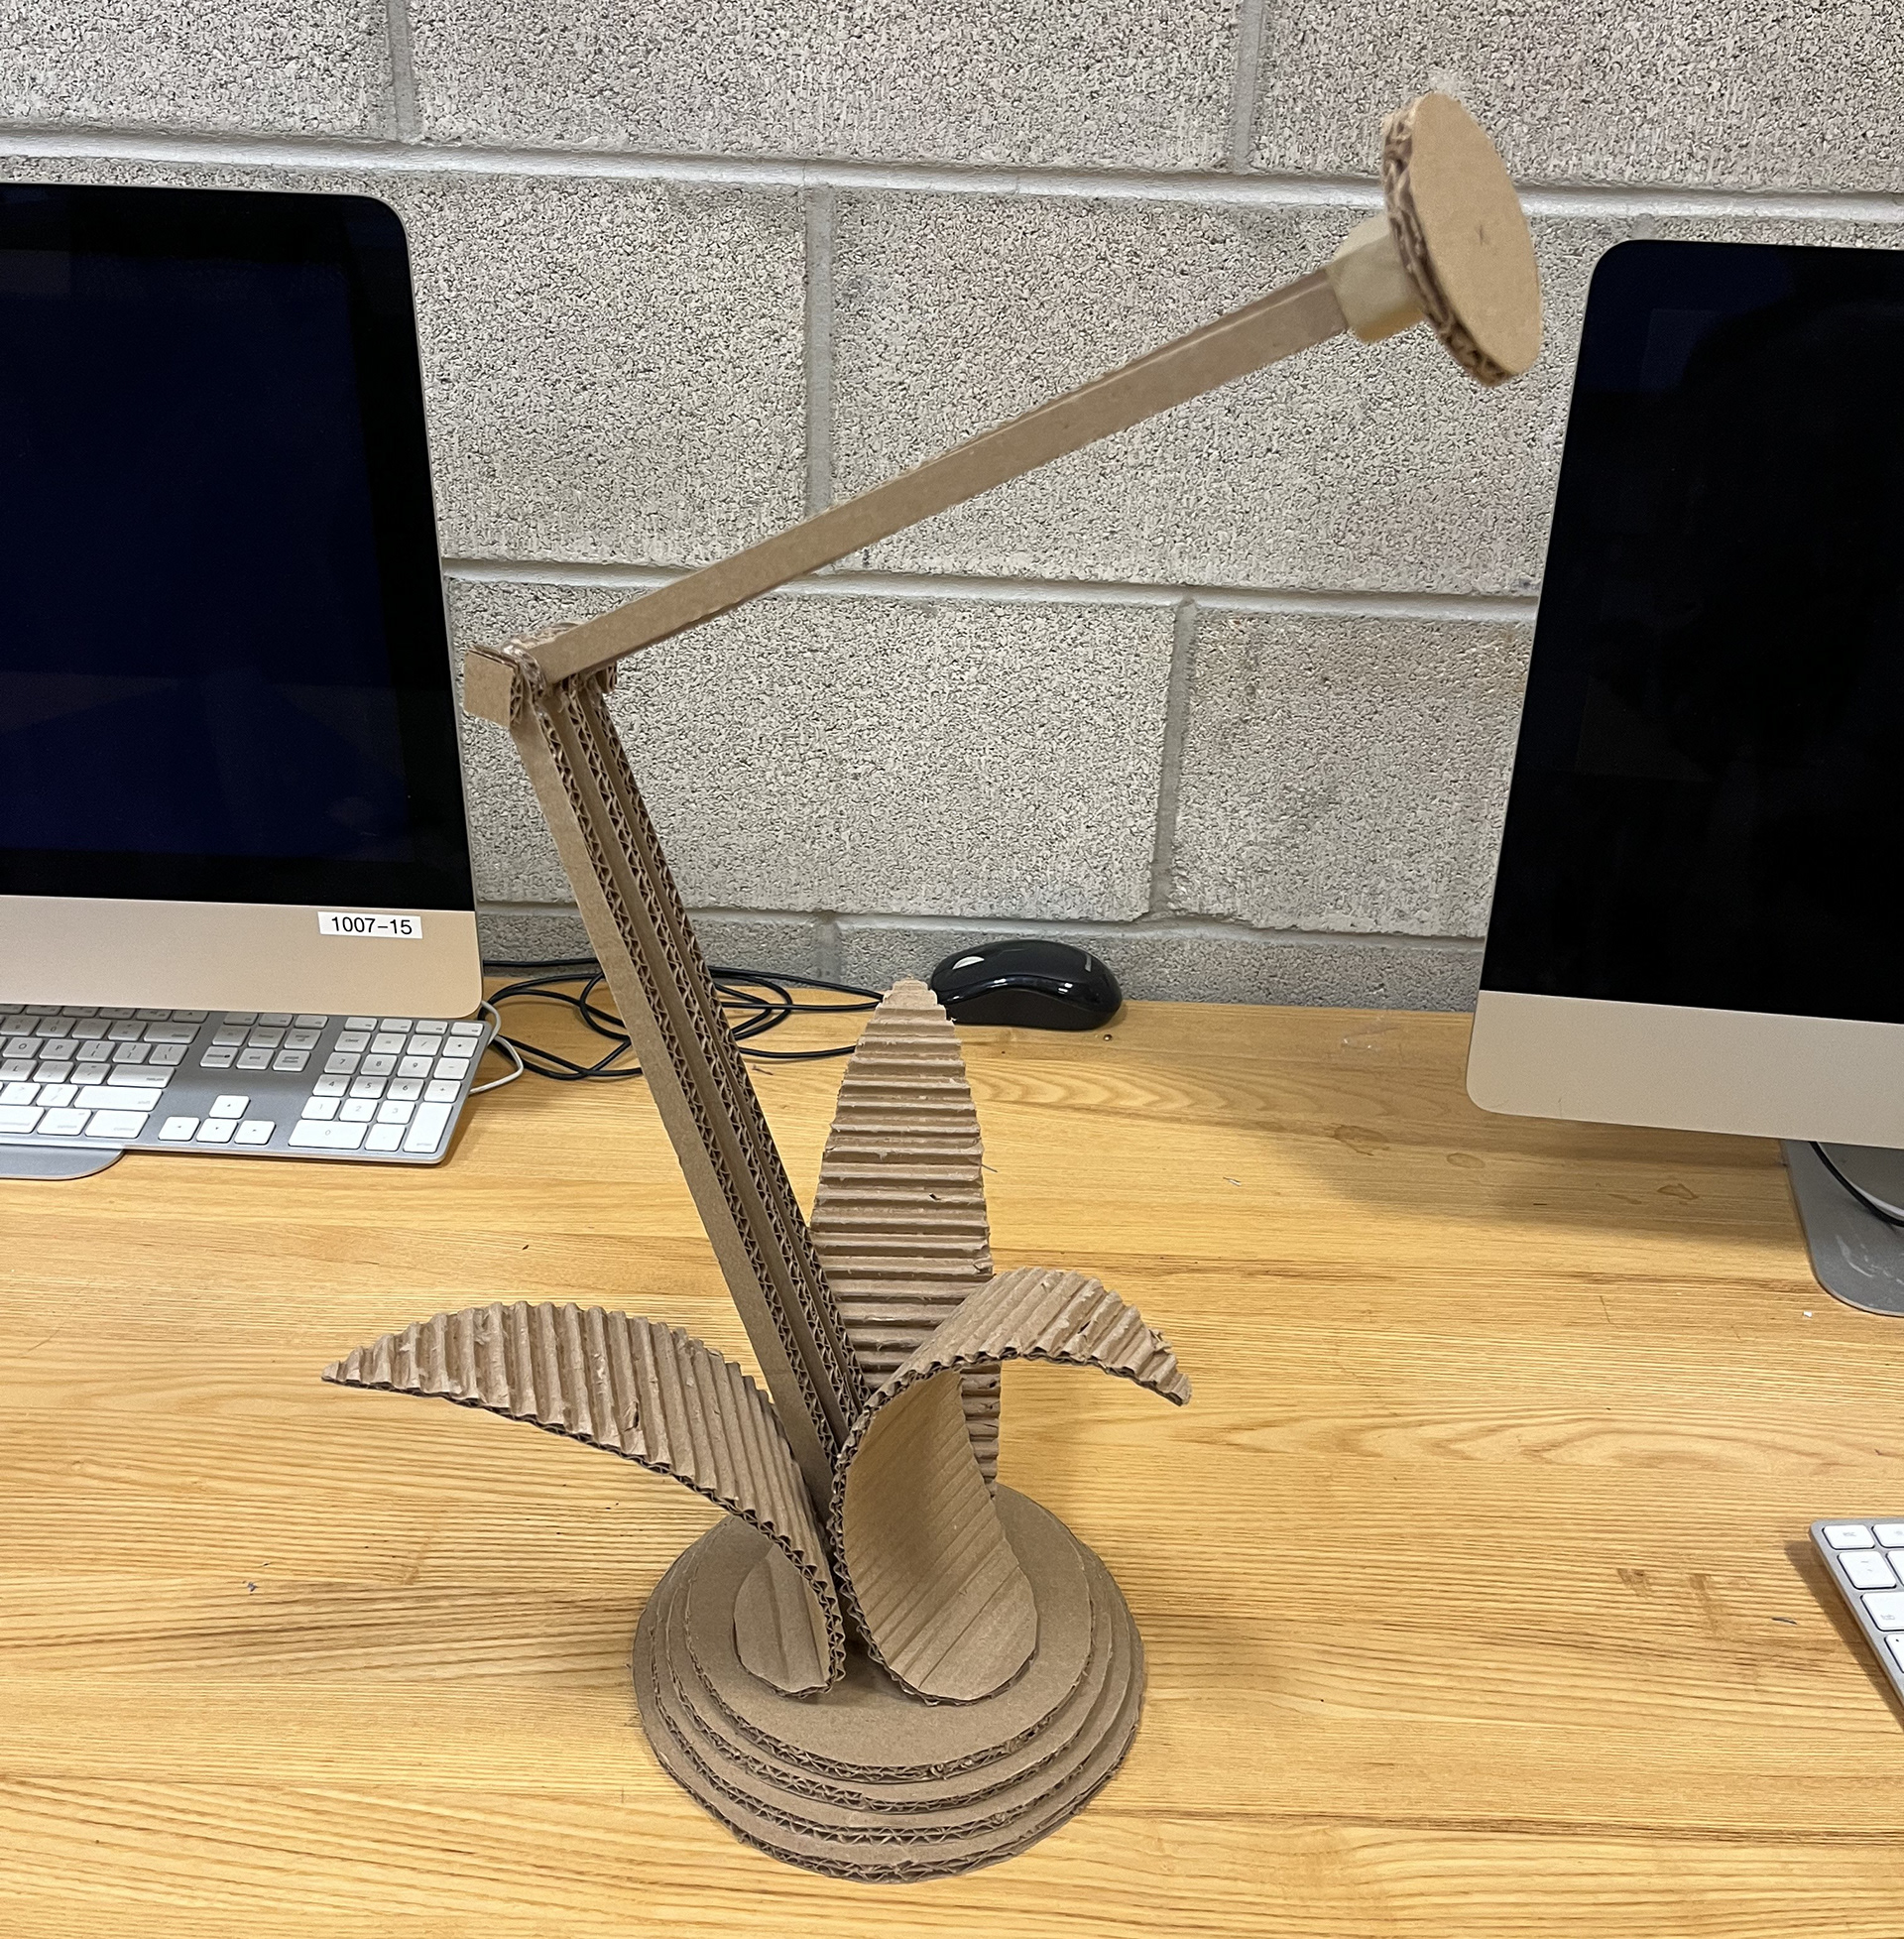
Full view of adjustable desk lamp

Flowerhead cutout
Center detail of flowerhead
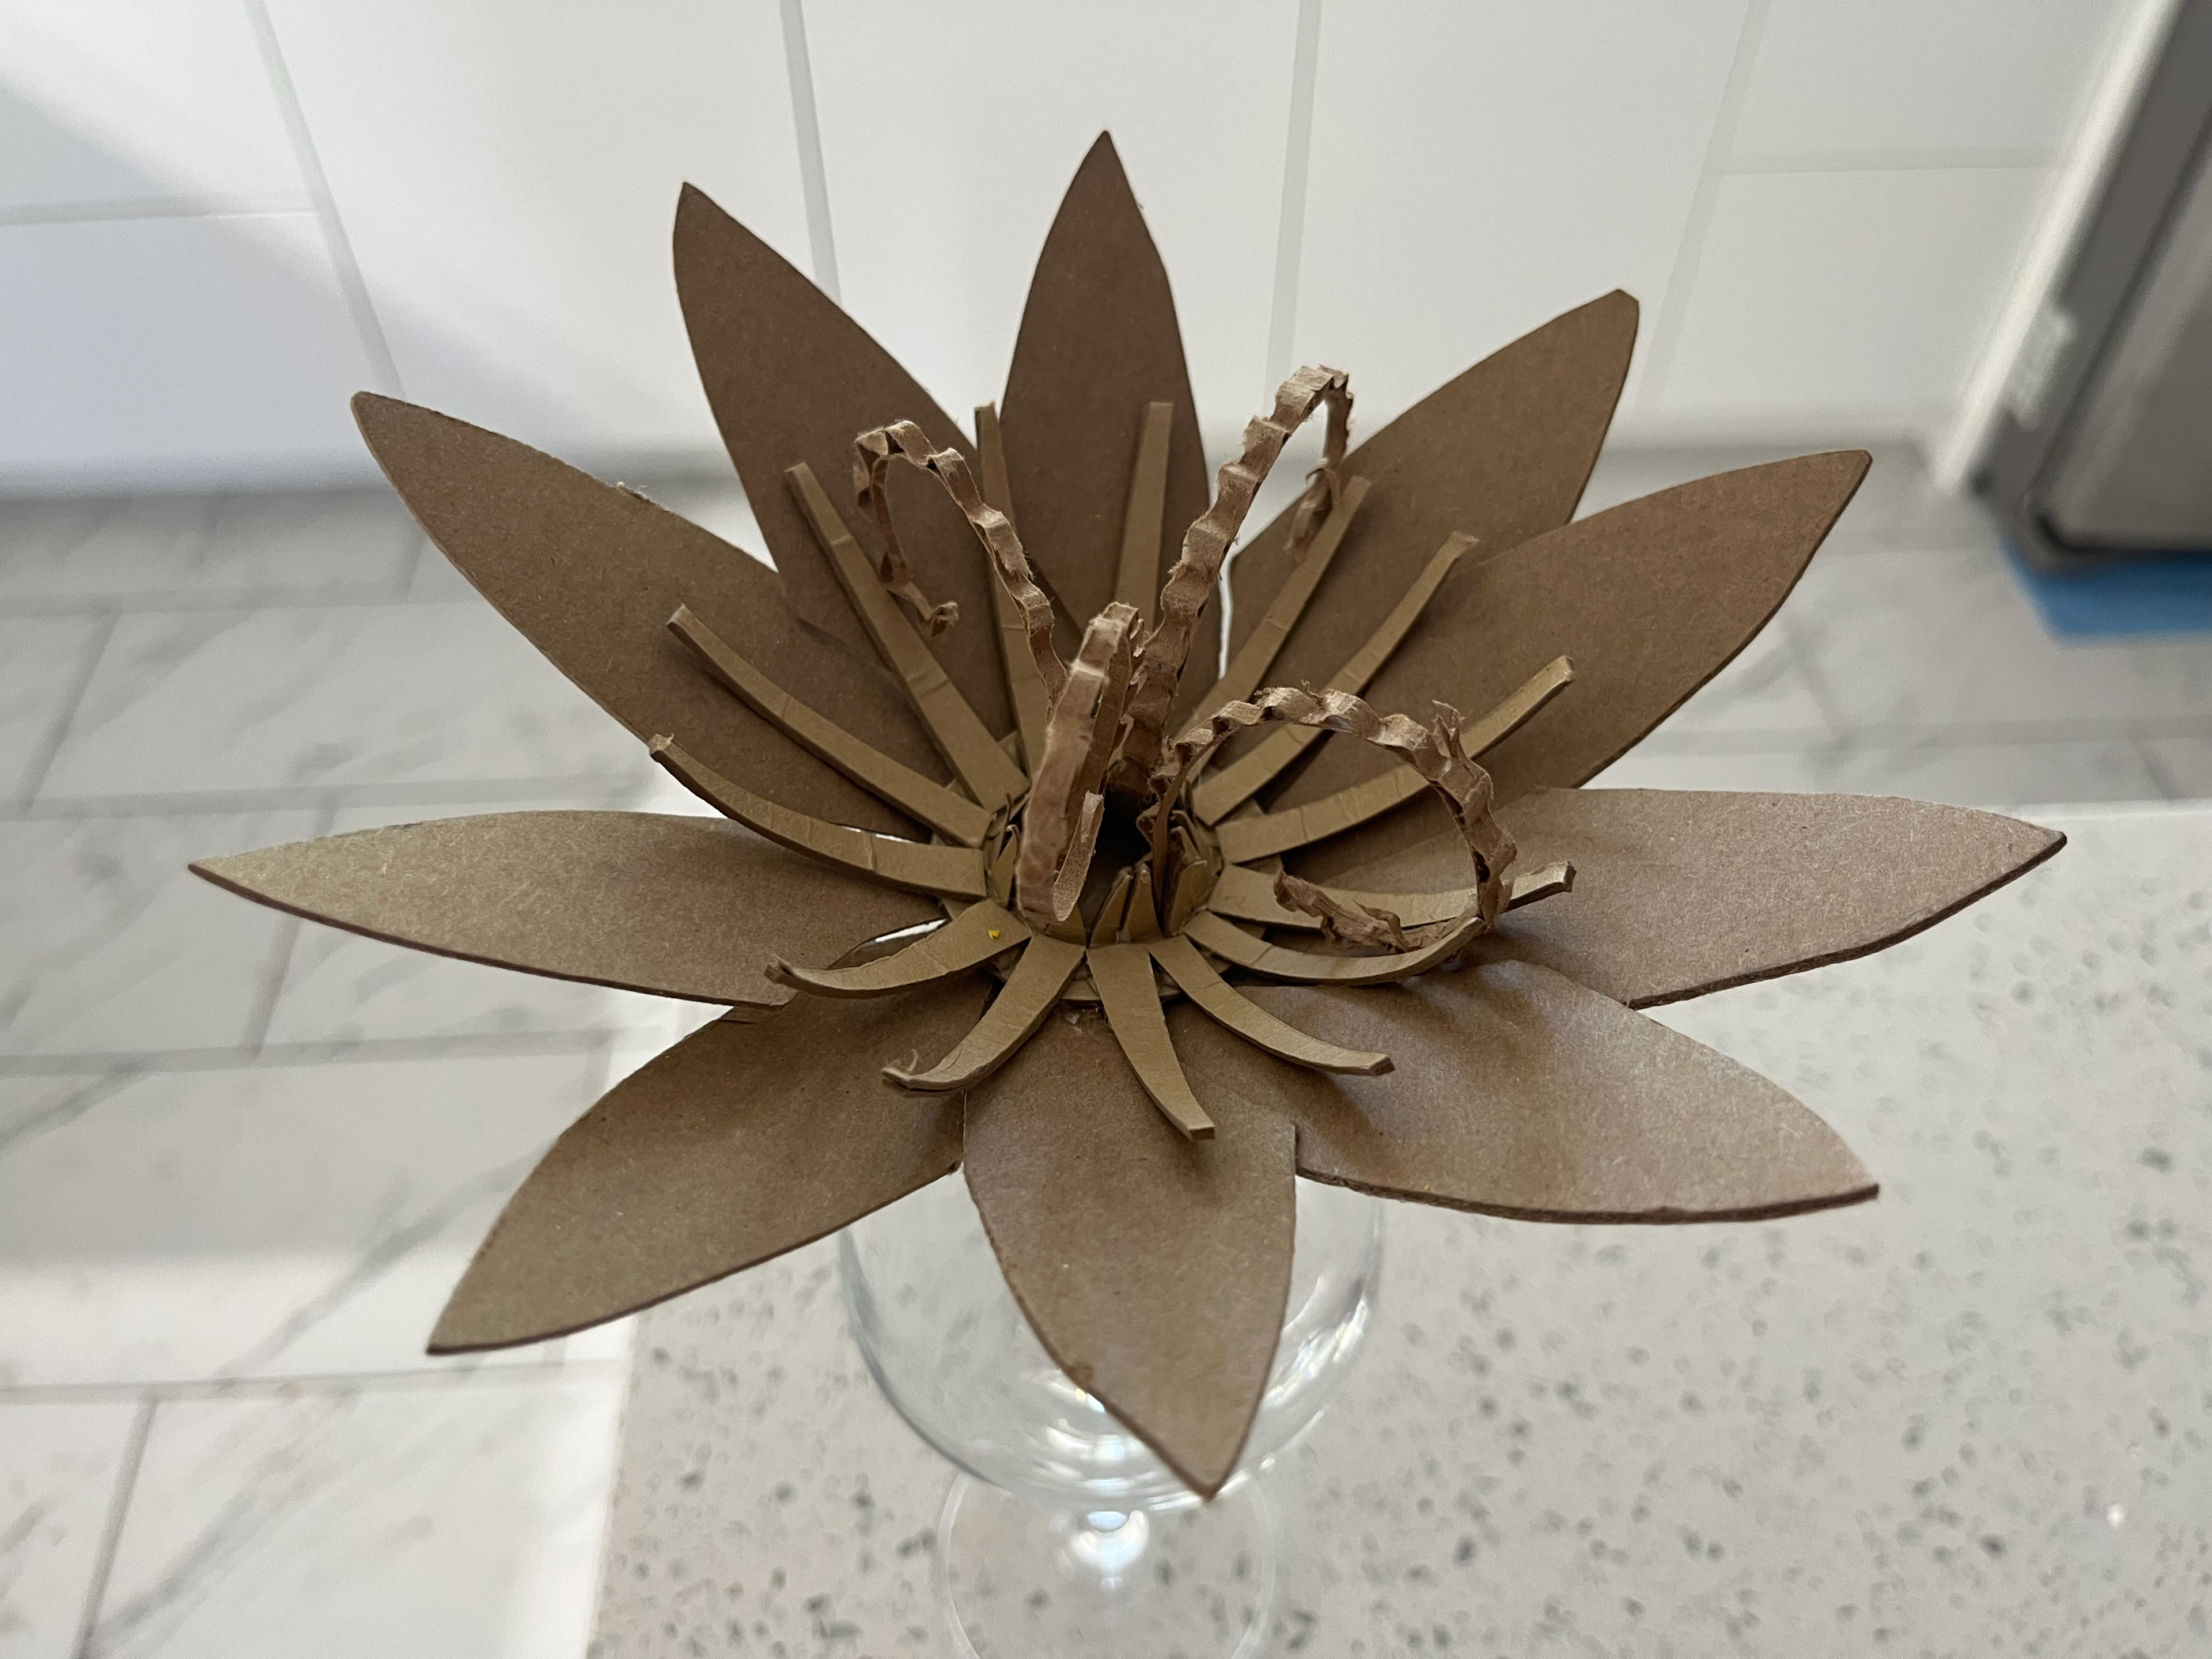
Assembled flowerhead
Additional supports to help balance out weight
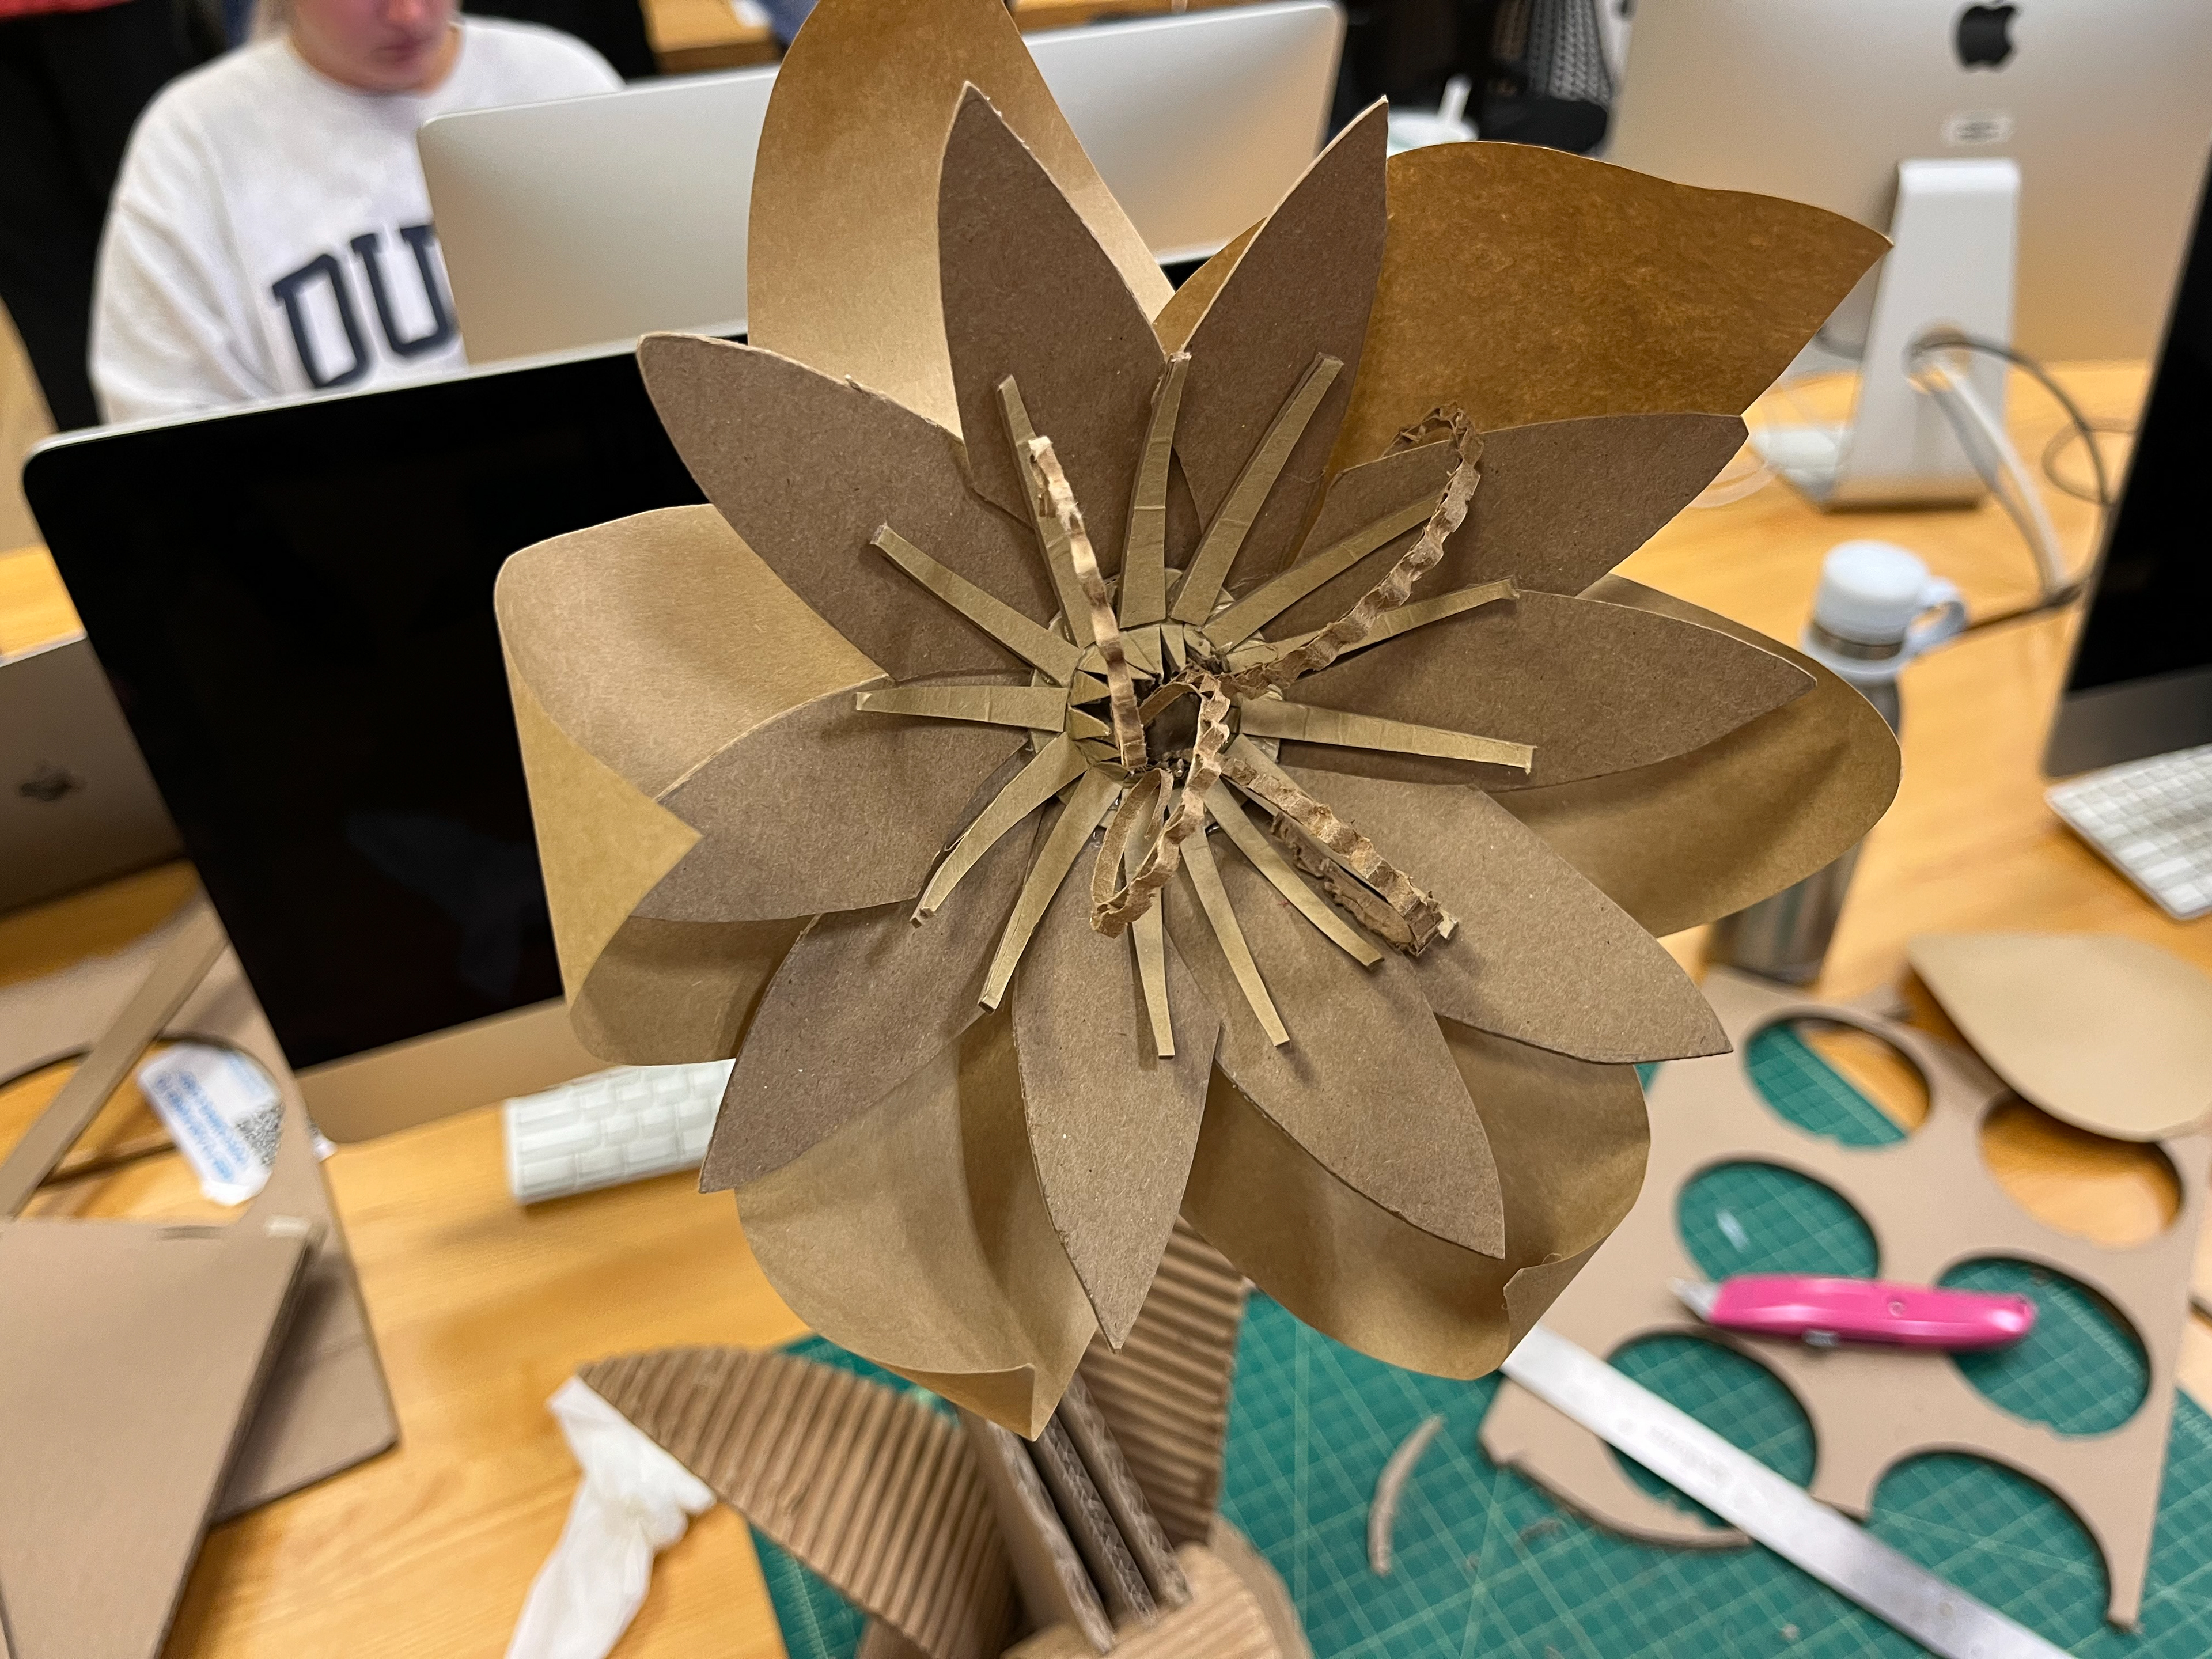
Attached flowerhead with additional petals
FINAL OUTCOME OF FULL-SCALE DESK LAMP